Easy Crochet Baby Romper Pattern – Step-by-Step Beginner Baby Crochet Tutorial
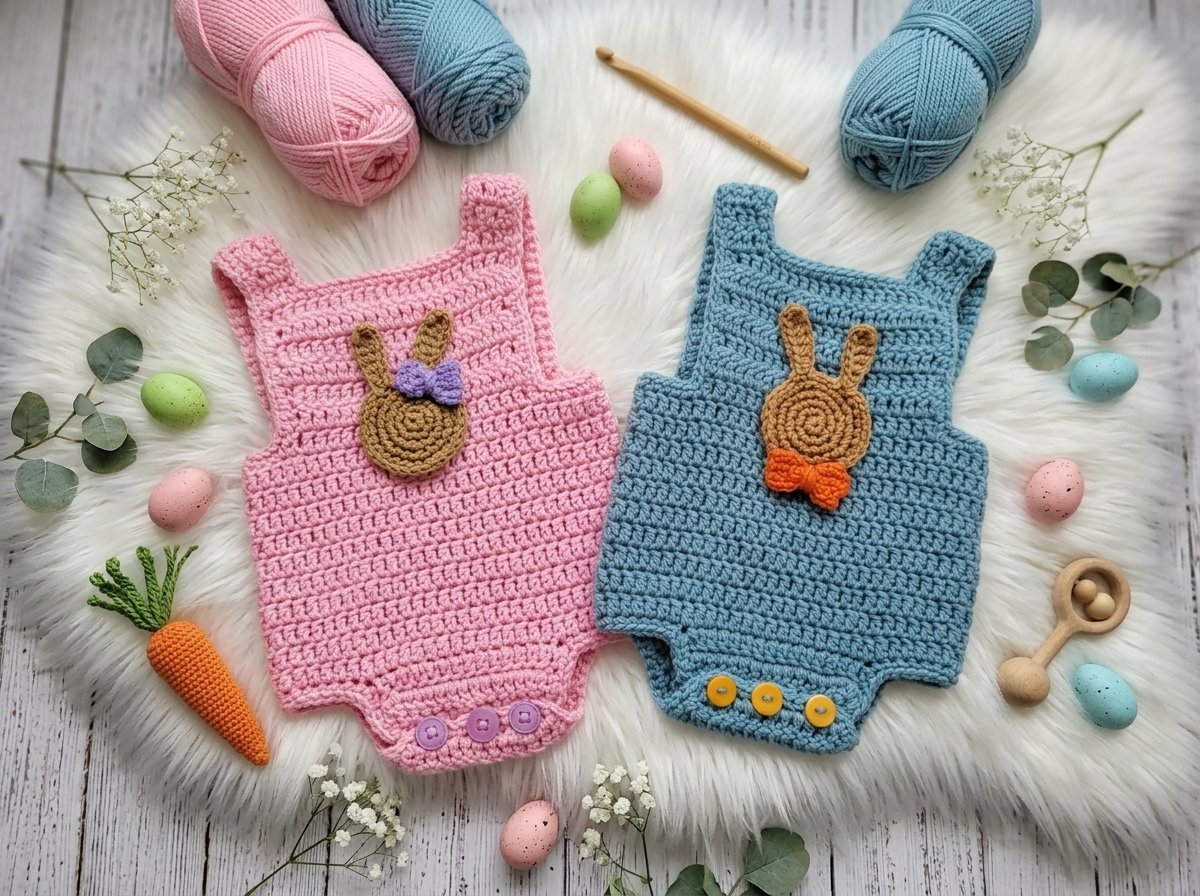
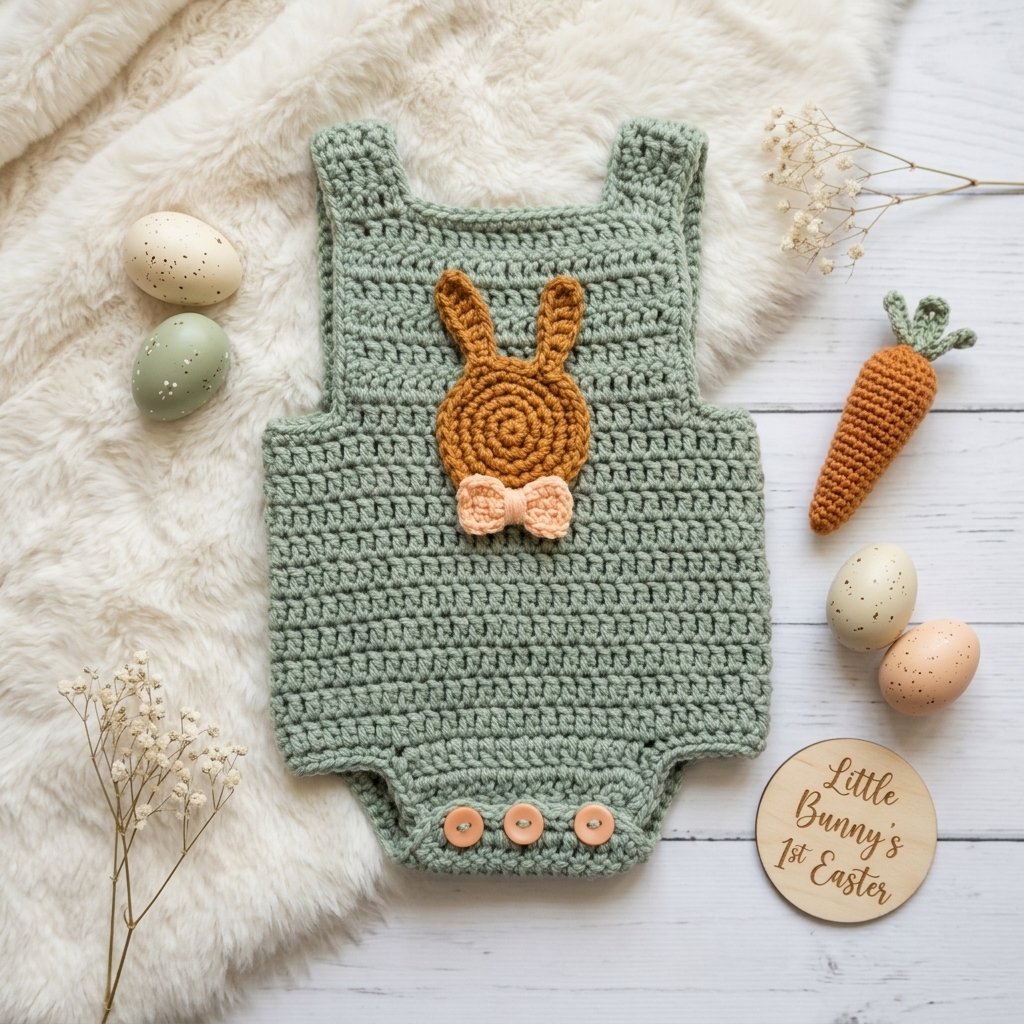
A soft, adjustable overall-style romper with a scooped front bib, crossed-back straps, a buttoned front flap, and a sweet crocheted bunny appliqué with a little bow. Sized from newborn through 12 months just by changing your hook — the stitch counts stay exactly the same across every size.
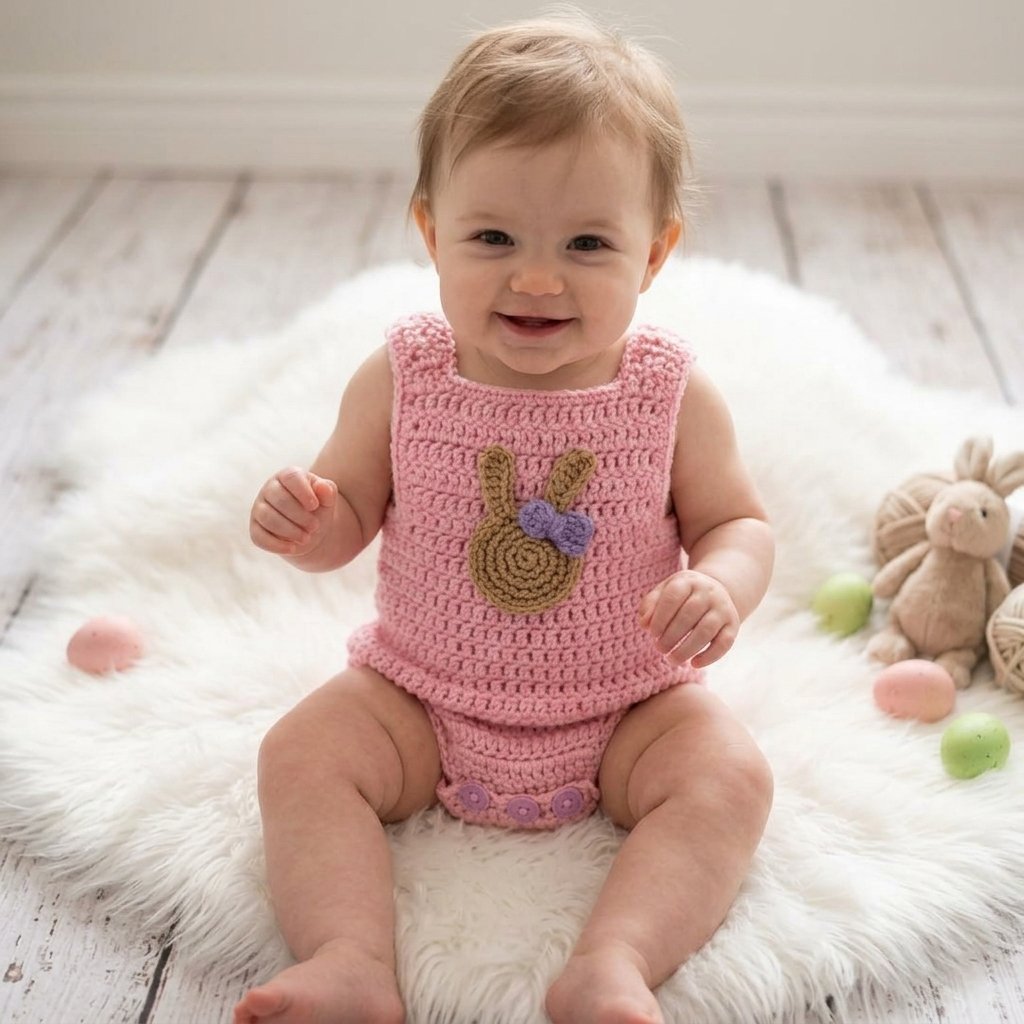
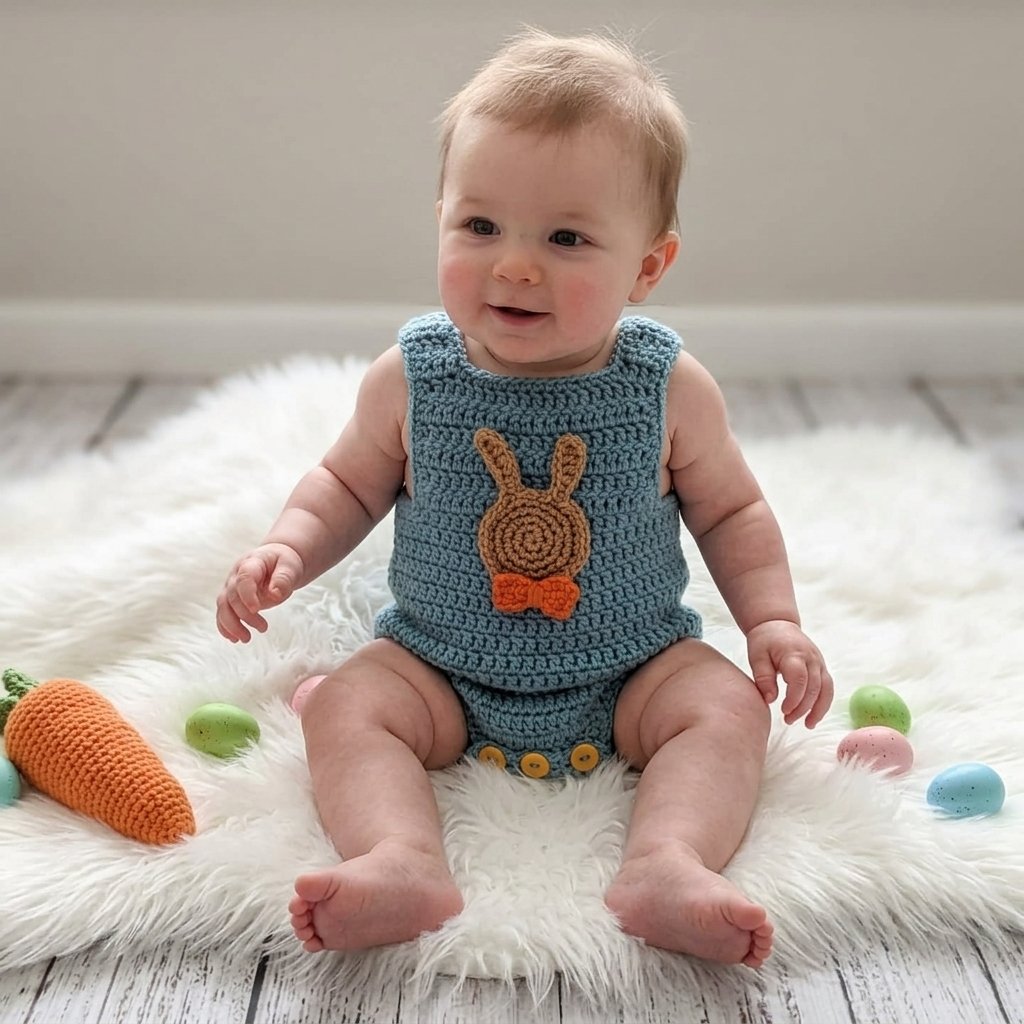
Quick glance
| Time | Skill | Sizes | Hook |
| 4–6 hrs | Intermediate | Newborn – 12 months | See size chart below |
Materials
- Worsted weight yarn: main color (romper body), brown (bunny), plus a bow color
- Crochet hook — see size chart
- 3 buttons
- Stitch marker, yarn needle, scissors
- Glue (optional, for the bunny/bow instead of sewing)
Hook size by age (US sizes)
| Size | Hook |
| Newborn | E (3.5mm) |
| 0–3 months | F (3.75mm) |
| 3–6 months | G (4.5mm) |
| 6–9 months | H (5.0mm) |
| 9–12 months | I (5.5mm) |
Terms & abbreviations
| Abbrev | Term | Notes |
| ch | chain | — |
| sc | single crochet | used for edging and the bunny/bow |
| dc | double crochet | used for the main body of the romper |
| hdc | half double crochet | used only in the bunny’s ears |
| inc | increase | 2 dc (or sc) in same st |
| dc2tog | double crochet 2 together | decrease used on the front flap |
| MR | magic ring | — |
| sl st | slip stitch | — |
| st(s) | stitch(es) | — |
| rnd(s)/row(s) | rounds for the main body; rows for the flaps, straps, and bow | — |
Part 1 — Back Flap
Foundation: Chain 14.
Row 1: Dc in the 3rd chain from your hook and in each chain across.
| Row | Instruction | St count |
| 2 | inc, dc across, inc | 14 |
| 3 | dc across (plain) | 14 |
| 4 | inc, dc across, inc | 16 |
| 5 | inc, dc across, inc | 18 |
| 6 | inc, dc across, inc | 20 |
Fasten off. This is the finished back flap.
Part 2 — Main Body (worked in the round)
Chain 40. Connect this chain to the opposite edge of your back flap’s foundation row with a slip stitch (double check the chain isn’t twisted first). Chain 2.
Round 7: Dc in each stitch around — across the top of the back flap, then around the chain-40. (60 dc total) Join with a slip stitch, chain 2.
Rounds 8–16: Repeat Round 7 exactly. (60 dc, constant across all 9 rounds)
Fasten off, and weave in both this end and your starting tail.
Part 3 — Front Bib
Locate the stitch on the front of the body that lines up with the width of your back flap (use your hook to find the corresponding position). Attach yarn there, chain 2.
Row 1: Dc in the same stitch, then 19 more dc across. (20 dc)
Rows 2–7: Chain 2, turn, dc across. (20 dc, constant across all 6 rows)
Part 4 — Straps (make 2)
Continuing from the bib’s edge, chain 2, turn.
Row 1: 3 dc.
Rows 2–14: Chain 2, turn, dc across. (3 dc, constant — 14 rows total)
Fasten off, leaving a longer tail for sewing. Repeat to make a second strap.
Attach the straps: Center the back flap, then sew each strap’s end to the back flap’s edge with 3–4 stitches, checking both straps line up evenly. Weave in ends.
Part 5 — Edging (both armholes + neck opening)
For each of the 3 openings: attach yarn anywhere along the edge, chain 1, and sc evenly all the way around (exact count doesn’t matter — just keep it evenly spaced). Join with a slip stitch, fasten off, weave in ends. Repeat for both armholes and the neck opening.
Part 6 — Front Flap (with buttonholes)
Turn the piece so the front faces you, upside down (back flap pointing away). The back flap’s last row was 20 stitches — this flap will be 16, centered with 2 free stitches on each side. Count 2 stitches in from the edge and attach yarn in the 3rd stitch. Chain 2.
Row 1: Dc across. (16 dc)
Row 2: Chain 2, turn. Dc2tog, dc across to the last 2 stitches, dc2tog.
Row 3: Repeat Row 2’s decrease pattern.
Edging + buttonholes: Without turning, chain 1 and sc evenly around the flap’s perimeter until you reach the corner nearest the back flap. From there: sc in the next stitch, chain 2, skip 2 stitches, sc in the 3rd (this makes one buttonhole loop). Repeat this chain-2/skip-2/sc sequence 2 more times for a total of 3 buttonholes. Continue sc evenly around the rest of the perimeter, join with a slip stitch, fasten off, weave in ends.
Part 7 — Buttons
Sew 3 buttons onto the body to align with the 3 buttonholes — start with the center button, then space the other two evenly from it. Using the same yarn color as your romper makes the sewn ends easy to hide.
Part 8 — Bunny Appliqué (brown yarn)
Head:
| Rnd | Instruction | St count |
| 1 | MR, 6 sc | 6 |
| 2 | inc around | 12 |
| 3 | [sc 1, inc] x6 | 18 |
| 4 | [sc 2, inc] x6 | 24 |
| 5 | [sc 3, inc] x6 | 30 |
Ears (worked directly from the head, make 2):
Slip stitch into the next stitch on the head, chain 7. Starting in the 2nd chain from your hook: 2 dc in the same chain (increase), 1 dc in the next chain, 1 dc in the next chain, then 1 hdc in each of the next 2 chains, then 1 sc in the last chain. Slip stitch into the next stitch on the head, then 3 more slip stitches across the top of the head (4 total) before starting the second ear the same way.
Sew or glue the finished bunny onto the front bib, centered as shown in the reference photo.
Part 9 — Bow
Chain 7. Sc in the 2nd chain from your hook and in each remaining chain across. (6 sc)
Rows 2–3: Chain 1, turn, sc across. (6 sc, both rows — 3 total rows)
Cut a shorter tail and weave in both ends. Wrap yarn tightly around the center of the rectangle a few times to cinch it into a bow shape, adjusting until you’re happy with the look. Thread a longer tail onto your needle and stitch through the back of the bow (underneath the wrap) twice to secure it. Sew or glue the bow onto the bunny.
Common mistakes
| Mistake | Fix |
| Body rounds drift off 60 stitches | Count at the end of every round through Rounds 7–16 — a single missed stitch compounds over 10 identical rounds |
| Front flap doesn’t center under the back flap | Double check your 2-free-stitch count on each side before attaching yarn for Part 6 |
| Buttonholes don’t align with buttons | Sew the center button first, matching the center buttonhole, before placing the outer two |
| Bunny ears look uneven | Compare both ears side by side after finishing the second one, before attaching to the romper |
Finishing
Weave in all remaining ends. Let any glued elements (bunny, bow) fully set before dressing baby in the finished romper.