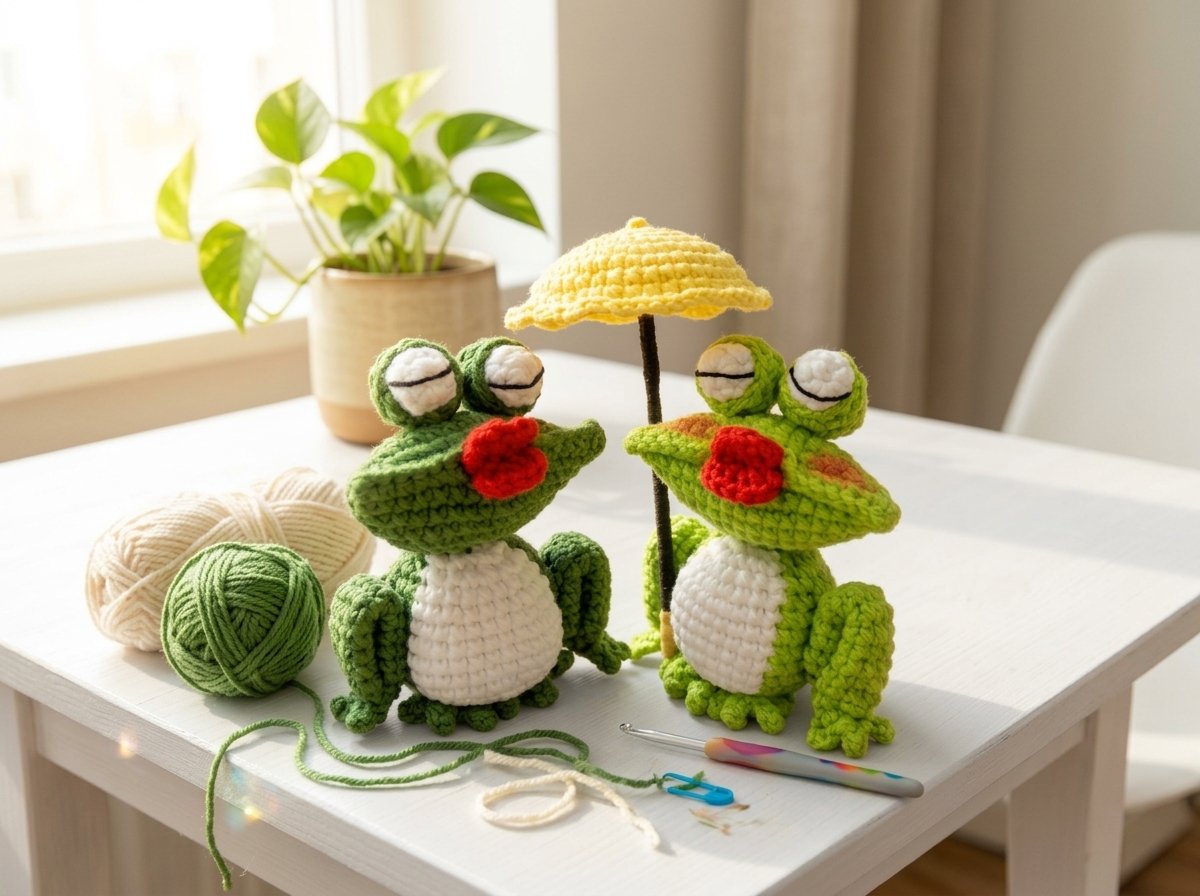
Kissing Frog Couple Crochet Pattern – Cute Frog Amigurumi Pair with Big Eyes
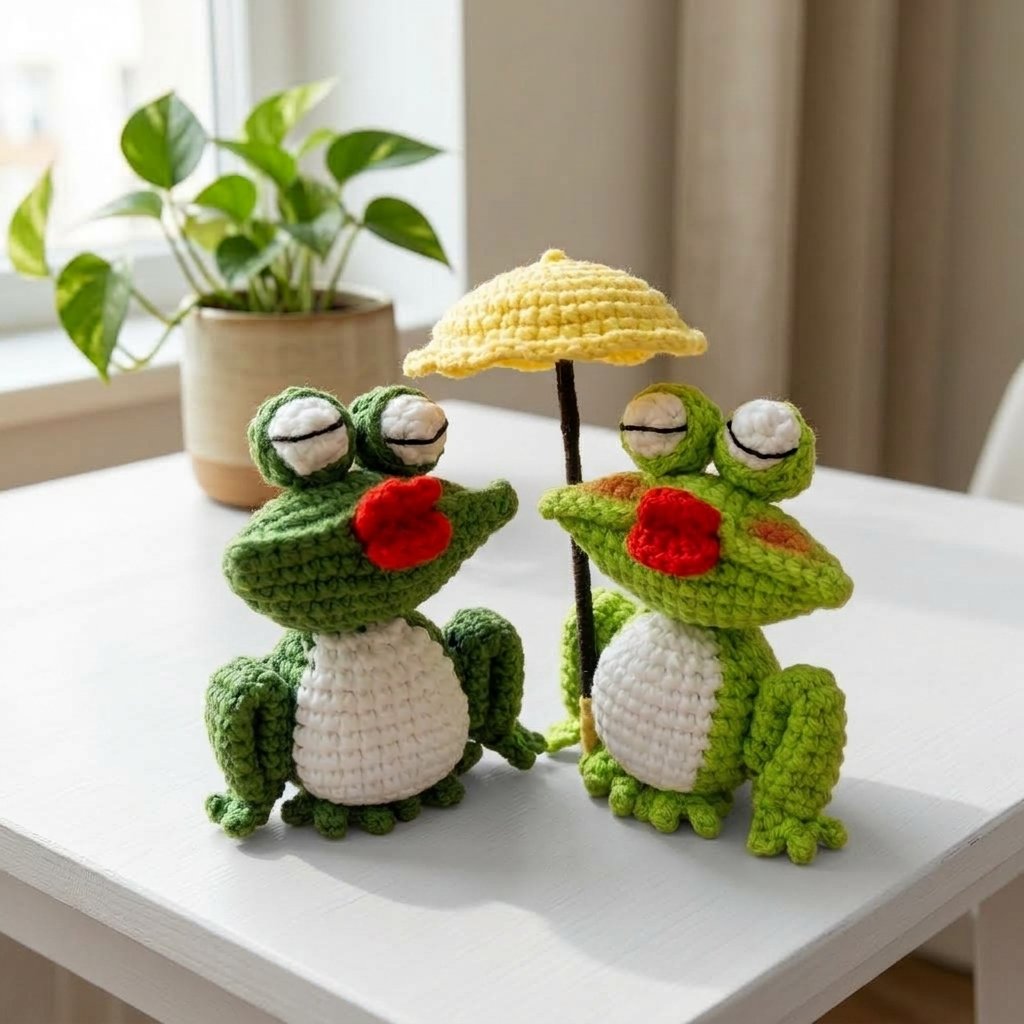
I fell completely in love with this pair while designing them. The whole personality comes from three details: those enormous droopy eyes with embroidered closed lids, the wide flat mouth that the head folds into, and those bright red puckered lips. Put two of them side by side and they look like they’re mid-kiss, which is exactly the charm.
The stitches themselves are simple — mostly single crochet with increases and decreases — but there are a few techniques worth slowing down for: the color-change method for the white belly panel, the folded-and-seamed head construction, and the back-loop/front-loop trick that lets the legs and toes grow from the same round. I’ll flag each of those as we get to them.
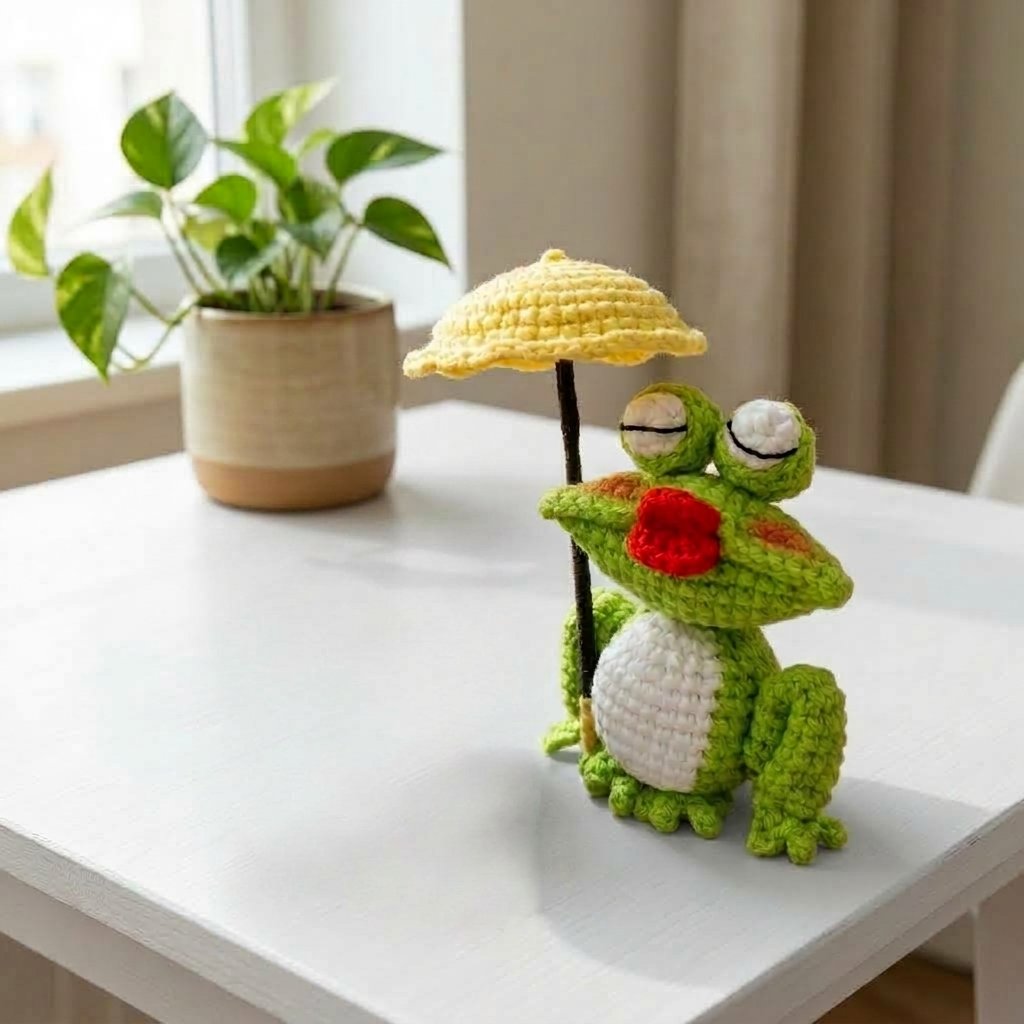
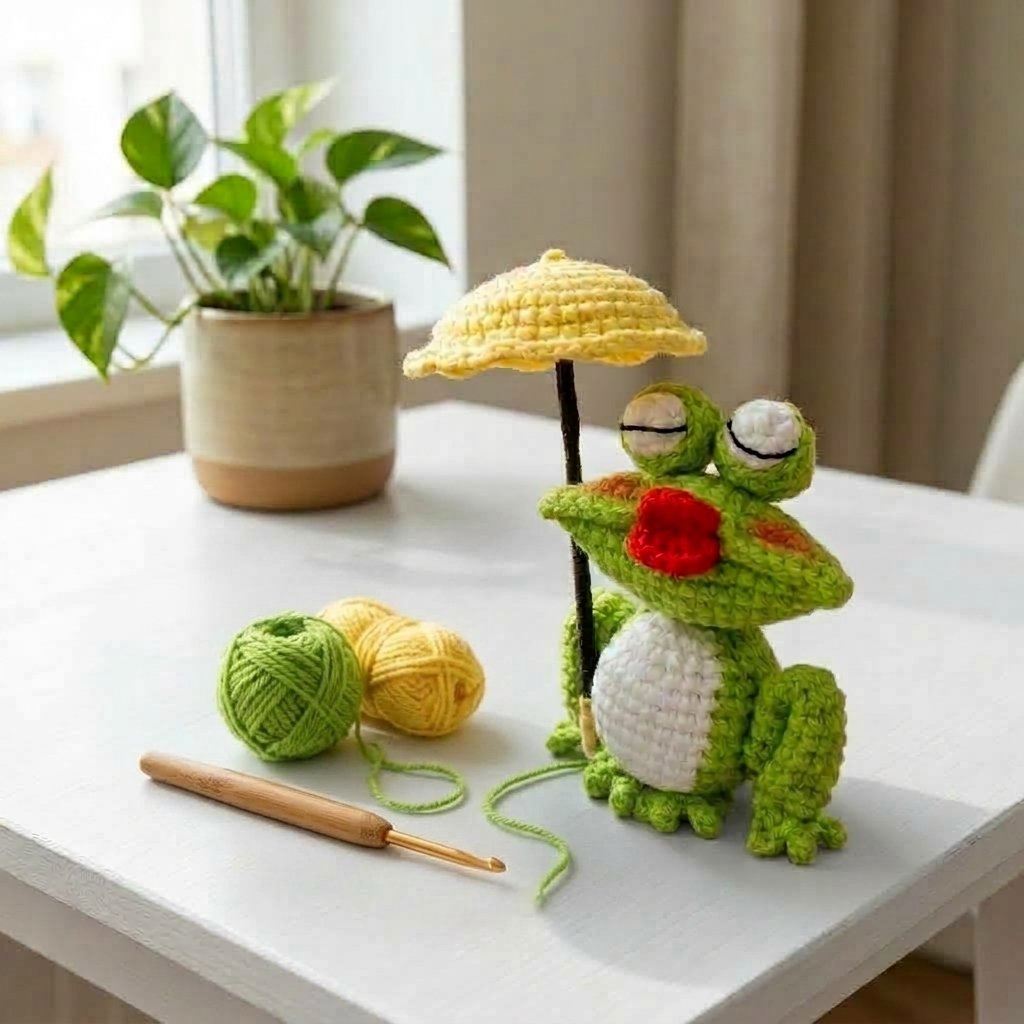
Materials
All abbreviations below are in US terminology.
| Item | Notes |
| 5-ply milk cotton yarn (2mm), green | The main body color — I love a rich, slightly deep green here |
| 5-ply milk cotton yarn (2mm), white | For the belly panel and the eyeballs |
| 5-ply milk cotton yarn (2mm), red | For the lips |
| 2.5mm crochet hook | |
| Fiberfill stuffing | |
| Tapestry needle | |
| Stitch markers | Genuinely useful here, especially through the head and belly color changes |
| Scissors | |
| Black embroidery thread | For the closed-eye expression |
| Hot glue (optional) | Handy for attaching the feet, eyes, and lips if you’d rather not sew everything |
Abbreviations
| Abbreviation | Meaning |
| MR | magic ring |
| ch | chain |
| sc | single crochet |
| hdc | half double crochet |
| sl st | slip stitch |
| inc | increase (2 sc in the same stitch) |
| dec | decrease (2 sc worked together) |
| BLO / FLO | back loop only / front loop only |
| st(s) | stitch(es) |
A Note on How the Rounds Work
Every round in this pattern is worked the same way: chain 1 at the beginning, and close with a slip stitch into the first single crochet at the end. I’ll only call this out again if something changes. If you’re newer to amigurumi, pop a stitch marker into that first stitch of each round so you don’t lose your place.
Part 1: The Head
The head starts as a simple sphere, then gets folded flat and seamed to create that wide, characteristic frog mouth.
| Round | Instructions | Stitch Count |
| 1 | 6 sc in a magic ring | 6 |
| 2 | 6 inc around | 12 |
| 3 | (1 sc, inc) ×6 | 18 |
| 4 | 18 sc around | 18 |
| 5 | (1 sc, inc, 1 sc) ×6 | 24 |
| 6 | 24 sc around | 24 |
| 7 | (3 sc, inc) ×6 | 30 |
| 8 | 30 sc around | 30 |
| 9 | (2 sc, inc, 2 sc) ×6 | 36 |
| 10–12 | 36 sc around (3 rounds) | 36 |
Forming the mouth: once Round 12 is complete, fold the piece flat in half so the opening becomes a wide slot.
- Ch 1, then work through both layers together (insert your hook through the front and back at once) — work 7 sc across this way.
- Stuff a small amount of fiberfill into the head at this point.
- Work 4 sl sts.
- Skip 4 stitches along the bottom layer, marking your stopping point with a stitch marker.
- Insert your hook into the bottom layer right at that marker, and work 1 sc there.
- Continue working 1 sc into each remaining stitch the same way, all the way to the end.
- Pull your loop up, cut the yarn, and tuck the tail inside the head to hide it.
That skipped section is what creates the open mouth — the seamed part becomes the lip line, and the gap becomes the opening.
Part 2: The Body (with the White Belly Panel)
This is the trickiest section, but only because of the color changes. Here’s the principle: the white belly grows outward by one stitch on each side with every round, from Round 3 through Round 5. Once it’s reached the width you want, you simply keep working those established white stitches in white for the rest of the body, whether you’re increasing, decreasing, or working plain.
The color-change technique: when you reach the spot where the color needs to switch, work the first half of the single crochet in your current color (insert hook, yarn over, pull up a loop), then pull the new color through to complete the stitch. This gives a clean, seamless transition with no visible jog.
| Round | Instructions | Stitch Count |
| 1 | 6 sc in a magic ring | 6 |
| 2 | 6 inc around | 12 |
| 3 | (1 sc, inc) around — switching to white for stitches 8 through 11 (4 white stitches total), then back to green | 18 |
| 4 | (1 sc, inc, 1 sc) around — expanding the white section by one stitch on each side | 24 |
| 5 | (3 sc, inc) around — expanding the white section by one more stitch on each side | 30 |
| 6 | 3 inc, 24 sc, 3 inc — working the established belly stitches in white | 36 |
| 7–9 | 36 sc around (3 rounds), keeping the belly stitches white and not expanding the white section further | 36 |
| 10 | 3 dec, 24 sc, 3 dec | 30 |
| 11 | (3 sc, dec) around | 24 |
| 12 | 24 sc around | 24 |
| 13 | (1 sc, dec, 1 sc) around — stuff with fiberfill after this round | 18 |
| 14 | (1 sc, dec) around | 12 |
Pull up a loop and cut both the green and white yarn, leaving a long green tail for sewing the head on later. Add a bit more stuffing before closing.
Part 3: The Legs (Make 2)
Here’s the clever bit: Round 2 is worked in the back loops only, which leaves the front loops free. Later, you’ll come back and build the toes directly into those free front loops — no separate foot piece needed for the back legs.
| Round | Instructions | Stitch Count |
| 1 | 6 sc in a magic ring | 6 |
| 2 | BLO: (1 sc, inc, 1 sc) ×2 | 8 |
| — | Turn the piece right side out | |
| 3–14 | 12 sc around (12 rounds) | — |
Cut the yarn.
Now for the toes: return to Round 2 and find the unworked front loops. Attach your yarn to the first free front loop, then:
- Ch 3, turn and work back: starting in the 2nd chain from the hook, work 1 sl st, then 1 more sl st in the next chain.
- Sl st into the next stitch on the base to anchor the toe down.
- That’s one toe. Repeat the whole sequence twice more for a total of 3 toes.
Fasten off, cut the yarn, and weave the tail inside. Make a second leg exactly the same way.
Part 4: The Front Feet (Make 2)
These little feet are just a magic ring with three toes worked directly off it.
| Round | Instructions |
| 1 | 6 sc in a magic ring |
| 2 | Ch 1, work 2 sc. Then: ch 3, work back from the 2nd chain from the hook with 1 sl st, 1 more sl st, and a sl st into the next stitch on the ring to anchor. Repeat this toe sequence 2 more times (3 toes total). After the last toe, ch 1 and work 1 sc in the same stitch, then 1 sc in the next stitch to join. |
Fasten off and cut the yarn. Make a second foot.
Part 5: The Eyelids (Make 2)
These are worked flat, back and forth, and become the green hood that wraps over each eyeball.
| Row | Instructions | Stitch Count |
| 1 | Ch 11. Starting in the 2nd chain from hook, 1 sc in each chain across | 10 |
| 2 | Ch 1, turn. 1 sc in each stitch across | 10 |
| 3 | Ch 1, turn. (3 sc, dec) ×2 | 8 |
Ch 1 to fasten off and cut the yarn, leaving a long tail for sewing — you’ll need it to attach the eyelid around the eyeball. Make a second eyelid.
Part 6: The Eyeballs (Make 2)
| Round | Instructions | Stitch Count |
| 1 | 6 sc in a magic ring | 6 |
| 2 | (1 sc, inc) ×3 | 9 |
| 3 | 9 sc around | 9 |
| 4 | (1 sc, dec) ×3 | 6 |
Cut the yarn, leaving about a 20cm tail. Stuff lightly with fiberfill, then thread your needle through the front loops of each remaining stitch, pull tight to close, and weave the end inside. Make a second eyeball.
Part 7: The Lips
This little piece is what gives the frogs their whole personality — a pair of red puckered lips worked into a single magic ring.
- Make a magic ring.
- Ch 3, then work 3 hdc into the ring.
- Ch 2, then sl st into the ring.
- Ch 3 again, work 3 hdc into the ring.
- Ch 2, then sl st into the ring.
- Pull the yarn tail to tighten the magic ring closed, and cut the yarn.
That gives you two little lobes that read beautifully as a kissing pout.
Assembly
- Assemble the eyes: position an eyeball slightly offset inside an eyelid piece, so the eyelid sits around Round 2 of the eyeball and wraps snugly over the top. Sew them together, pulling the outer edge of the eyelid with a bit of tension so it hugs the eyeball fully. Weave in the tail. Repeat for the second eye.
- Add the expression: using black embroidery thread, embroider a curved line across each eyeball just under the eyelid edge, to give that sweet closed-eye look.
- Attach the head to the body — sew it on with your long green tail, or glue it if you prefer.
- Attach the legs to the body, positioned around the 5th round up from the bottom. Sew or glue in place.
- Glue the two front feet to the bottom front area of the body. It helps to mark your placement spots first so both sides match.
- Attach the eyes, positioned about two rounds above the mouth.
- Glue the lips onto the mouth area, pressing firmly until set.
And there’s your frog couple, mid-smooch. I love how much character comes out of such simple shapes — the oversized eyes and that little red pout do all the heavy lifting. Make two and they’re instantly a pair; make one and you’ve still got the sweetest little desk companion.