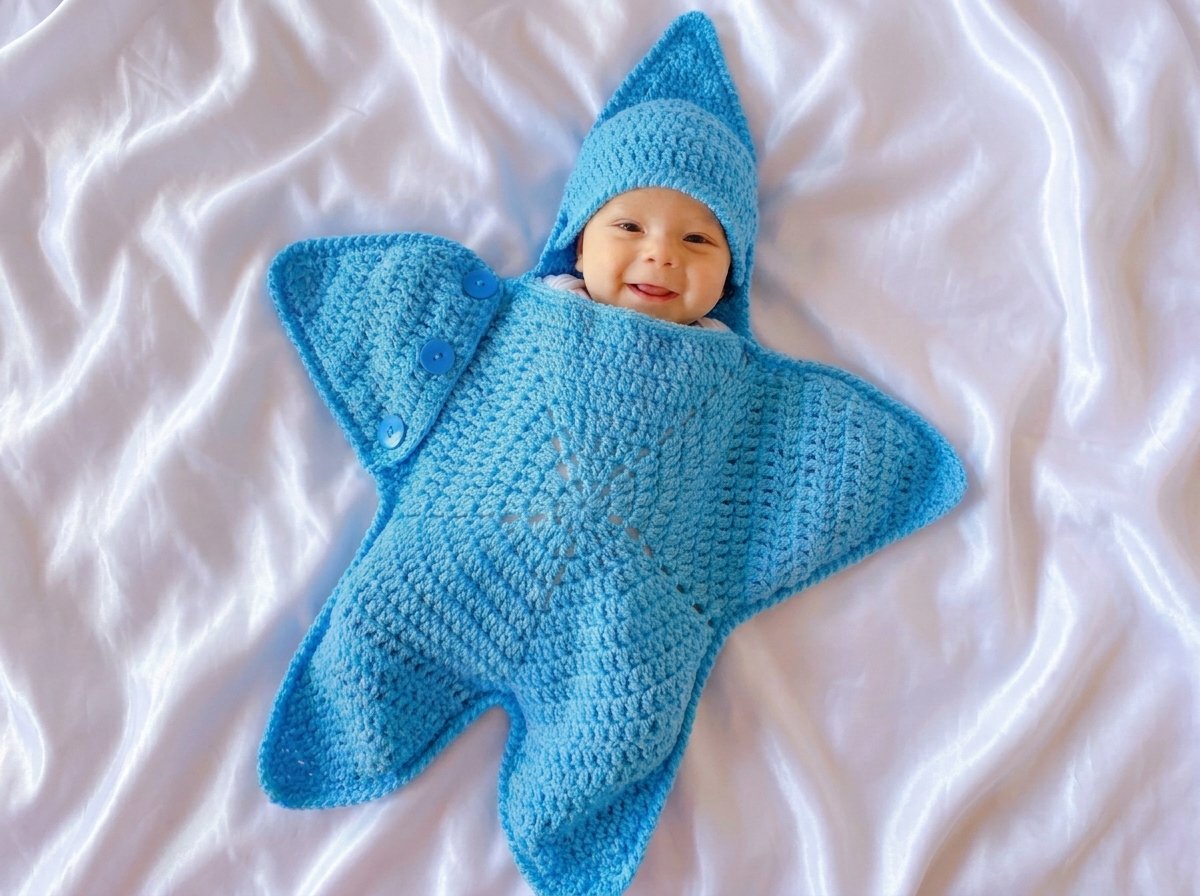
Crochet Star Shape Baby Sleep Sack Pattern – Easy Baby Cocoon for 0–6 Months
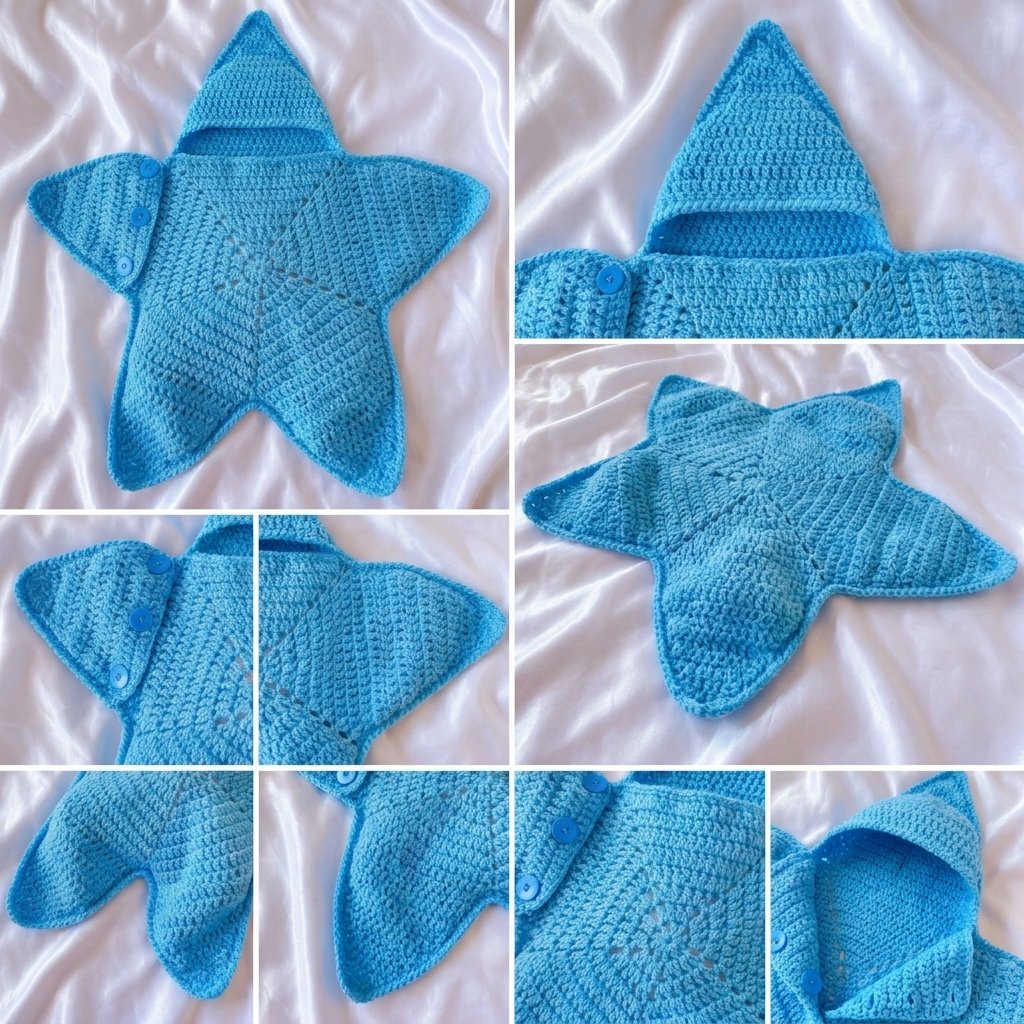
There’s something so charming about a baby item that doubles as a little piece of nursery decor, and this star-shaped sleep sack does exactly that. It starts as a simple crocheted pentagon, grows five points into a proper star, and then gets folded into a soft envelope with a little pointed hood and a button placket down one side. It looks far more complicated than it actually is — the whole thing is built from just double crochet, a basic decrease, and a simple front-post/back-post rib for the hood brim.
This makes a snug, wearable-blanket-style sack sized for 0–6 months. Let’s walk through it piece by piece: the pentagon base, the star points, the hood, and then how it all comes together.

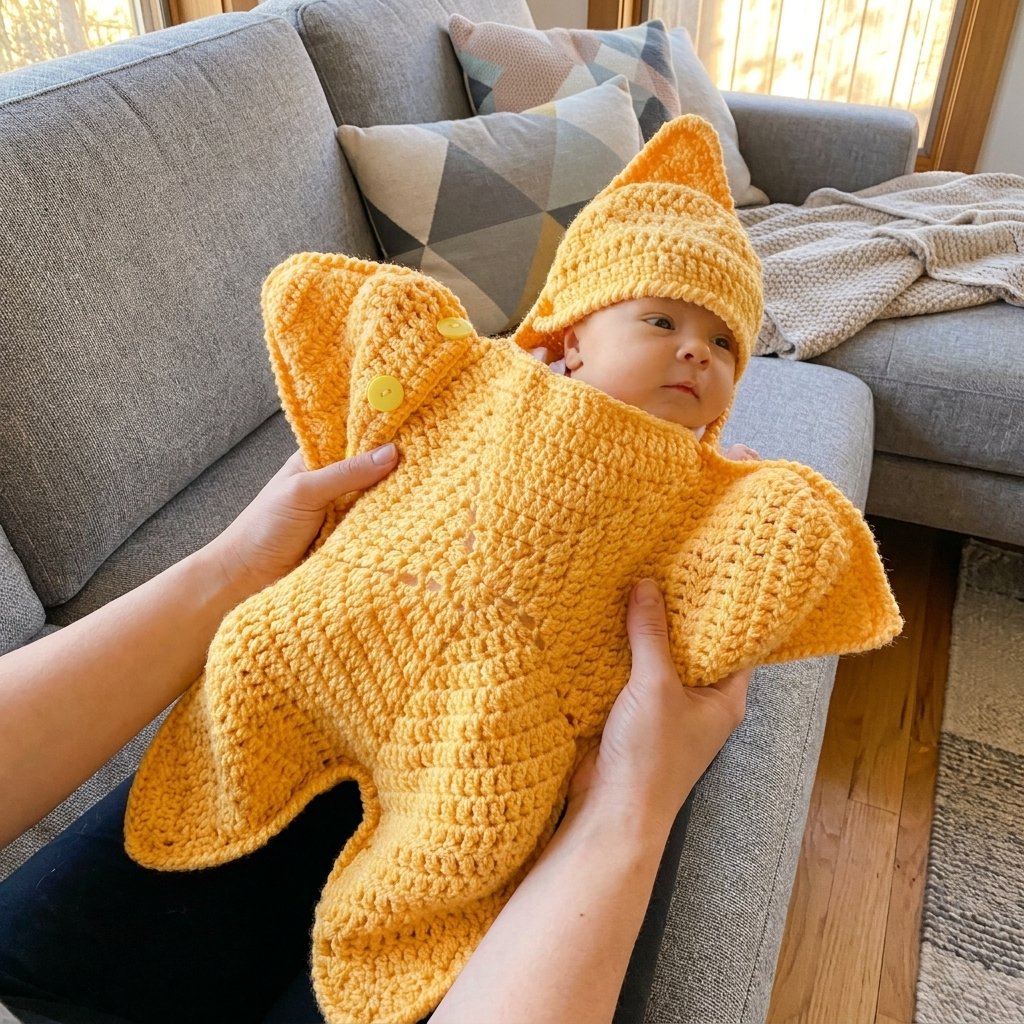
Materials
| Item | Notes |
| Soft worsted weight (US #4) yarn | Baby items call for the softest yarn you can find — I used about 4 skeins of a 120g/354yd acrylic |
| 5.0mm crochet hook | Main hook for the body of the sack |
| A slightly smaller hook (I used a 3.5mm) | For seaming the pieces together neatly |
| Scissors | |
| Measuring tape | |
| Darning/tapestry needle | |
| Stitch markers | Genuinely helpful here — this pattern has a few spots where it’s easy to lose track of a stitch |
Abbreviations (US Terms)
| Abbreviation | Meaning |
| ch | chain |
| sl st | slip stitch |
| sc | single crochet |
| dc | double crochet |
| dc2tog | decrease — 2 dc worked together as 1 |
| FPdc / BPdc | front post double crochet / back post double crochet |
| MR | magic ring |
| st(s) | stitch(es) |
| sp(s) | space(s) |
How This Comes Together
- Crochet two flat pentagon panels — one becomes your back (all 5 points), one becomes your front (only 3 points, leaving a gap for the opening).
- Extend 5 points on the back panel and 3 points on the front panel to form the star shape.
- Crochet a small pointed hood with a ribbed brim.
- Seam the front and back panels together, and attach the hood.
- Add a button placket along the open front edge, and crochet 3 little buttons to match.
Part 1: The Pentagon Base (Make 2 — One Front, One Back)
Both panels start out identically as a simple flat pentagon, made up of 4-dc clusters separated by chain-2 corner spaces.
Round 1:
- Make a magic ring. Ch 3 (counts as your first dc), then work 3 more dc into the ring — that’s your first cluster of 4 dc.
- Chain 2, then work another cluster of 4 dc into the ring.
- Repeat this (ch 2, cluster of 4 dc) until you have a total of 5 clusters and 5 chain-2 spaces evenly around the ring.
- Join with a slip stitch to the top of your very first dc.
Getting set up for Round 2: slip stitch across the remaining stitches of your first cluster to reach the first chain-2 space, then slip stitch into that space itself. This little bit of repositioning only happens this once.
Round 2 (and every round after, until your pentagon is the size you want):
- In your first chain-2 space, work a “V” — that’s 1 dc, chain 2, 1 dc, all into the same space.
- Work 1 dc into each dc of the cluster below it.
- When you reach the next chain-2 space, work another V-stitch (1 dc, ch 2, 1 dc) to turn the corner.
- Continue this all the way around — 1 dc per stitch along each side, a V-stitch in every corner space — and join with a slip stitch to close the round.
Keep repeating this same expansion round, and your flat pentagon will grow steadily larger with each pass. Count your stitches as you go to make sure every side matches — it’s easy to end up one stitch short or long on your very first expansion round, especially right after that repositioning step, so don’t be afraid to add or skip a single stitch here or there to true everything up if a side looks a little off. It won’t show once the piece is finished.
Keep working expansion rounds until your pentagon measures about 18cm (7in) from the center point out to any outer edge. Make a note of how many stitches you have along one full side once you reach this point — you’ll want both panels to match, and you’ll use this same count as your starting point for each star point below.
Part 2: Shaping the Star Points
Each point is worked as its own separate flat triangle, built directly onto one edge of the pentagon.
- Join your yarn at one corner of a pentagon edge. Chain 3 (counts as your first dc), and work 1 dc into each stitch across that entire edge, including a couple of stitches into the corner chain-2 space to keep your edge full and even.
- Chain 2, turn.
- The decrease row: work a dc2tog over your first 2 stitches, then 1 dc in each stitch across, ending with a dc2tog over your last 2 stitches.
- Repeat that decrease row over and over — chain 2, turn, decrease at both ends every single row — until you’re down to just 2 stitches remaining.
- On your very last row, work one final dc2tog over those last 2 stitches, chain 1, and fasten off.
That’s one point. In my version, it took 17 rows total to shape one full point, but this will vary depending on your gauge and how wide your pentagon ended up — just keep decreasing evenly at both ends until you reach the tip.
For the back panel: repeat this entire point on all 5 edges of the pentagon, so you end up with a complete, symmetrical 5-pointed star.
For the front panel: shape points on only 3 of the 5 edges — two adjacent points become the legs, and one becomes an arm. Leave the remaining two edges of the pentagon completely unworked; this open gap is what becomes your front chest opening, where the hood and button placket will attach.
Part 3: The Hood
The hood starts as a rectangle with a ribbed brim, then shapes into a point using the exact same decrease technique as the star.
- Chain 36. Skip the first 3 chains (these act as your turning chain), then work 1 dc into the 4th chain from your hook and in each chain across — you should end with 33 stitches total.
- Chain 2, turn. Work a round of front post and back post double crochet: work a front post dc over the first stitch, then a back post dc over the next, alternating front post/back post all the way across. On your next row, work a front post dc over each front post stitch below it, and a back post dc over each back post stitch below it — this keeps the same rib pattern stacking neatly. Repeat for a total of 4 rows — this becomes the folded brim of the hood.
- Switch to plain double crochet (1 dc in each stitch, every row) for several more rows, until the hood is as deep as you’d like — I made mine a little roomier than the star’s points so it comfortably fits over a baby’s head.
- Shape the hood into a point using the same method as the star points: chain 2, turn, dc2tog at the beginning of the row, dc across, dc2tog at the end. Repeat every row until you’re down to your last 2 stitches, then work a final decrease, chain 1, and fasten off.
A quick sizing note: since the star’s points and the hood are shaped with the same decrease technique, it helps if their stitch counts match going into the decrease rows. If your hood’s foundation count doesn’t quite line up with your pentagon’s per-side stitch count, simply work one extra stitch into (or skip one stitch from) your first decrease row to bring the two in line before you start shaping the point — it makes seaming everything together later much tidier.
Part 4: Assembling the Sack
- Lay your back panel (the full 5-pointed star) right side down.
- Lay your front panel (the 3-pointed star with the open gap) on top, wrong sides together, so both right sides will face outward once seamed. Line up the two leg points and the one arm point with their matching points on the back panel.
- Switch to your smaller hook for a neater seam. Starting at one corner, single crochet through both layers together, going into the actual stitch on each side (rather than just catching the top bar) for the cleanest finish. Work your way all the way around each pointed edge, joining the front and back layers together.
- Leave the button-placket edge and the neckline/hood gap open and unseamed — that’s your dressing opening and where the hood attaches.
- Attaching the hood: fold the hood’s ribbed brim section over so it shows as a folded brim on the right side, then single crochet it in place all the way around, joining it into the neckline gap on the front panel. Take your time here — stitching through the folded brim layer plus the panel underneath is a little fiddly, but it settles in nicely once you’re through it.
- Single crochet the last remaining open arm seam closed the same way you joined the points.
Part 5: The Button Placket
Worked along the one straight edge left open on the front panel, where it meets the back — this becomes the overlapping closure of your sleep sack.
- Row 1: attach your yarn along that open edge and work a straight row of dc evenly along its length.
- Row 2 (buttonholes): work dc across, but at each spot you’d like a button, skip 2 stitches and chain 2 over that gap instead. Space your buttonholes evenly along the row — I used 3 buttonholes for my size, but adjust the count and spacing to fit your own gauge and preference.
- Row 3: work dc across, working 2 dc into each chain-2 buttonhole gap from the row below to reinforce the edges neatly. Fasten off.
Part 6: The Crochet Buttons (Make 3, or to Match Your Buttonholes)
- Make a magic ring and work 10 sc into it.
- Work 2 sc into every stitch around for a total of 20 sc.
- Cut your yarn, leaving a long tail, and thread it onto your darning needle. Skip your first stitch, then work through both loops of the second stitch and the back loop of the following stitch to draw the edge into a smooth, closed little disc — this gives a clean finish and quietly closes the gap you skipped at the start.
- Use the same tail to sew the button onto the placket, lining it up over the center of its matching buttonhole, stitching in and out until it’s secure. Weave in the end.
Repeat for as many buttons as you have buttonholes.
Finishing Up
Give the whole sack a final look-over, weave in any remaining ends, and it’s ready for its first snuggly nap. This one always gets such a warm reaction as a handmade gift — the shape alone makes it feel like more than “just” a blanket, and that little pointed hood is honestly the cutest part of the whole thing.