Easy Crochet Baby Cardigan Sweater Pattern – Beginner-Friendly Step-by-Step Tutorial
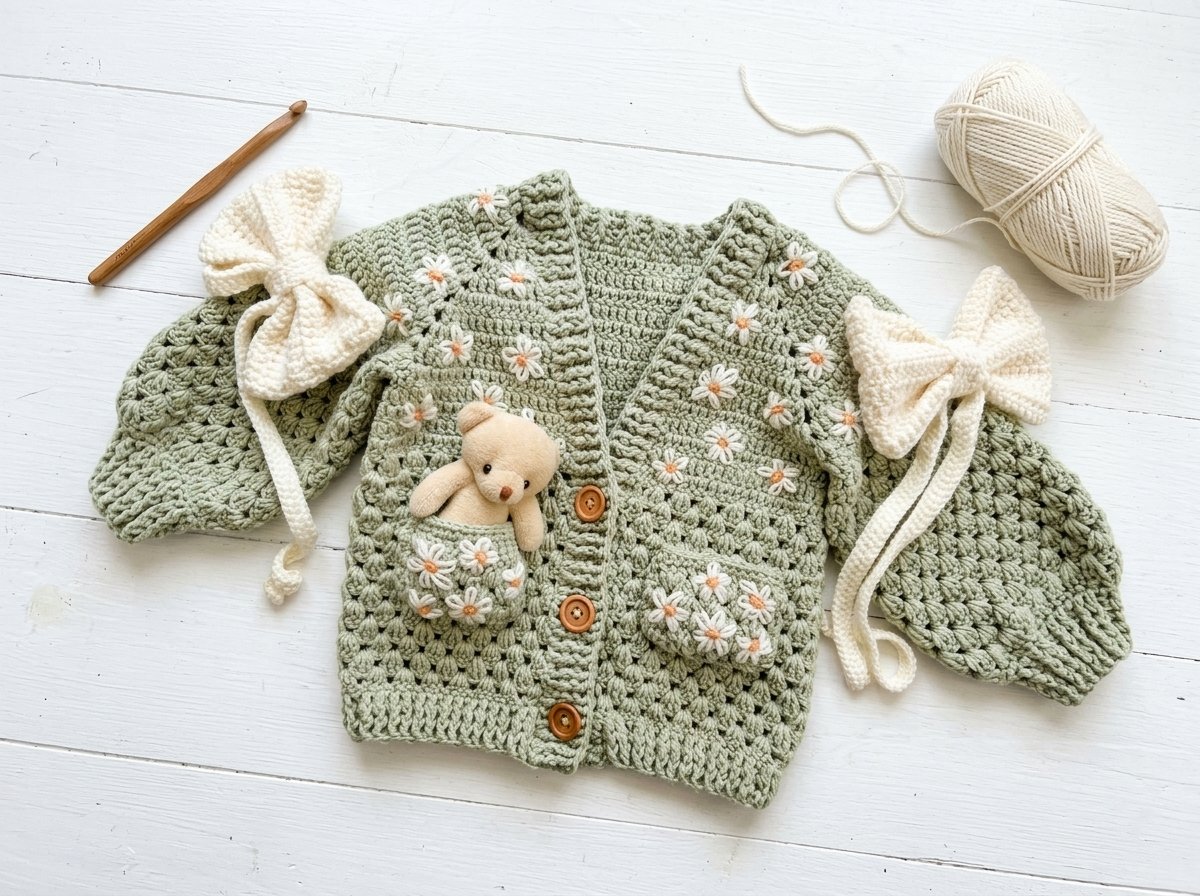
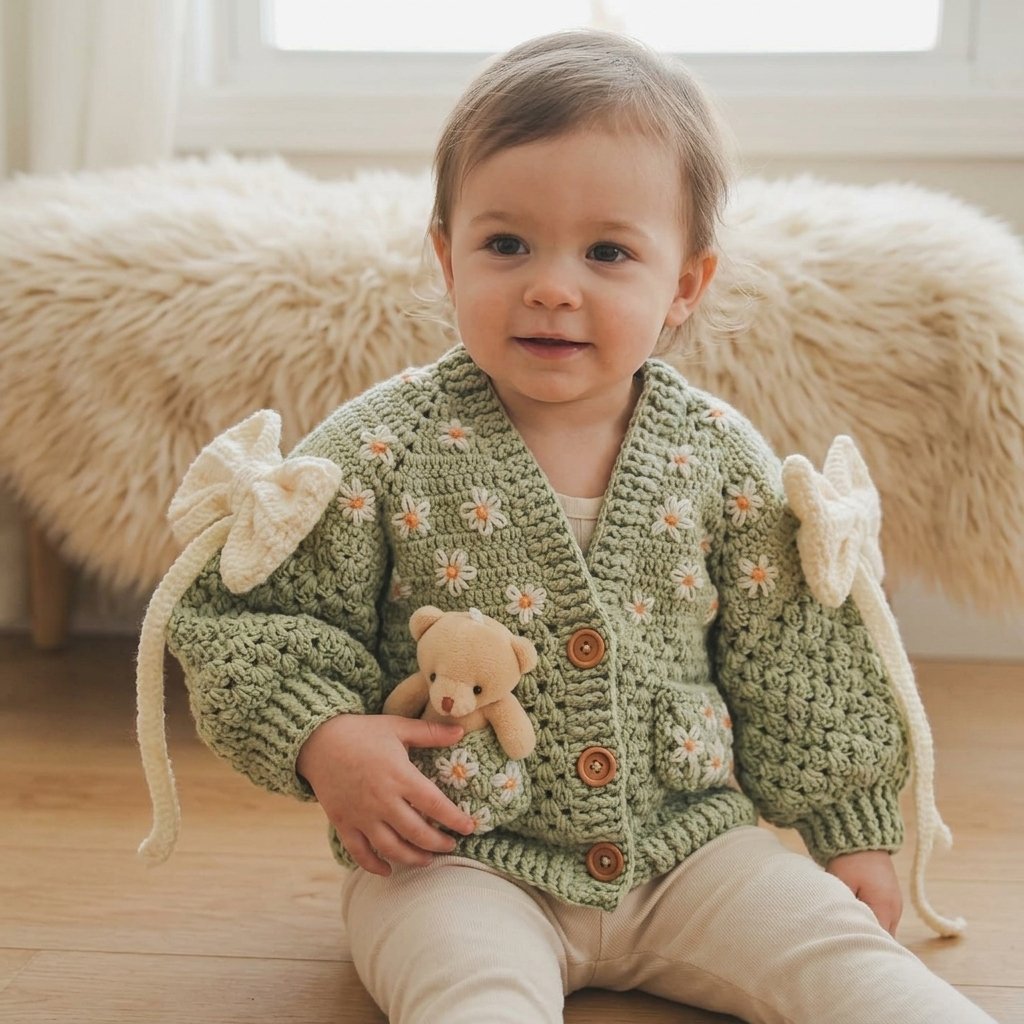
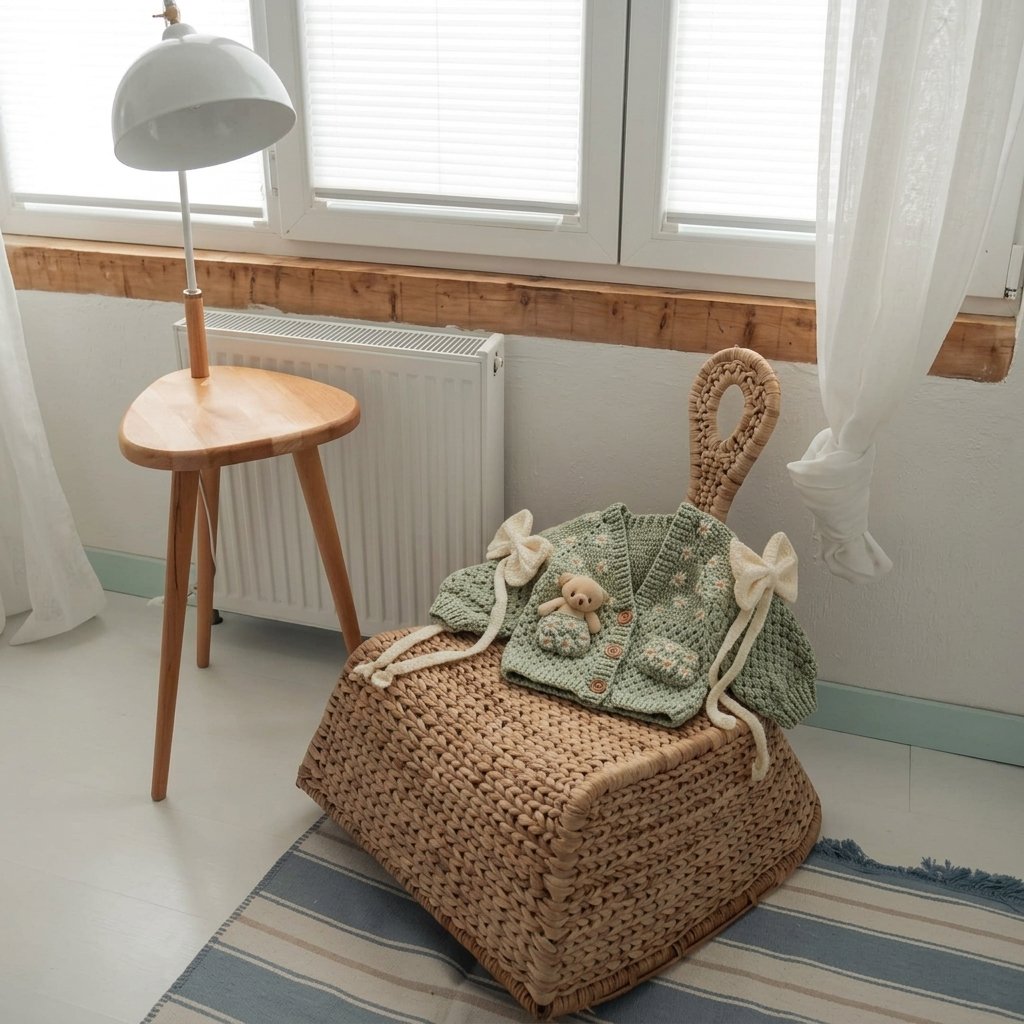
This cardigan started as a simple raglan-yoke vest and grew into one of my favorite baby patterns — a soft, textured lattice body, a sweet embroidered daisy pocket, matching bows, and a knit-look ribbed trim that fools almost everyone into thinking it’s actually knitted. It’s worked entirely top-down in double crochet, and once you understand the shaping logic, you can size it for anything from a newborn to a 4-year-old using the same set of rules.
I want to be upfront about something: this is a technique-driven pattern rather than a single fixed set of row numbers. Yarn weight, hook size, and everyone’s individual tension change row counts significantly, so instead of chasing an exact row number, you’ll be watching two things throughout — your stitch counts at the start, and your centimeter measurements as you go. I’ll give you both a sizing chart and the measurement targets you’re aiming for at each stage.
Materials
| Item | Notes |
| DK/light worsted weight yarn | A soft, baby-safe acrylic or cotton-acrylic blend works beautifully |
| 2.5mm crochet hook | |
| Contrast cream/white yarn | For the ribbing, bows, and daisy petals |
| Small amount of yellow or orange yarn | For the daisy centers |
| 3 or more buttons | Wooden or plain buttons suit this cardigan nicely |
| Tapestry needle | |
| Measuring tape | Genuinely essential — more important than counting rows for this pattern |
| Stitch markers | Handy for tracking your 4 raglan increase points |
Abbreviations (US Terms)
| Abbreviation | Meaning |
| ch | chain |
| sl st | slip stitch |
| sc | single crochet |
| dc | double crochet |
| FPdc / BPdc | front post double crochet / back post double crochet |
| st(s) | stitch(es) |
| sp(s) | space(s) |
Sizing Chart: Your Foundation Row
The yoke starts as one long foundation row split into five sections: front, sleeve, back, sleeve, front — each separated by a small chain gap. Both fronts are always just 1 stitch to start; only the sleeve and back numbers change by size.
| Age | Each Front | Each Sleeve | Back |
| 0–1 year | 1 | 10 | 20 |
| 2 years | 1 | 11 | 22 |
| 3 years | 1 | 12 | 24 |
| 4 years | 1 | 13 | 26 |
| 5 years | 1 | 14 | 28 |
The pattern continues in the same rhythm for larger sizes: add 1 stitch to the sleeve count and 2 stitches to the back count for each size up (the back is always exactly double the sleeve). Pick your size, chain your foundation with ch 2 before each section (this accounts for the height of your first dc), and you’re ready to start.
A Technique Worth Understanding Before You Start
The raglan increase point: every increase in this yoke happens at the top of an actual double crochet stitch — never into the little turning-chain gap next to it. This trips up almost everyone at least once: when you turn your work, you chain 2 to substitute for your first dc, and it’s tempting to treat that chain-2 as a stitch to work into on the next row. Don’t. Always find the real stitch (the “hub” of the dc below), and increase there. Getting this right is what keeps your raglan lines straight and even instead of crooked.
Part 1: The Yoke
Work back and forth in rows, turning at the end of each one.
Row 1: work your foundation row exactly as your size chart lays out — front, gap, sleeve, gap, back, gap, sleeve, gap, front — working 1 dc into each stitch and chain space across.
From Row 2 onward, the rule is:
- Even rows: work a double increase (essentially 2 dc worked into the same point) at each of your 4 raglan corners — where a sleeve meets a front, and where a sleeve meets the back, on both sides. That’s 8 total increase stitches added per even row (2 at each of the 4 corners).
- Odd rows: no increases at all — just work straight across.
Keep repeating this even-row-increase, odd-row-plain rhythm. As you go, periodically fold your work and measure straight across the back panel (not around the curve, just the flat width). Stop increasing once you reach the target width for your size:
| Age | Target Back Panel Width |
| 0–3 months | ~20 cm |
| 5–6 months | ~22 cm |
| 8 months – 1 year | ~25 cm |
| 2 years | ~28 cm |
| 3 years | ~30–31 cm |
| 4 years | ~33–34 cm |
Don’t worry at all about which row number you land on — it genuinely varies with yarn, hook, and hand tension. The centimeter measurement is what matters.
Part 2: Separating the Body from the Sleeves
Once your yoke is the right width, it’s time to set the sleeves aside and join the two fronts to the back at each underarm.
- Work across one front and reach the last stitch before the sleeve.
- Chain a small bridge to skip over the sleeve stitches entirely: 5–6 chains for younger sizes (1–3 years), 7–8 chains for older sizes (4–7 years).
- Continue into the back stitches, work all the way across the back, then chain the same small bridge again to skip the second sleeve, and continue onto the second front.
- Work 4 full rows straight (no increases) across this newly joined body.
This is also where you can add a slight double increase at each side “seam” (the point right at the underarm bridge) every 3–4 rows for the first several rows below the armhole — this keeps the body from flaring out into an unwanted bell shape as it grows. Once the body reaches the width you want, stop increasing and continue straight.
Part 3: The Lattice Body Pattern
This textured, diamond-like stitch is what gives the body its lovely open, breathable structure.
Setting up the pattern: work 1 dc, then skip 2 stitches and work 3 dc all into the next stitch. Continue this skip 2, shell of 3 dc repeat all the way across, ending the row with 1 dc into the final stitch.
Every row after: work 1 dc into the first stitch, then work your next shell of 3 dc directly into the gap created by the shell in the row below (not into the top of the stitches) — this is what stacks the diamonds evenly on top of each other as the fabric grows.
Continue this pattern for the desired body length. Shoulder-to-hem length varies quite a bit by preference and age — here are some general references:
| Age | Approx. Shoulder-to-Hem Length |
| 0–3 months | ~25 cm |
| 1 year | ~28–29 cm |
| Older sizes | ~31–34 cm, adjust to taste |
A cropped or a longer, tunic-length cardigan are both completely valid — this is entirely down to your preference.
Part 4: The Knit-Look Ribbing
This ribbing technique is used three times in this pattern: the bottom hem, the sleeve cuffs, and the front button bands. It’s worked in short rows using front-post and back-post stitches, alternating in a rhythm of 2 back-post, 1 front-post.
Every row: work 2 dc taken from the back post of the stitches below, then 1 dc taken from the front post of the next stitch. Repeat this 2-back, 1-front rhythm all the way across, then chain 2, turn, and repeat.
An important consistency note: whichever side (right side or wrong side of your fabric) you start this ribbing from, you need to start every other ribbed section of the garment — cuffs, hem, front bands — from that exact same side. If you mix it up, the ribs won’t visually align once everything’s sewn together, which is a very easy mistake to make and hard to fix after the fact.
Work 3–4 rows of this ribbing for the hem, matching the same row count on your front bands so everything reads as one continuous, even trim.
Part 5: The Front Bands and Buttonholes
Work the ribbing technique above along both front edges of the cardigan. On the side where your buttonholes go (traditionally the right side for girls, left for boys):
- Work your ribbing as normal until you reach a spot where you’d like a buttonhole.
- Instead of continuing the regular stitch pattern, work a small chain of 2 and skip the stitch you’d normally anchor into — this creates the buttonhole gap.
- Continue your ribbing pattern as normal past the gap.
- On your final row, when you reach that chain-2 gap, simply work 1 dc into the gap to close it into a clean, finished loop.
Space your buttonholes evenly along the band — 3 buttonholes suits a smaller size nicely; larger sizes can take 4–6 depending on the length of your cardigan.
Part 6: The Balloon Sleeves
Pick up your sleeve’s live stitches (plus your small underarm bridge chains) and work in rounds or rows from here.
- The fitted top: work about 4 rows directly at the underarm using the same front-post/back-post ribbing technique from Part 4 — this keeps the very top of the sleeve snug against the arm.
- The balloon shape: switch to a tighter version of the lattice pattern from Part 3 — instead of skipping 2 stitches before each shell of 3 dc, skip only 1. This denser repeat is what puffs the sleeve body outward into that rounded balloon shape. Continue for your desired sleeve length, matching roughly the same number of rows you worked for the body.
- The cuff: work one decrease round first, combining stitches in pairs (working 1 sc over 2 stitches at a time) to bring the wide balloon shape back down to a snug circumference. Then switch to the front-post/back-post ribbing technique for a few rows to finish the cuff neatly.
Repeat the entire sleeve for the second arm.
Part 7: The Pocket (Optional)
A small square worked flat and sewn onto the front of the cardigan.
- Chain a width to suit your size — 17 chains worked nicely for my smaller size; go larger for bigger sizes.
- Work the same lattice pattern from Part 3 for about 5 rows.
- Finish with a plain row of dc rather than single crochet along the final edge — a plain dc edge sews on far more neatly than an sc edge does.
- Sew the finished pocket onto the front panel wherever you’d like it.
Part 8: Daisy Embroidery
These little flowers scatter across the pocket, yoke, and body for a sweet finishing touch.
- Using your cream/white yarn threaded on a needle, form 5–6 small loop “petals” radiating outward from a central point using a simple loop or chain stitch, shaping each petal by hand into a rounded daisy silhouette.
- Switch to your yellow or orange yarn. Wrap it around your needle (or your fingertip) 5–6 times to form a small, tightly coiled bud, then secure that bud right in the center of your petals.
- Repeat as many times as you like across the pocket and the body.
Part 9: The Bow
A sweet, optional embellishment for the shoulder or collar.
The main bow body:
- Chain 25–30 (I used 25 for a 13cm finished bow — go longer for a bigger bow).
- Work in plain dc rows for about 19 rows, adjusting up or down to suit the size you’d like. This forms a simple rectangle.
- Fold the rectangle and join the two short ends together, leaving a small gap in the center. Single crochet along both long open edges to close them neatly, keeping that central gap open.
- Turn the piece right side out through the gap, then fold it flat with the seam centered on the back, pinching it into the classic bow-tie shape.
The center wrap band:
- Crochet a small rectangular strip in plain dc, about 8 rows, sized to wrap snugly around the center of your pinched bow.
- Wrap it around the bow’s center and sew the ends together at the back to secure everything and hide the seam.
- Optional: add a crocheted cord or chain tail hanging from the center band for extra decorative streamers.
Attach your finished bow to the shoulder — either sew it on permanently, or attach it to a button so it’s removable and interchangeable with future outfits.
Assembly
- Sew the underarm gap closed on each side, centering the seam directly under the arm.
- Attach your buttons on the opposite front band, lining each one up with its matching buttonhole.
- Sew or attach your bows and any additional embellishments.
- Weave in every remaining end.
And that’s the whole cardigan — a genuinely adaptable pattern once you’ve internalized the shaping rhythm. I love how much personality the daisies and the bow add to what’s otherwise a very classic raglan shape, and being able to resize it just by adjusting a chain count and a tape measure means this one pattern covers years of growth.