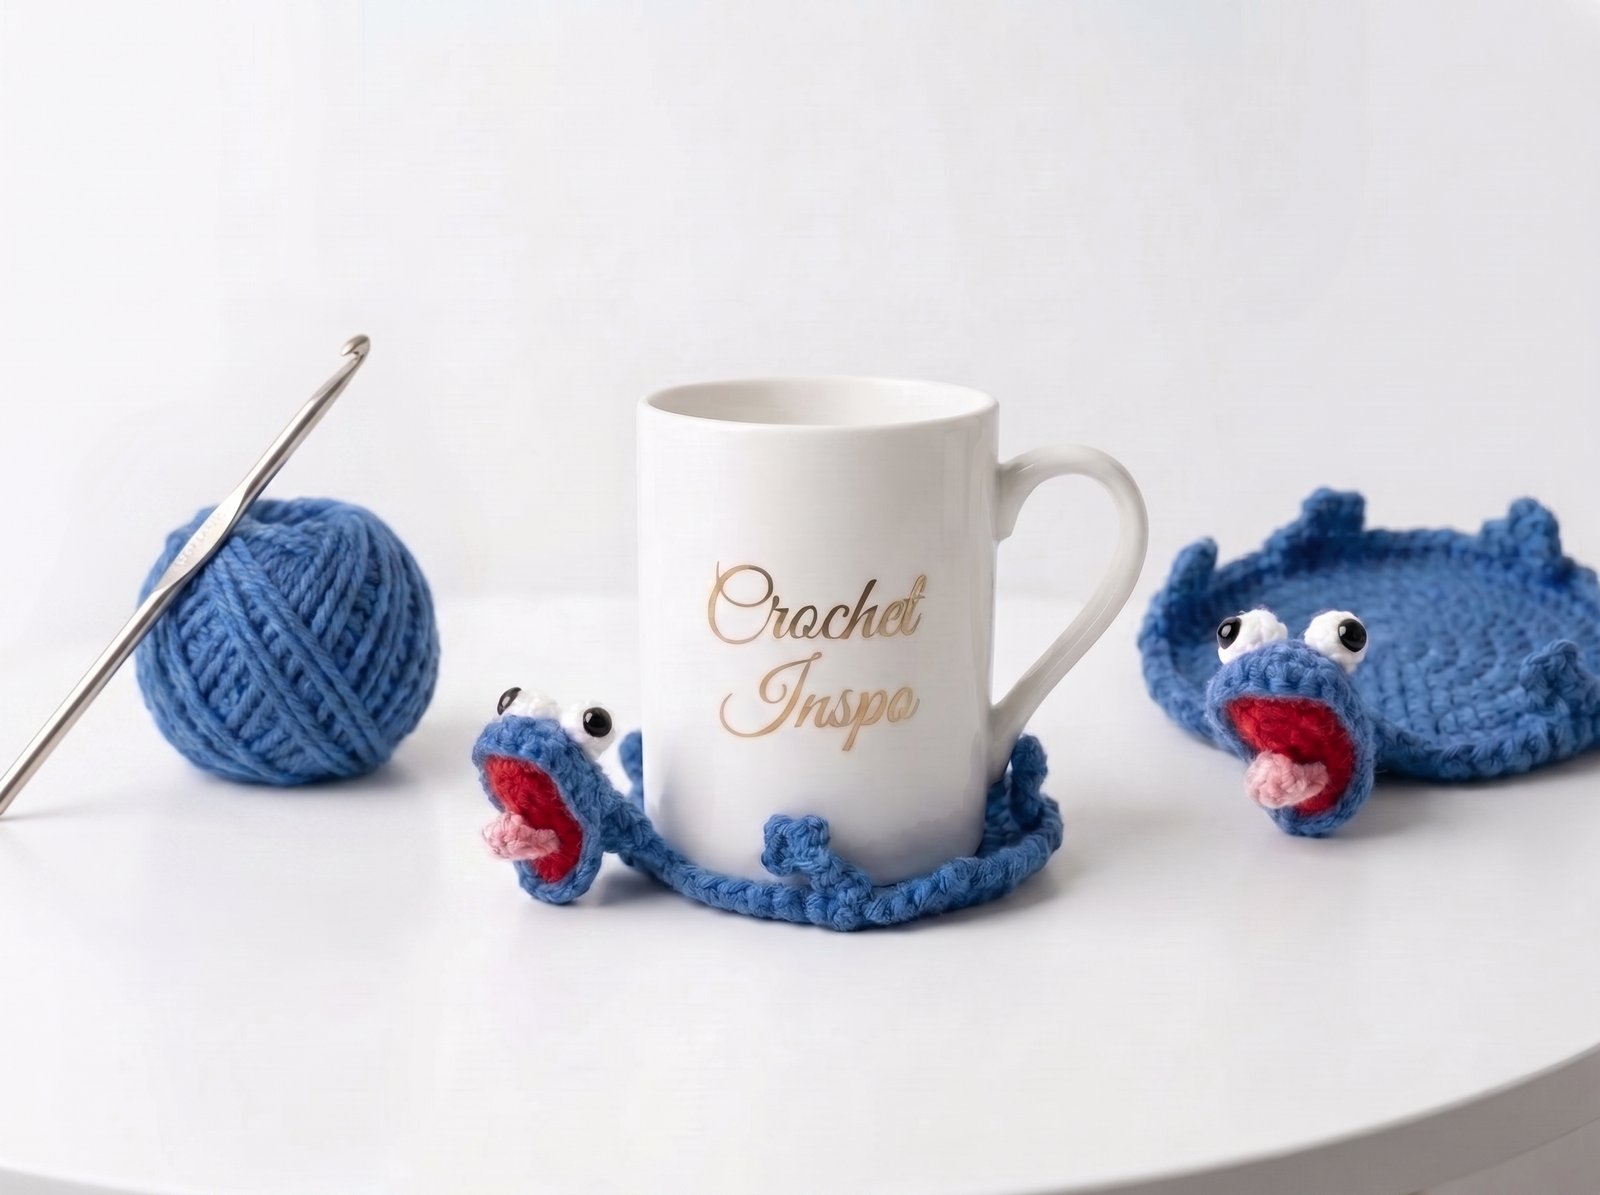
Crochet Lizard Mug Coaster — Free Pattern
A textured, bumpy-skinned lizard coaster that wraps around the base of a mug, with a big open mouth and googly eyes propped up off the table. This one’s a step up from a flat coaster — it combines bobble-stitch texture, a dimensional appliqué mouth, and enough flexibility in the base to actually curl around a mug rather than sit as a flat circle.
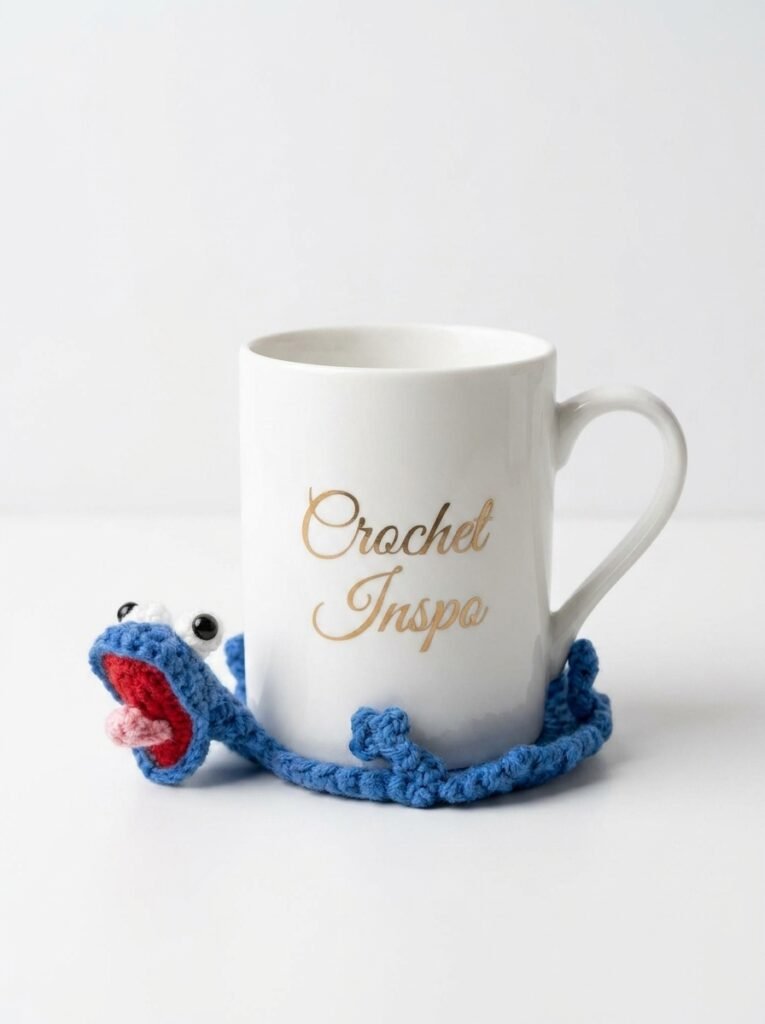
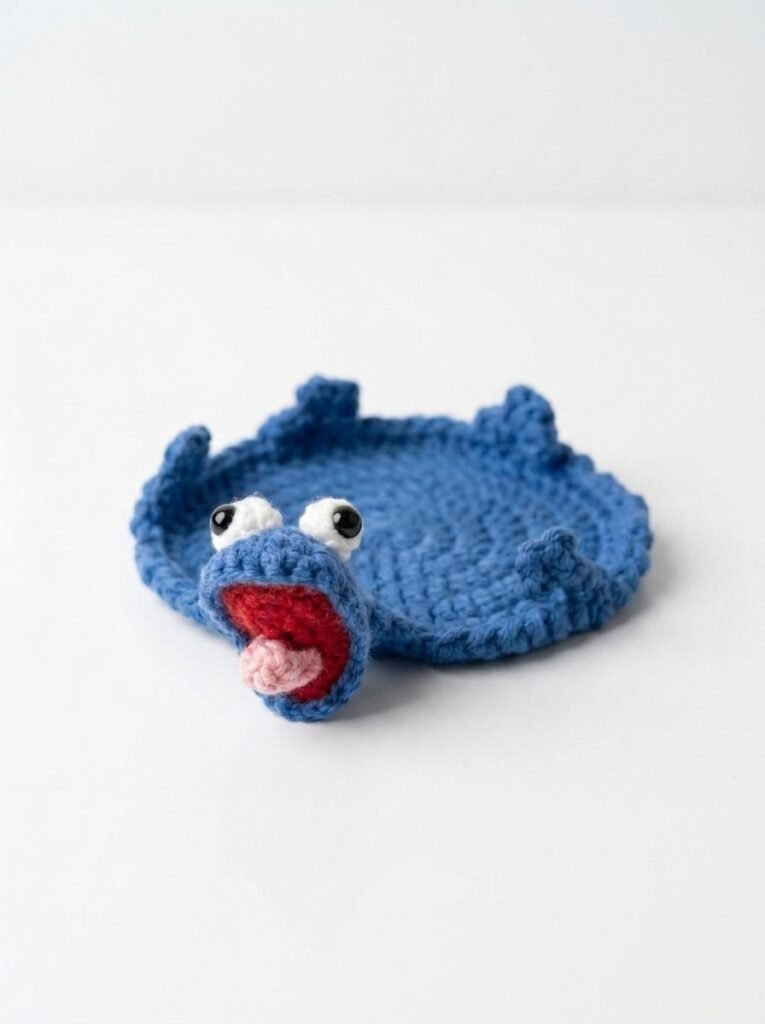
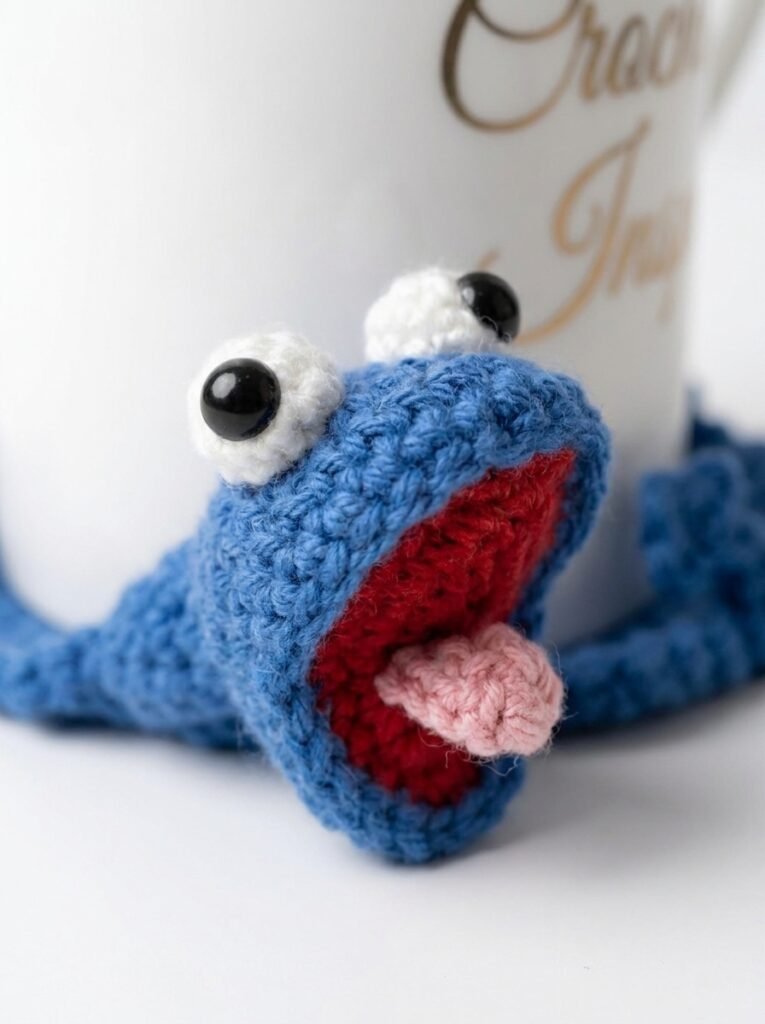
Crochet Lizard Mug Coaster
Bumpy bobble-stitch texture with an open mouth and tongue, sized to wrap right around your mug.
Time
2–3 hrs
Skill
Intermediate
Size
5×4 in
Hook
4mm
Materials
- Worsted weight yarn — green (main), small amounts red, pink, white, black
- 4mm (G) crochet hook
- Small amount of polyester fiberfill (mouth + head ridges only)
- Two 12mm safety eyes, or black/white yarn for embroidered eyes
- Yarn needle, stitch marker
Terms & abbreviations
| Abbrev | Term | Notes |
|---|---|---|
| sc | single crochet | — |
| inc | increase | 2 sc in same st |
| dec | invisible decrease | front loops only of next 2 sts |
| bobble | bobble stitch | creates the raised skin texture |
| MR | magic ring | — |
| rnd(s) | round(s) | continuous spiral |
Stitch count checkpoints
Common mistakes
| Mistake | Fix |
|---|---|
| Won’t curve around mug | Body was stuffed — leave it flat and flexible |
| Mouth looks pasted-on | Leave the top third of the mouth edge unsewn for an open look |
| Texture looks flat | Pull the bobble’s final loop through more snugly |
Quick glance
| Time | Skill | Finished size | Hook |
| 2–3 hrs | Intermediate (bobble stitch + appliqué assembly) | approx. 5 in long x 4 in wide | 4mm (G) |
Materials
- Worsted weight yarn: green (main color), small amounts of red, pink, white, black
- 4mm (G) crochet hook
- Small amount of polyester fiberfill (for the mouth and head ridges only — the body stays flat and flexible)
- Two 12mm safety eyes, or black + white yarn for embroidered eyes if this will be used by small children
- Yarn needle, stitch marker
Terms & abbreviations
| Abbrev | Term | Notes |
| ch | chain | — |
| sc | single crochet | — |
| inc | increase | 2 sc in same st |
| dec | invisible decrease | insert into front loops only of next 2 sts |
| bobble | bobble stitch | 5 dc worked partially, then pulled through together — creates the raised bump texture |
| MR | magic ring | — |
| st(s) | stitch(es) | — |
| rnd(s) | round(s) | worked in continuous spiral unless noted |
Gauge
Gauge isn’t critical for shape here since the piece is flat and flexible by design, but keep tension snug — a loose bobble stitch loses the raised texture that gives this coaster its “toad skin” look.
Part 1 — Body (oval base, bobble texture)
Worked flat in a continuous spiral, starting from an oval foundation and increasing only at the two rounded ends so the middle stays flat enough to sit under a mug.
Foundation: Ch 12.
| Rnd | Instruction | St count |
| 1 | 3 sc in 2nd ch from hook, sc in next 9 ch, 3 sc in last ch, sc in next 9 ch along other side of foundation chain, join | 24 |
| 2 | inc in each of next 3 sts (end cap), sc in next 9, inc in each of next 3 sts (end cap), sc in next 9 | 30 |
| 3 | sc around, working [bobble, sc 1] along the top surface only (skip bobbles on the 3 sts of each end cap, keep those plain sc) | 30 |
| 4–6 | repeat Rnd 3 pattern — sc around with bobbles spaced every other stitch on the top surface, plain sc underneath | 30 |
| 7 | sc around, no more increases — this row flattens the edge before the mouth is attached | 30 |
Fasten off, leaving a long tail for assembly. Do not stuff the body — it needs to stay flexible to wrap the mug base.
Stitch count checkpoints
| Round | Total sc |
| 1 | 24 |
| 2 | 30 |
| 3–7 | 30 (even, texture only, no further shaping) |
Part 2 — Mouth (worked separately, sewn on)
Outer mouth (red):
| Rnd | Instruction | St count |
| 1 | 6 sc in MR | 6 |
| 2 | inc around | 12 |
| 3 | [sc 1, inc] x6 | 18 |
| 4 | [sc 2, inc] x6 | 24 |
Fasten off. Flatten slightly and set aside — this becomes the open red mouth shape.
Tongue (pink, small):
| Rnd | Instruction | St count |
| 1 | 6 sc in MR | 6 |
| 2 | inc around | 12 |
| 3–4 | sc around | 12 |
Fasten off, stuff very lightly for a slight 3D puff, then sew flat-side-down onto the lower half of the red mouth piece.
Part 3 — Eye ridges (make 2 small triangle points)
These sit at the back of the head like brow ridges (visible in the reference photo as two pointed bumps).
| Row | Instruction |
| 1 | ch 4, sc in 2nd ch from hook and next 2 ch, turn (3 sc) |
| 2 | sc, dec, turn (2 sc) |
| 3 | dec, fasten off (1 sc — point of the triangle) |
Make 2. Leave tails for sewing.
Assembly
- Position the red mouth piece (with tongue already attached) at the rounded front end of the body — it should overlap slightly so the edge of the mouth sits inside the front curve of the head.
- Sew around the outer edge of the mouth piece, leaving the top edge open enough that it reads as “open mouth” rather than a flat sewn-on circle — a slight gap between mouth and head edge at the top is what creates the open-mouth look in the reference photo.
- Attach safety eyes (or embroider) above and slightly behind the mouth, angled outward.
- Sew the two triangle points to the back/top of the head, just behind the eyes.
- Weave in all remaining ends.
Common mistakes
| Mistake | Fix |
| Coaster won’t curve around the mug | Body was stuffed — leave it unstuffed; the bobble texture alone gives it enough structure |
| Mouth looks flat/pasted-on instead of open | Not enough gap left at the top edge when sewing the mouth on — leave the top third unsewn |
| Bobble texture looks flat, not bumpy | Tension too loose on the bobble stitch — pull the final loop through snugly before moving to the next stitch |
Finishing
Fit the coaster around a mug base before final steam-blocking — light steam (iron on low, held above the fabric, no direct contact) will help it hold a slight curve once it’s been wrapped around the mug shape a few times.
Write a review
 no image