Easy Crochet Ghost Granny Square Pattern – Beginner-Friendly Crochet
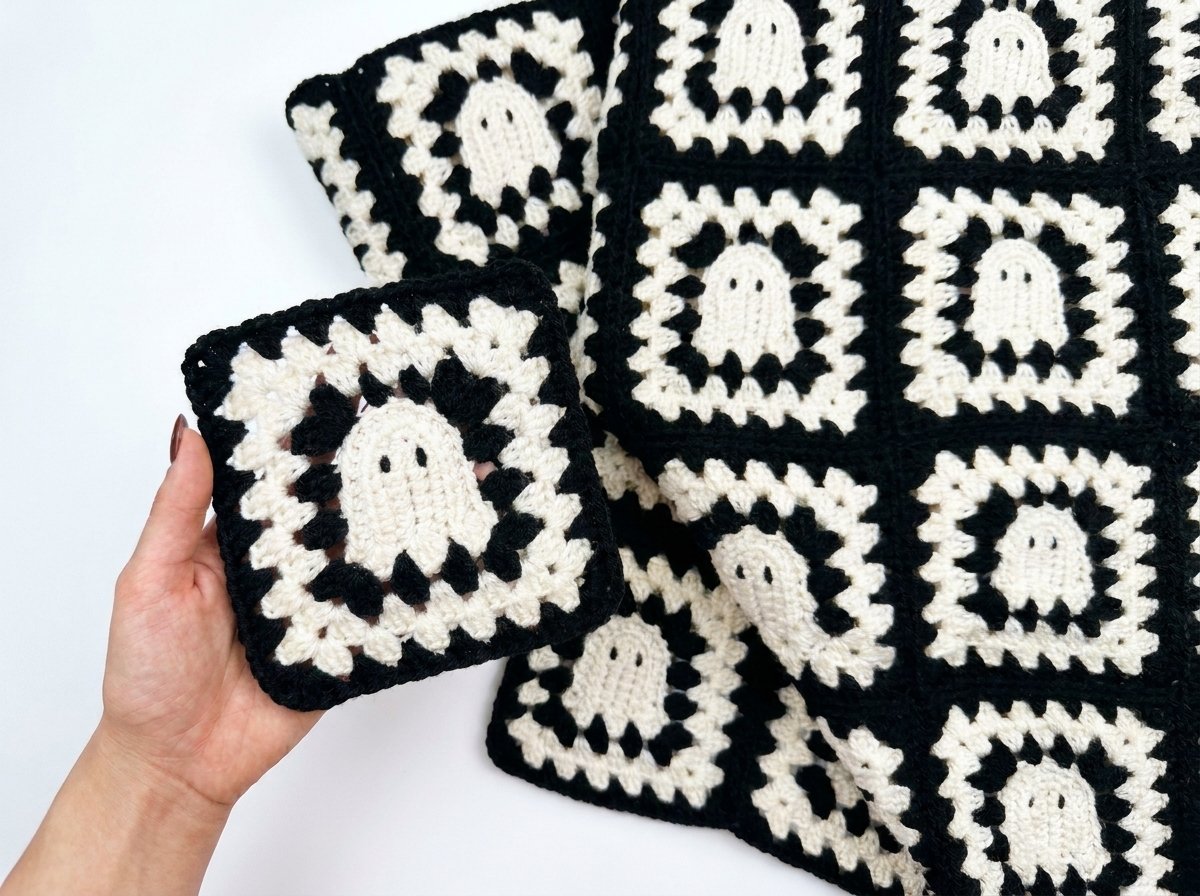
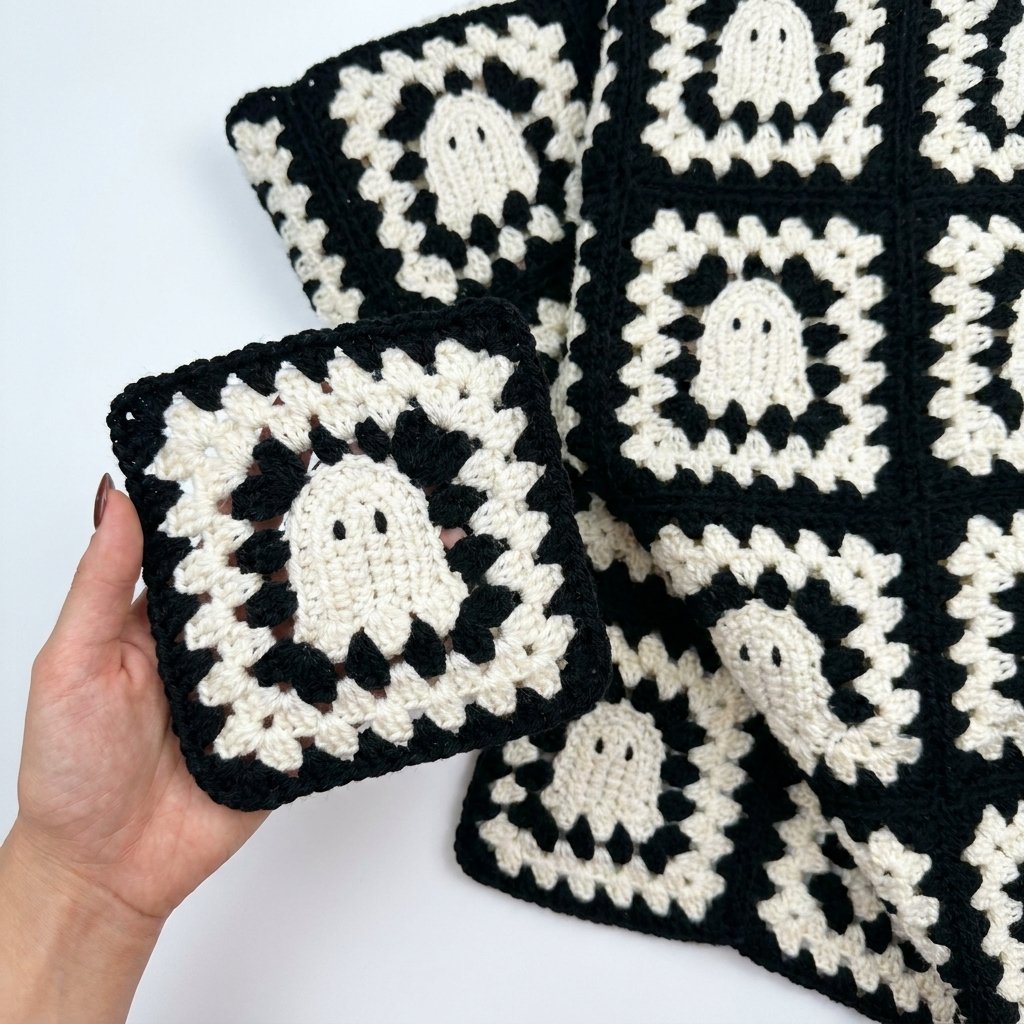
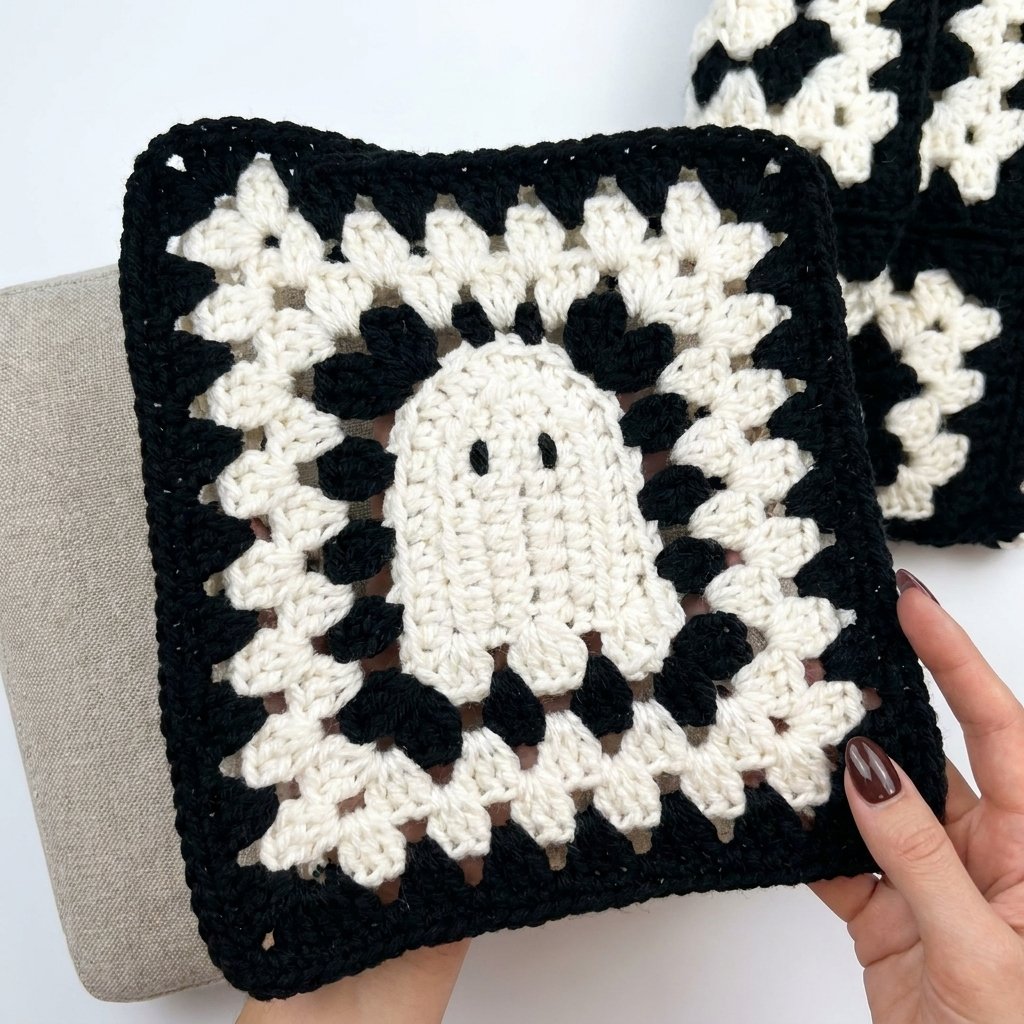
I love a project that lets me combine two things I already adore separately: the endless satisfaction of a granny square, and a sweet little seasonal motif tucked right into the middle of it. This ghost square started as a one-off block and quickly became one of my favorites — I’ve used it to build an entire throw blanket, but it works just as well as a single coaster, a pillow front, or mixed in with plain granny squares in any blanket you’re already planning.
This isn’t a total beginner project — you’ll want to already be comfortable with basic granny square construction and a few taller stitches — but if you’ve made a granny square or two before, you have everything you need to make this one your own centerpiece.
Materials
| Item | Notes |
| Worsted weight (US #4) yarn, cream or white | This becomes the ghost and the main body of the granny rounds |
| Worsted weight yarn, a darker contrast color | Traditionally black, though pink or any color you love works just as well — this outlines the ghost and finishes the border |
| 4.5mm crochet hook | |
| Tapestry needle | For the ghost’s little embroidered eyes and weaving in ends |
| Scissors |
Abbreviations (US Terms)
| Abbreviation | Meaning |
| ch | chain |
| sl st | slip stitch |
| sc | single crochet |
| hdc | half double crochet |
| dc | double crochet |
| tr | triple/treble crochet |
| BLO | back loop only |
| st(s) | stitch(es) |
| sp(s) | space(s) |
| rnd | round |
How This Square Comes Together
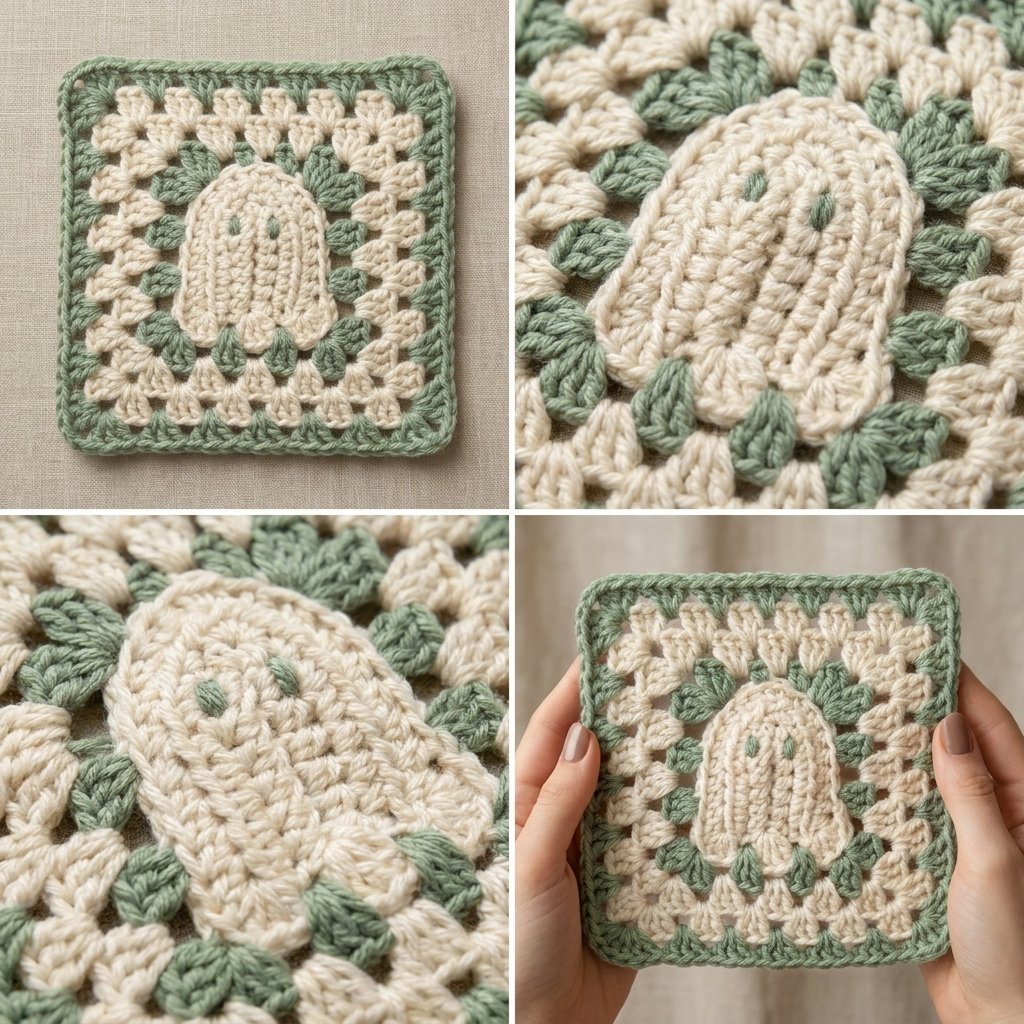
- Crochet the ghost shape first, worked flat in your cream yarn — this becomes the centerpiece the whole square builds around.
- Work Round 1 of the granny section directly into the back loops of the ghost’s outer edge, in your contrast color, to outline it cleanly.
- Build up two more standard granny rounds in cream.
- Finish with one more contrast-color round.
- Embroider two simple eyes onto the ghost and weave in your ends.
Part 1: The Ghost Motif
This little shape is worked flat, back and forth, starting from a small foundation chain and gradually curving into a rounded dome with three wavy points along the bottom — no counting rounds here, just following the shape as it grows.
Starting the base:
- Chain 8.
- Starting in the 2nd chain from the hook, work 7 hdc across.
- Work 3 hdc into that very last chain (this little cluster is what keeps your work flat instead of curling as it grows).
- Turn and work back up the other side of your foundation chain with 1 hdc into each of the remaining loops (7 hdc), all the way to your starting point.
You should now have a small, flat oval outline — don’t worry if it wants to curl; a gentle stretch flattens it right back out, and it’ll behave more as you keep adding rows.
Building the rounded head (2 more full wraps):
| Row | Instructions |
| 2 | Ch 1, turn. Work 1 hdc into each stitch all the way around, skipping the turning chain itself. When you reach the very top-center stitch, work 3 hdc into it (this is your increase point, and it’s what keeps the dome rounded rather than pointed). Continue 1 hdc per stitch the rest of the way around. |
| 3 | Repeat Row 2 exactly: ch 1, turn, 1 hdc in each stitch, 3 hdc in the top-center stitch, then 1 hdc in each remaining stitch. |
After these two rows, you’ll have a nicely rounded little ghost head, and eyes will eventually go right at that top-center point.
The wavy bottom (3 points):
Flip to work along the flat, unworked bottom edge of your very first row — this is where the classic scalloped ghost-tail shape happens.
- Without chaining, work 4 dc all into the same stitch (skip roughly one stitch in from the edge to start).
- Slip stitch into a stitch a little further along, roughly centered.
- Work another 4 dc cluster into that same slip-stitched spot.
- Slip stitch again, evenly spaced toward the other end.
- Work your last 4 dc cluster into that spot.
- Slip stitch into the final edge stitch to finish.
You’re aiming for even spacing rather than an exact stitch count here — a little bit of eyeballing is totally normal and won’t show in the finished piece. Chain 1, cut your yarn, and pull it through to fasten off. Your ghost is complete — set it aside as the centerpiece for the granny rounds.
Part 2: Round 1 — Outlining the Ghost (Contrast Color)
This round is worked entirely into the back loops only of the ghost’s outer edge stitches, which is what gives the finished ghost such a clean, crisp outline instead of a blurry one.
- Attach your contrast yarn in the back loop of the stitch immediately to the right of the ghost’s top-center point. Chain 1 (this counts as your first sc), then work 1 more sc (BLO) into that same stitch.
- Skip the top-center stitch itself, and work 2 sc (BLO) into the next stitch to the left.
- First scalloped corner: skip the next stitch, then into the following stitch (BLO): 2 dc + 1 tr all in the same space, chain 2, then 1 tr + 2 dc back into that same space.
- Skip 2 sts, 3 dc (BLO) into the 3rd stitch.
- Skip 2 sts, 3 dc (BLO) into the 3rd stitch.
- Second scalloped corner (mirroring step 3, on the other side of the ghost’s head): skip a stitch, then 2 dc + 1 tr, ch 2, 1 tr + 2 dc, all in the same space (BLO).
- Working along the bottom edge now: 3 dc (BLO) into the gap between your first two bottom bump-clusters, then 3 dc (BLO) into the gap between the next two.
- Third corner (a standard corner this time): skip a stitch, 3 dc (BLO), chain 2, 3 dc (BLO), all in the same space.
- Skip 2, 3 dc (BLO); skip 2, 3 dc (BLO) — mirroring steps 4–5 along the opposite side.
- Fourth corner (standard, matching the third): 3 dc (BLO), chain 2, 3 dc (BLO).
- Slip stitch into your very first stitch to close the round. Chain 1, cut your yarn.
The two scalloped corners near the ghost’s head use that taller triple-crochet point on purpose — it echoes the curve of the dome and gives the whole outline a nice little peak on each side, while the two corners near the ghost’s tail stay as ordinary granny corners.
Part 3: Rounds 2–4 — The Granny Square Border
From here on out, this becomes a completely standard granny square, built outward round by round.
| Round | Color | Instructions |
| 2 | Cream | Attach in any corner ch-2 space. Ch 3 (counts as first dc) + 2 dc into that space, ch 2, 3 dc into the same space (completing the corner). Work 3 dc into each remaining corner space the same way. Along each side, work one 3 dc cluster between each set of clusters from Round 1 — including one worked into the gap at the very top, between your two starting sc clusters, where there isn’t an obvious space to count into (just eyeball the middle point). Close with a slip stitch into the top of your starting chain. |
| 3 | Cream | Same pattern as Round 2, but you’ll now have 4 clusters along each side between the corners instead of 3. |
| 4 (final) | Contrast | Same pattern again, this time with 5 clusters along each side between the corners. |
Close each round with a slip stitch into the top of your starting chain-3, and fasten off after the final round.
Part 4: Adding the Face
The finishing touch is two simple embroidered eyes.
- Thread your tapestry needle with your contrast yarn.
- Position your eyes at the top of the ghost’s head, on either side of that original top-center point — about a stitch’s height down from the very top looks best.
- Insert your needle up through the back of the work, make a small stitch, and go back down right next to where you came up. Repeat once more in the same spot for a slightly more defined dot.
- Move to the opposite side and repeat for the second eye.
- Secure your yarn on the back and weave in every remaining tail.
Making It Your Own
- Swap the colors for the season or occasion — this same construction works beautifully in orange and black for a pumpkin-adjacent set, or in any two colors that just make you happy.
- Mix it into a blanket of plain granny squares for one delightful surprise block, or make a whole stack of them for a fully spooky throw.
- Adjust the scale by starting with a longer or shorter foundation chain for the ghost — just keep the same shaping logic (increase clusters at the corners and top-center point) and it’ll scale right along with you.