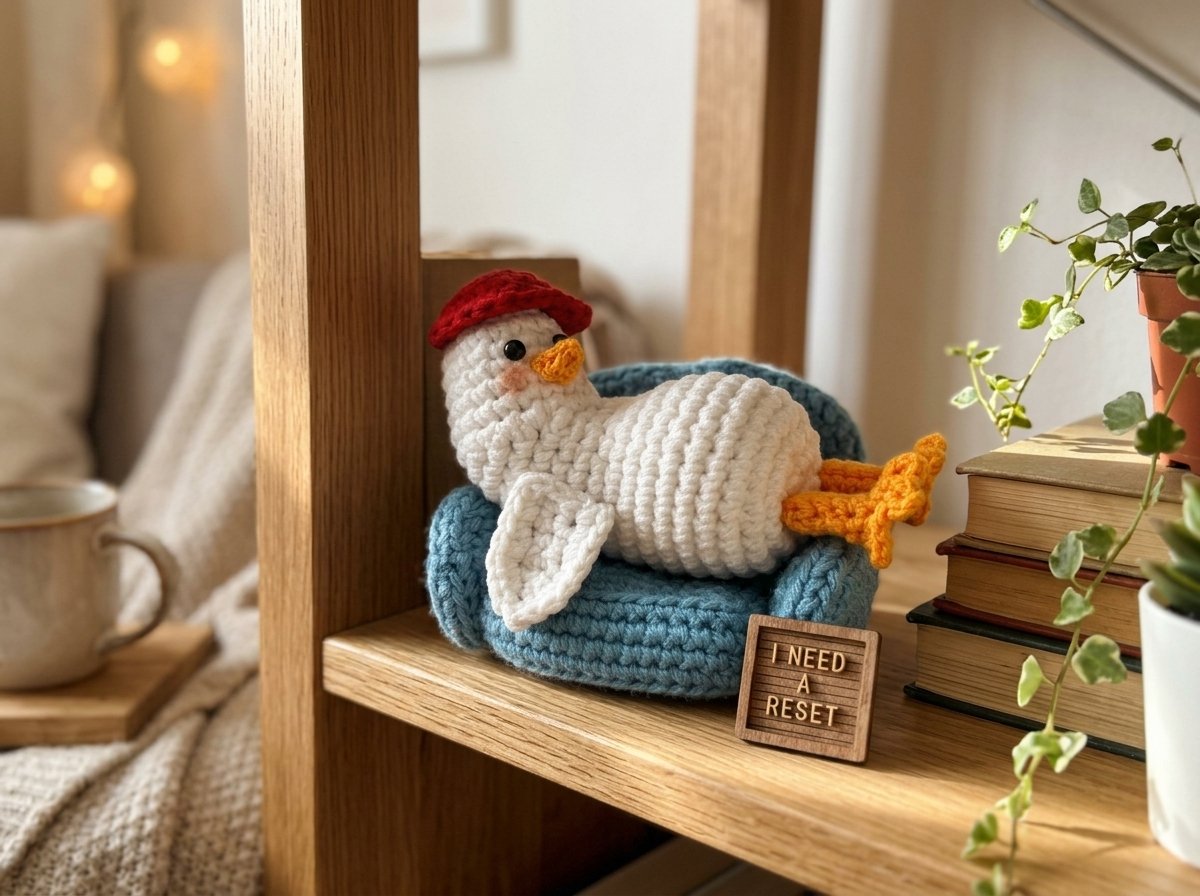
How to Crochet a Duck “I Need a Reset” – Cute Easy Duck Amigurumi Pattern
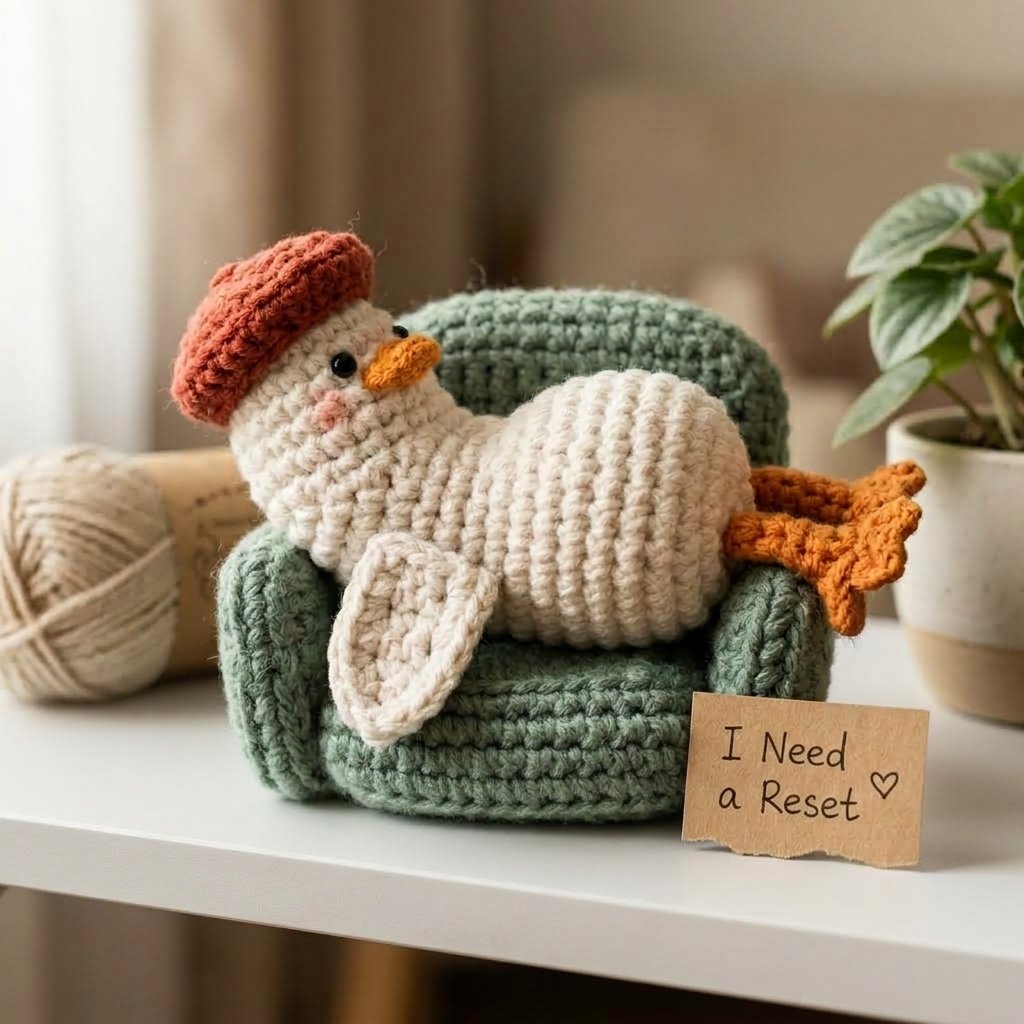
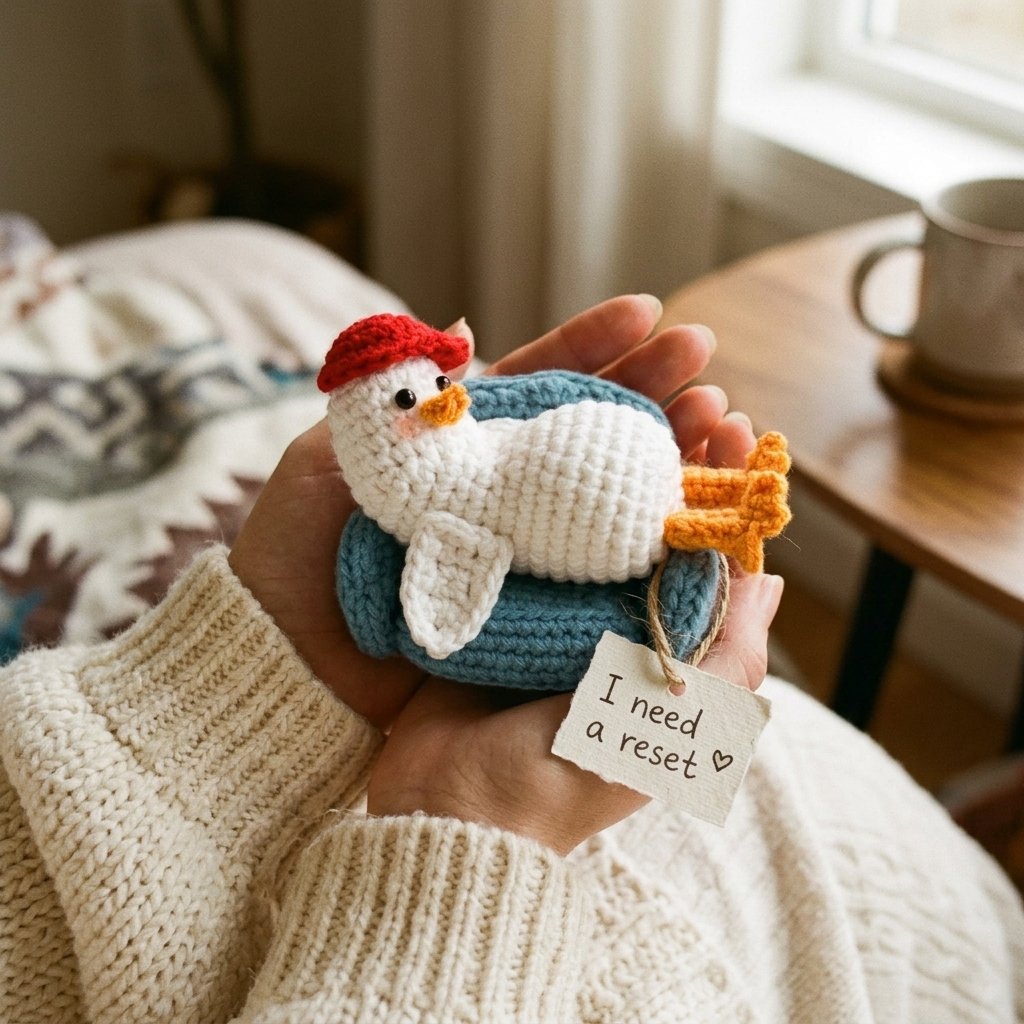
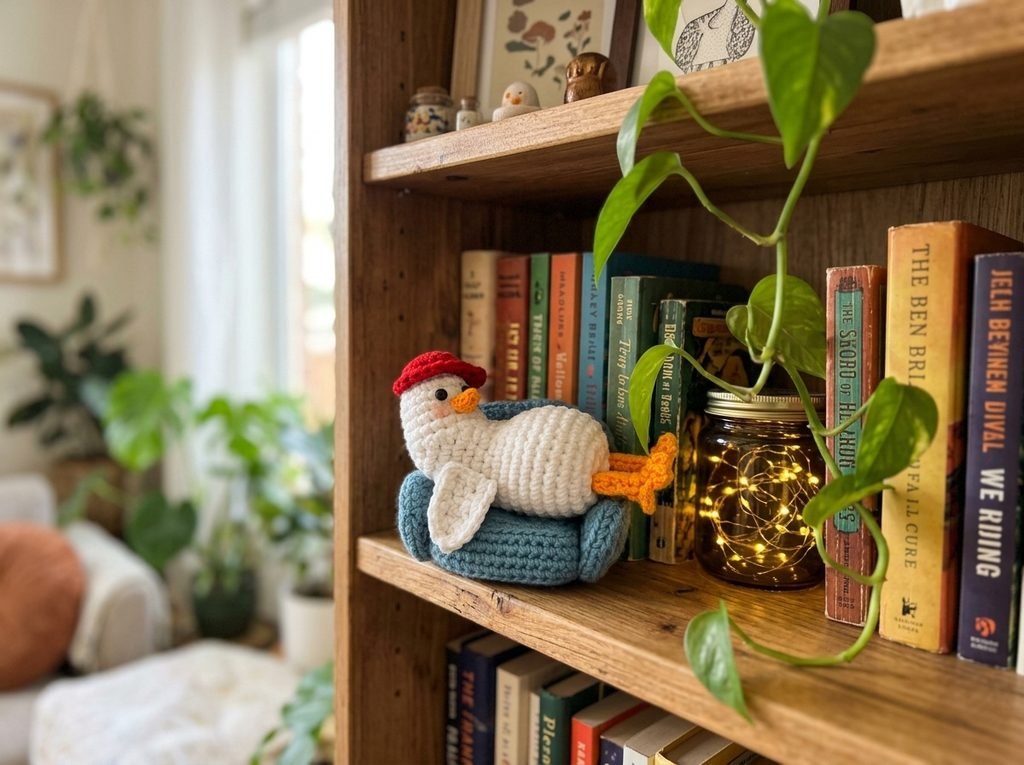
Some days call for a tiny duck in a tiny hat, sitting on a tiny sofa, doing absolutely nothing. That’s the whole vibe of this project, and I love it for exactly that reason. It’s a full amigurumi build — a shaped body, two slightly different little wings, a beak, feet with legs, a jaunty hat, and even a mini sofa for him to relax on — but every single piece is built from stitches you already know: single crochet, half double, double, a couple of increases and decreases, and one clever short-row shaping trick on the body.
This is a long one, so I’ve broken it into clear sections: the body, the wings, the beak, the feet and legs, the hat, the sofa (in three pieces), and finally how it all comes together.
Materials
| Item | Notes |
| 4-ply yarn, white | For the body and both wings |
| 4-ply yarn, orange (a finer weight than your main yarn works especially well) | For the beak and feet |
| 4-ply yarn, red | For the hat |
| 4-ply yarn, blue | For the sofa |
| 2mm crochet hook | |
| Pair of safety eyes | Size is up to you and the look you’re going for |
| Tapestry needle | |
| Fiberfill stuffing | |
| Craft glue | For assembling the sofa and attaching the hat, eyes, and beak |
| Stitch markers | Genuinely essential for the body’s shaping section below |
| A little blush (optional) | For rosy cheeks |
Abbreviations (US Terms)
| Abbreviation | Meaning |
| MR | magic ring |
| ch | chain |
| sl st | slip stitch |
| sc | single crochet |
| hdc | half double crochet |
| dc | double crochet |
| tr | treble/triple crochet |
| inc | increase |
| dec | decrease |
| FLO / BLO | front loop only / back loop only |
| st(s) | stitch(es) |
Part 1: The Body
The body works up as a fairly standard sphere at first, but partway through there’s a short-row shaping section that builds a small raised, curved area on the front of the body by working repeated partial rows directly on top of an earlier round — fastening off and rejoining the yarn a stitch or two further back each time. It’s one of the trickier bits in this whole pattern, so go slowly, use a stitch marker to track your place, and don’t worry if it takes a re-read or two to click.
| Round | Instructions | Stitch Count |
| 1 | 6 sc in a magic ring | 6 |
| 2 | 6 inc around | 12 |
| 3 | (1 sc, inc) ×6 | 18 |
| 4–8 | 18 sc around (5 rounds) | 18 |
The short-row shaping (worked on top of Round 8):
- Work 3 sc, then fasten off.
- Count back to the 16th stitch of Round 8 and rejoin your yarn there. Chain 1 into the back loop of the 15th stitch (this little trick keeps the transition smooth), then 1 sc into the 16th stitch, then 2 more sc — 6 stitches total in this pass. Fasten off.
- Work 4 sc across the top of what you just made, then fasten off again. Rejoin at the 15th stitch of Round 8 and work 4 more sc — 8 stitches total this pass.
- Rejoin and work: 1 sc, 1 inc, 3 sc, fasten off. Rejoin at the 14th stitch of Round 8 and work: 3 sc, 1 inc, 1 sc — 12 stitches total this pass.
- Work 7 sc, fasten off. Rejoin at the 13th stitch of Round 8 and work 7 more sc — 14 stitches this pass.
- Work 1 sc, 1 dec, 5 sc, fasten off. Rejoin at the 12th stitch of Round 8 and work 5 sc, 1 dec, 1 sc — 14 stitches this pass.
Once this section is complete, you’re ready to continue working full rounds again — the stitch count folds back in with the rest of Round 8’s stitches to bring you back to a complete round.
| Round | Instructions | Stitch Count |
| 9–10 | 18 sc around (2 rounds) | 18 |
| 11 | 7 sc, inc, 2 sc, inc, 7 sc | 20 |
| 12 | 6 sc, (2 inc, 1 sc) ×3, 5 sc | 26 |
| 13 | 10 sc, inc, 4 sc, inc, 10 sc | 28 |
| 14–18 | 28 sc around (5 rounds) | 28 |
| 19 | (5 sc, dec) ×4 | 24 |
| 20 | (1 sc, dec) ×8 — pause and stuff the body firmly here | 16 |
| 21 | 8 dec around | 8 |
Fasten off, leaving a long tail. Thread it through the front loop only of each of the remaining 8 stitches, pull tight to close the opening, and weave the end inside the body.
Part 2: The Left Wing
This little wing is worked flat in one single row, using graduated stitch heights to create a naturally curved, fan-like shape.
- Chain 7.
- Starting in the 2nd chain from your hook: 1 sc, 1 hdc, 1 dc, and 3 tr across the remaining chains.
Cut your yarn, leaving a long tail for sewing on later.
Part 3: The Right Wing
This one’s a small bordered rectangle, giving you a slightly different paddle-shaped wing for a bit of charming asymmetry.
| Row | Instructions | Stitch Count |
| 1 | Ch 2, sc + inc in the 2nd chain from the hook | 2 |
| 2 | Ch 1, turn. 1 sc, 1 inc | 3 |
| 3–6 | Ch 1, turn. 3 sc across (4 rows total) | 3 |
To finish, work single crochet evenly along both side edges of this little rectangle, placing 3 sc into each corner to round it out nicely. Cut your yarn, leaving a long tail for sewing.
Part 4: The Beak
A tiny, simple shape in orange (or a finer yarn than your body color, if you have one on hand).
- Chain 3.
- Starting in the 2nd chain from your hook, work 2 sc across.
Cut your yarn, leaving a long tail for sewing.
Part 5: Feet and Legs (Make 2)
The foot:
| Round | Instructions | Stitch Count |
| 1 | 6 sc in a magic ring | 6 |
| 2 | 6 inc around | 12 |
| 3 (the toes) | Ch 2, 1 dc, ch 2, 1 sl st — then repeat this whole sequence once more, spaced around the foot | — |
The leg, worked upward from the foot:
| Round | Instructions | Stitch Count |
| 1 | Working in the front loop only of the foot’s Round 1, 6 sc around | 6 |
| 2–3 | (2 hdc, 4 sc) around (2 rounds) | 6 |
| 4 | 6 sc around | 6 |
Cut your yarn, leaving a long tail for sewing. Repeat this entire foot-and-leg piece to make a second one.
Part 6: The Hat
Worked in red yarn, nice and simple.
| Round | Instructions | Stitch Count |
| 1 | 6 sc in a magic ring | 6 |
| 2 | 6 inc around | 12 |
| 3 | (1 sc, inc) ×6 | 18 |
| 4 | 18 sc around | 18 |
| 5 (the brim) | Working in the front loop only: ch 2, 2 dc, ch 2, 1 sl st, repeated around for a scalloped edge | — |
Fasten off — your hat is complete.
Part 7: The Sofa Cushion (Seat)
The sofa is a really fun bonus addition, and it’s built the same way as the armrests and backrest below: starting from a flat oval foundation worked in a continuous spiral around both sides of a starting chain.
| Round | Instructions | Stitch Count |
| Foundation | Ch 10, then work in a continuous spiral around both sides of the chain: starting in the 2nd ch from the hook, 8 sc, 3 sc in the next st, 7 sc, 1 inc | 20 |
| 2 | inc, 7 sc, inc, 1 sc, 1 sc, 7 sc, inc, 1 sc | 24 |
| 3 | 2 inc, 7 sc, 2 inc, 1 sc, 2 inc, 7 sc, 2 inc, 1 sc | 32 |
| 4 | 1 sc, 2 inc, 9 sc, 2 inc, 3 sc, 2 inc, 9 sc, 2 inc, 2 sc | 40 |
| 5 | BLO, 40 sc around | 40 |
| 6–8 | 40 sc around (3 rounds) | 40 |
| 9 | BLO, 1 sc, 2 dec, 9 sc, 2 dec, 3 sc, 2 dec, 9 sc, 2 dec, 2 sc | 32 |
| 10 | 2 dec, 7 sc, 2 dec, 1 sc, 2 dec, 7 sc, 2 dec, 1 sc | 24 |
| 11 | 1 dec, 7 sc, 1 dec, 1 sc, 1 dec, 7 sc, 1 dec, 1 sc | 20 |
Stuff firmly, fold the piece flat in half, and sew it closed.
Part 8: The Sofa Armrests (Make 2)
| Round | Instructions | Stitch Count |
| Foundation | Ch 5, continuous spiral around both sides: starting in the 2nd ch from the hook, 3 sc, 3 sc in the next st, 2 sc, 1 inc | 10 |
| 2 | inc, 2 sc, inc, 1 sc, inc, 2 sc, inc, 1 sc | 14 |
| 3 | 2 inc, 2 sc, 2 inc, 1 sc, 2 inc, 2 sc, 2 inc, 1 sc | 22 |
| 4 | 1 sc, 2 inc, 4 sc, 2 inc, 3 sc, 2 inc, 4 sc, 2 inc, 2 sc | 30 |
| 5 | BLO, 30 sc around | 30 |
| 6 | BLO, 1 sc, 2 dec, 4 sc, 2 dec, 3 sc, 2 dec, 4 sc, 2 dec, 2 sc | 22 |
| 7 | 2 dec, 2 sc, 2 dec, 1 sc, 2 dec, 2 sc, 2 dec, 1 sc | 14 |
| 8 | 1 dec, 2 sc, 1 dec, 1 sc, 1 dec, 2 sc, 1 dec, 1 sc | 10 |
Stuff, fold in half, and sew closed. Repeat for a second armrest.
Part 9: The Sofa Backrest
The largest of the three sofa pieces, and the only one with a little decorative stitch detail along the top edge.
| Round | Instructions | Stitch Count |
| Foundation | Ch 6, continuous spiral around both sides: starting in the 2nd ch from the hook, 4 sc, 3 sc in the next st, 3 sc, 1 inc | 12 |
| 2 | inc, 3 sc, inc, 1 sc, inc, 3 sc, inc, 1 sc | 16 |
| 3 | 2 inc, 3 sc, 2 inc, 1 sc, 2 inc, 3 sc, 2 inc, 1 sc | 24 |
| 4 | 1 sc, 2 inc, 5 sc, 2 inc, 3 sc, 2 inc, 5 sc, 2 inc, 2 sc | 32 |
| 5 | 2 sc, 2 inc, 7 sc, 2 inc, 5 sc, 2 inc, 7 sc, 2 inc, 3 sc | 40 |
| 6 | 3 sc, 2 inc, 9 sc, 2 inc, 7 sc, 2 inc, 9 sc, 2 inc, 4 sc | 48 |
| 7 | 4 sc, 2 inc, 11 sc, 2 inc, 9 sc, 2 sc, 2 hdc, 3 dc, 2 hdc, 2 sc, 2 inc, 5 sc | 56 |
| 8 | BLO, 56 sc around | 56 |
| 9 | 56 sc around | 56 |
| 10 | BLO, 4 sc, 2 dec, 11 sc, 2 dec, 9 sc, 2 dec, 2 sc, 2 hdc, 3 dc, 2 hdc, 2 sc, 2 dec, 5 sc | 48 |
| 11 | 3 sc, 2 dec, 9 sc, 2 dec, 7 sc, 2 dec, 9 sc, 2 dec, 4 sc | 40 |
| 12 | 2 sc, 2 dec, 7 sc, 2 dec, 5 sc, 2 dec, 7 sc, 2 dec, 3 sc | 32 |
| 13 | 1 sc, 2 dec, 5 sc, 2 dec, 3 sc, 2 dec, 5 sc, 2 dec, 2 sc | 24 |
| 14 | 2 dec, 3 sc, 2 dec, 1 sc, 2 dec, 3 sc, 2 dec, 1 sc | 16 |
| 15 | 1 dec, 3 sc, 1 dec, 1 sc, 1 dec, 3 sc, 1 dec, 1 sc | 12 |
Stuff, fold in half, and sew closed.
Part 10: Assembling the Sofa
- Glue the sofa cushion to the front of the backrest.
- Glue the two armrests to either side of the joined cushion and backrest.
Part 11: Assembling the Duck
- Glue the hat onto the duck’s head.
- Attach the safety eyes about 2 rows below the hat, spacing them 2 stitches apart.
- Glue the beak directly below the eyes, centered between them.
- Sew the right wing onto the body pointing downward, for that relaxed, off-duty look.
- Sew the left wing on symmetrically, on the opposite side of the body.
- Sew both feet onto the bottom of the body.
- Add a little blush to the cheeks if you’d like some extra cuteness.
- Settle your finished duck onto the sofa, and let him have his well-earned reset.
That’s the whole build — genuinely one of the more involved projects I’ve put together, but there’s something so satisfying about a tiny duck who has done nothing all day but sit on his tiny sofa. I hope yours turns out just as relaxed as mine.