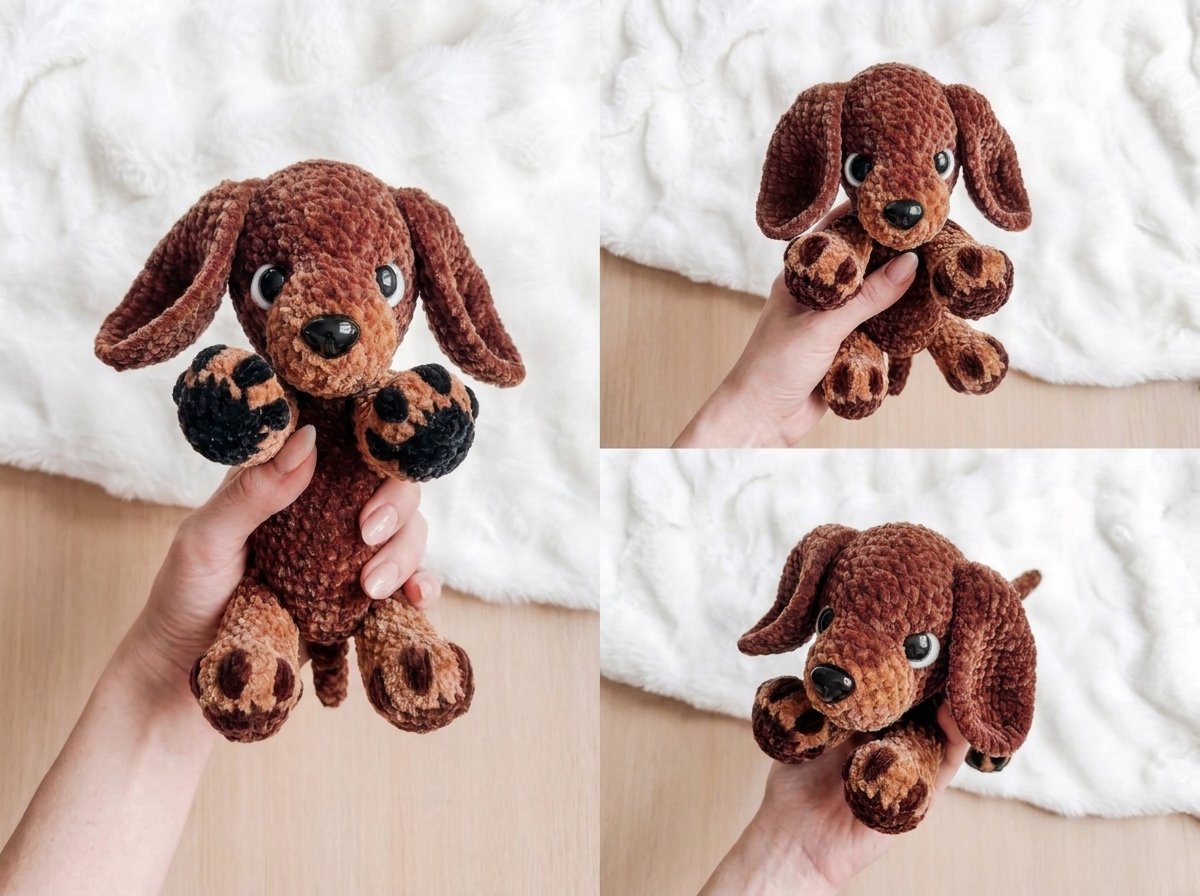
Low-Sew Crochet Wiener Dog Pattern – Easy Dachshund Amigurumi Crochet Pattern
There’s a special kind of joy in watching a pile of separate little crochet pieces turn into a floppy-eared dachshund with more personality than seems reasonable for a stuffed toy. This is genuinely one of my favorite patterns to make — the plush chenille yarn does so much of the work in terms of that soft, huggable look, and the two-tone coloring is what really sells the “real dog” effect without needing a single bit of painting or fussy detail work.
I built this pattern to be as low-sew as I could manage. The legs attach directly into the body as you crochet, the ears get worked right into the head, and the only true sewing you’ll do is closing a couple of small gaps, tacking on the tail, and attaching the head at the very end. If you’ve made a few amigurumi before and are comfortable with magic rings, increases, and decreases, you’re ready for this one.
Let’s get into it.
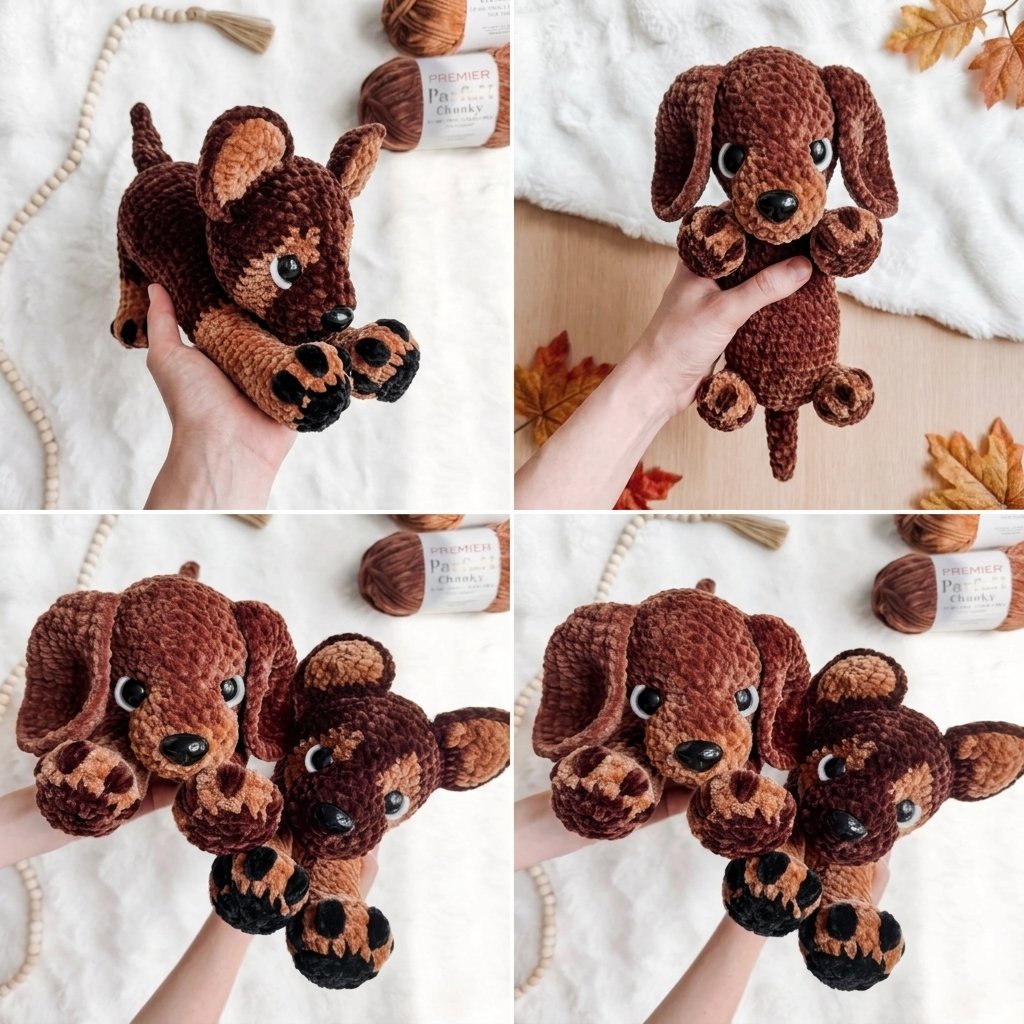
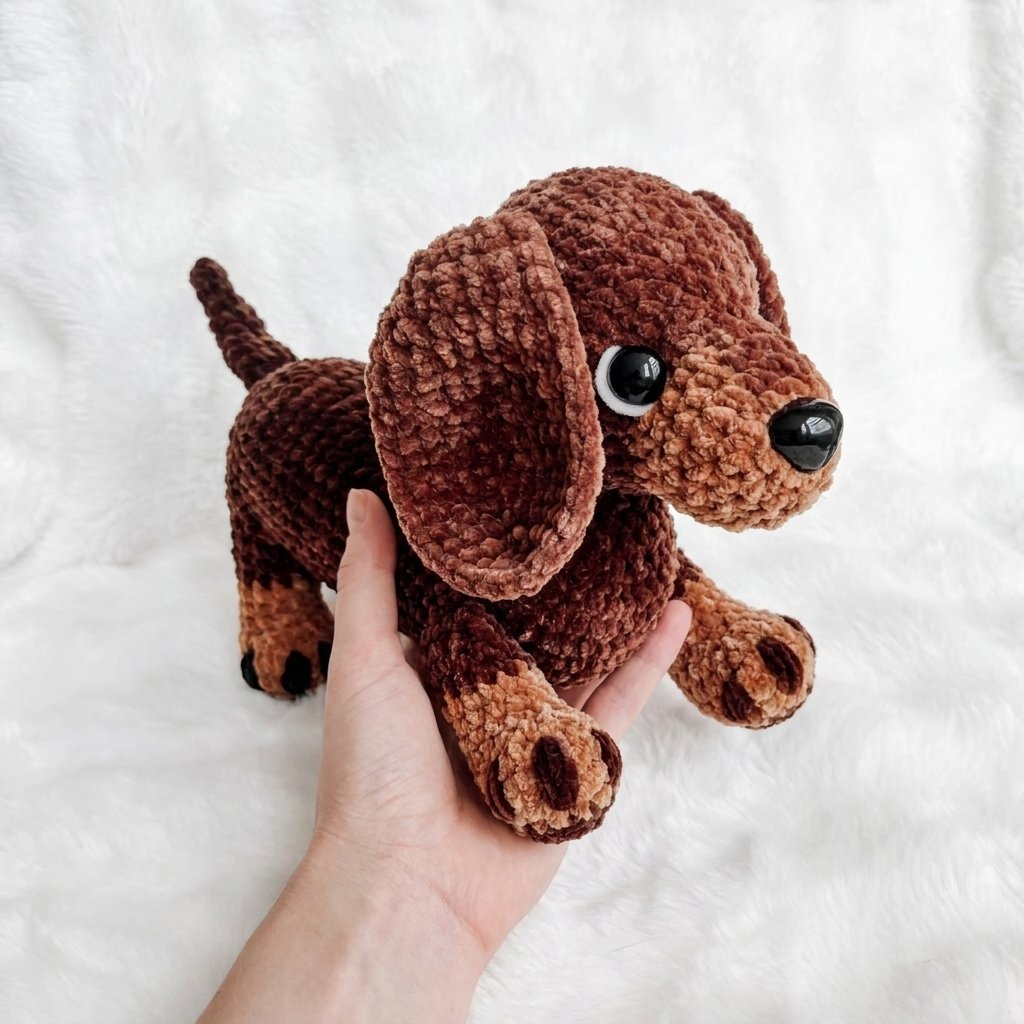
Finished Size & Look
| Detail | Notes |
| Finished length | A medium-sized amigurumi, roughly the size of a large stuffed animal (exact size depends on your yarn and tension) |
| Style | A sleepy, low-to-the-ground dachshund pose, though the legs can be positioned a few different ways (more on that below) |
| Skill level | Confident beginner to intermediate — comfortable with magic ring, increases, decreases, and basic sewing/whip stitching |
Materials
| Item | Notes |
| Chunky/bulky plush chenille yarn, main color (dark brown) | This makes up the bulk of the body, head, and tail |
| Chunky/bulky plush chenille yarn, accent color (light brown/tan) | Used for the feet and face markings for that classic two-tone dachshund look |
| Small scraps of white plush yarn | Just a tiny bit, for the little eye-highlight detail |
| 5mm crochet hook | Matches nicely with a chunky plush yarn |
| Stitch marker | I like to keep mine in the last stitch of the round rather than the first — small habit, but it keeps your rounds easier to track |
| Embroidery/yarn needle | For all the sewing and weaving in |
| Polyfill stuffing | For all the pieces |
| 20mm safety eyes (pair) | |
| 26mm safety nose | |
| Scissors |
Abbreviations (US Terms)
| Abbreviation | Meaning |
| MR | magic ring |
| ch | chain |
| sc | single crochet |
| inc | increase (2 sc in one stitch) |
| dec | decrease (2 sc worked together as 1) |
| st(s) | stitch(es) |
| rnd | round |
| FLO | front loop only |
The Pieces You’ll Make
- Tail (1)
- Ears (2, worked flat)
- Back feet/legs (2)
- Front feet/legs (2)
- Body (built directly from the two front legs)
- Head (with ears attached as you go)
- Face shaping and details
- Assembly
Step 1: The Tail
Work this piece using your main (dark brown) color.
| Round | Instructions | Stitch Count |
| 1 | 5 sc in a magic ring | 5 |
| 2–3 | 5 sc around (2 rounds) — place your stitch marker after round 3 | 5 |
| 4 | (1 sc, inc) ×2, then 1 more inc to finish the round | 8 |
| 5 | 8 sc around | 8 |
| 6 | 2 inc, 2 sc, 2 dec | 8 |
| 7 | 2 sc, 2 inc, 2 sc, 1 dec | 9 |
| 8–9 | 9 sc around (2 rounds) | 9 |
Don’t stuff the tail — flatten it and turn it right side out instead. Fold it flat and work 4 sc through both layers together to close the tip. Fasten off, leaving a tail of yarn for sewing it onto the body later, and set it aside.
Step 2: The Ears (Make 2)
The ears are worked flat, back and forth in rows, then edged to clean up the shape.
| Row | Instructions | Stitch Count |
| 1 | Ch 5, turn, sc in 2nd ch from hook and each ch across | 4 |
| 2 | Ch 1, turn, (1 sc, inc) ×2 across | 6 |
| 3 | Ch 1, turn, (2 sc, inc) ×2 across | 8 |
| 4–8 | Ch 1, turn, 8 sc across (5 rows total) | 8 |
| 9–12 | Turn without chaining, sc across starting in the 2nd st (this naturally decreases by one stitch each row) | 7, 6, 5, 4 |
| 13–17 | Ch 1, turn, 4 sc across (5 rows total) | 4 |
Once you’ve finished the shaping, turn your ear to work along the outer edge: single crochet evenly all the way around the outside, working into the ends of rows and any open spaces to clean up the shape. There’s no exact stitch count here — just work your way around, then go around a second full time in the same way. Fasten off (no need to leave a long tail — the ears get crocheted directly into the head later). Repeat the entire ear from scratch to make a second one.
Step 3: Back Feet/Legs (Make 2)
Start with your light/accent color, then switch to your main dark color partway through.
| Round | Instructions | Stitch Count |
| 1 | 6 sc in a magic ring | 6 |
| 2 | 6 inc around | 12 |
| 3 | (1 sc, inc) ×6 | 18 |
| 4 | (2 sc, inc) ×6 | 24 |
| 5–6 | 24 sc around (2 rounds) | 24 |
| 7 | 6 dec, 12 sc | 18 |
| 8 | 3 dec, 12 sc | 15 |
| 9 | (3 sc, dec) ×3 | 12 |
| 10–11 | 12 sc around (2 rounds) — switch to your main dark color on the very last stitch of round 11 | 12 |
| 12–13 | 12 sc around in the dark color (2 rounds) | 12 |
Fasten off (no need to leave a tail, this gets crocheted into the body). Add a bit of stuffing into the foot — and if you want to get fancy, this is a great spot to embroider a couple of little paw pads on the bottom in a dark color. Repeat everything to make a second back leg.
Step 4: Front Feet/Legs (Make 2)
Worked exactly like the back legs, but with a longer dark-colored section at the top since the front legs need to reach up into the body.
| Round | Instructions | Stitch Count |
| 1 | 6 sc in a magic ring | 6 |
| 2 | 6 inc around | 12 |
| 3 | (1 sc, inc) ×6 | 18 |
| 4 | (2 sc, inc) ×6 | 24 |
| 5–6 | 24 sc around (2 rounds) | 24 |
| 7 | 6 dec, 12 sc | 18 |
| 8 | 3 dec, 12 sc | 15 |
| 9 | (3 sc, dec) ×3 | 12 |
| 10–11 | 12 sc around (2 rounds) — switch to your main dark color on the very last stitch of round 11 | 12 |
| 12–15 | 12 sc around in the dark color (4 rounds) | 12 |
For your first front leg, fasten off and add a little stuffing. For your second front leg, don’t fasten off — leave the working yarn attached, since this is what you’ll use to start building the body directly.
Step 5: The Body (Built from the Front Legs)
This is where things get fun — instead of crocheting a separate body and sewing legs on, we build the body right off of the two front legs.
Joining the legs:
- Make sure your working yarn on the second front leg is centered on the side of the leg, then chain 3.
- Pick up your first front leg. Insert your hook into a stitch centered on its side (directly across from where your yarn is on the other leg) and work 1 sc to attach.
- Continue sc all the way around this first leg until you’re back at the base of your chain-3 — that’s 12 sc total, including your attaching stitch.
- Work 3 sc across the top of your chain-3.
- Continue around your second leg with 12 sc, back to your stitch marker.
That completes your first joining round. For the next round, work 3 sc into the other side of your chain-3 (the loops you haven’t used yet), then continue around, working in a few evenly spaced increases as you go to widen the chest area — build up gradually over the next couple of rounds until you’re at 36 stitches total around.
| Round | Instructions | Stitch Count |
| Join | Ch 3, sc around leg (12), 3 sc in chain, sc around other leg (12) | 27 |
| Shaping | 3 sc in other side of chain, plus a few evenly spaced increases worked around both legs | building toward 30 |
| Shaping | A few more evenly spaced increases around | building toward 36 |
| Next 3 rounds | 36 sc around, plain | 36 |
| Next round | (10 sc, dec) ×3 | 33 |
| Next round | (9 sc, dec) ×3 | 30 |
| Next 3 rounds | 30 sc around, plain | 30 |
Shaping the chest and shoulders (8 rounds): for the next eight rounds, you’ll gradually increase the body by working single crochet with one increase tucked in per round, always keeping your stitch marker centered at the bottom-front of the body (shift it over with an extra stitch or two if needed — this varies slightly with everyone’s tension). The first two rounds of this section look like:
| Round | Instructions |
| 1 | 14 sc, 1 inc, 15 sc |
| 2 | 11 sc, 1 inc, 19 sc |
Continue the same general approach — single crochet with one increase worked in — for the remaining six rounds of this section, always re-centering your marker at the start of each round.
Attaching the back legs: once your body has grown enough, it’s time to attach the back legs the same way the front ones started things off.
- Start the round with 1 sc.
- Find the 6 stitches centered on one side of a back leg (mark them if that helps) and line them up with the next 6 stitches on the body. Single crochet through both layers together, 6 times, to attach.
- Continue with 24 sc around the body.
- Attach your second back leg the same way — 6 sc through both leg and body stitches together — but starting from the opposite side of the foot this time (front-facing rather than back-facing) so the legs end up mirrored.
- Finish the round with 1 more sc.
Closing the gaps (false decrease technique): the round right after attaching the legs is where you’ll prevent little gaps from forming at each leg joint. Every time you transition from the body onto a leg (or back again), instead of just skipping the unused body stitch, pick up its front loop only and pull it through together with your next real stitch — this acts like a decrease and closes the gap invisibly. Work this way around both leg attachment points; the rest of the round is just regular single crochet. If this trick feels fiddly, you can absolutely skip it and just whip-stitch any small gaps closed later instead — the shaping will still look great either way.
Finishing the body (working down to closed):
| Round | Instructions |
| Next | 9 sc, (6 sc, dec) ×3, 9 sc |
| Next | 9 sc, (dec, 5 sc) ×3, 9 sc |
| — | Add stuffing now, packing the connection between the front legs and body especially well |
| Next | (4 sc, dec) ×6 |
| Next | (3 sc, dec) ×6 |
| Next | (2 sc, dec) ×6 |
| — | Add a bit more stuffing, including between the body and back legs, before the opening gets too small |
| Next | (1 sc, dec) ×6 |
| Final | 6 dec around |
Fasten off, leaving just a small tail. Thread it onto your embroidery needle and weave it through the last 6 remaining stitches, then pull tight to close the gap completely. Weave in the end.
Attaching the tail: thread the tail piece from Step 1 onto your needle and sew it onto the back-center of the body, right around where the back legs attach. You can angle it sticking up, laying down, or off to the side — whatever feels right. A few secure stitches through both pieces is all it takes.
Step 6: The Head (Ears Attach As You Go)
Work this piece in your main dark color to start.
| Round | Instructions | Stitch Count |
| 1 | 8 sc in a magic ring | 8 |
| 2 | 8 inc around | 16 |
| 3 | (1 sc, inc) ×8 | 24 |
| 4 | (3 sc, inc) ×6 | 30 |
| 5 | (4 sc, inc) ×6 | 36 |
| 6 | (5 sc, inc) ×6 | 42 |
| 7 | 42 sc around | 42 |
Attaching the ears (round 8): with the pretty side of your head facing up (magic-ring tail facing away from you), work 11 sc. Line up the top 6 stitches of your first ear with the next 6 stitches on the head, and sc through both together, 6 times, to attach. Work 8 sc. Attach your second ear the same way — 6 sc through both layers. Finish the round with 11 more sc.
| Round | Instructions | Stitch Count |
| 8 | 11 sc, attach ear (6 sc through both), 8 sc, attach ear (6 sc through both), 11 sc | 42 |
| 9 | 42 sc around | 42 |
| 10 | 8 sc, dec, 22 sc, dec, 8 sc | 40 |
| 11 | 6 sc, dec, (3 sc, dec) ×4, 2 sc, 2 dec, 6 sc | 33 |
| 12 | 33 sc around | 33 |
| 13 | 2 sc, dec, 5 sc, (dec, 3 sc) ×3, 5 sc, dec, 2 sc | 28 |
| 14 | 28 sc around | 28 |
Insert your safety eyes now, placing them between rounds 14 and 15, about 7–8 stitches apart, and centered nicely between the ears.
| Round | Instructions | Stitch Count |
| 15 | 8 sc, 2 dec, 4 sc, 2 dec, 8 sc — switch to your light color on the very last stitch | 24 |
| 16 | 8 sc (light), switch to dark for 4 dec, switch back to light for 8 sc | 20 |
| 17–19 | 20 sc around, keeping the same color pattern (8 light / 4 dark / 8 light) each round | 20 |
Stuff the head firmly, then tie off your dark color — everything from here is worked in the light color only.
| Round | Instructions | Stitch Count |
| 20 | (2 sc, dec) ×5 | 15 |
| 21 | (1 sc, dec) ×5 | 10 |
| 22 (final) | 5 dec around | 5 |
Insert your safety nose on the top-center of the snout, positioned between rounds 21 and 22 — it’ll be a snug fit working around the safety backing, but it’s worth it for how cute the finished snout looks. Fasten off, thread the tail through the remaining 5 stitches, and pull closed. Weave in the end.
Step 7: Face Shaping and Details
A couple of small embroidery touches make a big difference here.
- Bringing the eyes together: thread a small scrap of your dark yarn onto your needle. Insert it at the top-inner corner of one eye and come out at the top-inner corner of the other eye, leaving a small tail. Then insert it at the bottom-inner corner of the same eye and come out at the bottom-inner corner of the other eye. Tie the two ends together — tighter for eyes set closer together, looser for a bit more space. This is also what gives the snout that long, gentle dachshund taper.
- The little white eye highlight: thread a small scrap of white yarn onto your needle. Insert at the top-center of one eye and bring it out at the side of the head. Rethread and insert at the bottom-center of the same eye, bringing it out at that same point on the side of the head. Pull snug to cinch a tiny white accent right at the edge of the eye, then tie off. Repeat on the other eye.
Step 8: Assembling Your Dog
The very last step is attaching the head to the body.
- Look at your body from the side — you’ll notice a slight divot where the back curves up, followed by a flatter section right after it. That flat section is exactly where the head sits.
- Thread a long piece of your dark yarn onto your embroidery needle. Grab a stitch from the body and pull your yarn through, leaving a tail to tie off with later.
- Line up your head where you want it, then grab a stitch from the head and pull through.
- Continue working your way around, alternating between a stitch on the body and a stitch on the head, whip-stitching the whole way around until the head feels secure.
- Tie off your two ends together and weave them into the head.
Styling the back legs: you’ve got a few fun options here, and it’s entirely up to personal taste:
- Leave them extended as they are, for a playful, stretching pose.
- Bring them together at the bottom of the body and tack them together with a scrap of yarn, for more of a lounging-but-alert look.
- Fold them flat against the sides of the body and tack each one in place with a stitch or two, for a sleepy, curled-up pose (this is my personal favorite).
And that’s it — a squishy, floppy-eared little dachshund, ready for cuddling. If you make one, I’d genuinely love to see how yours turns out — every batch of chenille yarn dyes up just a little differently, so no two ever look quite the same, and that’s honestly part of the charm.