Crochet Puff Flower Bag Pattern – Easy & Beginner-Friendly Crochet Bag Tutorial
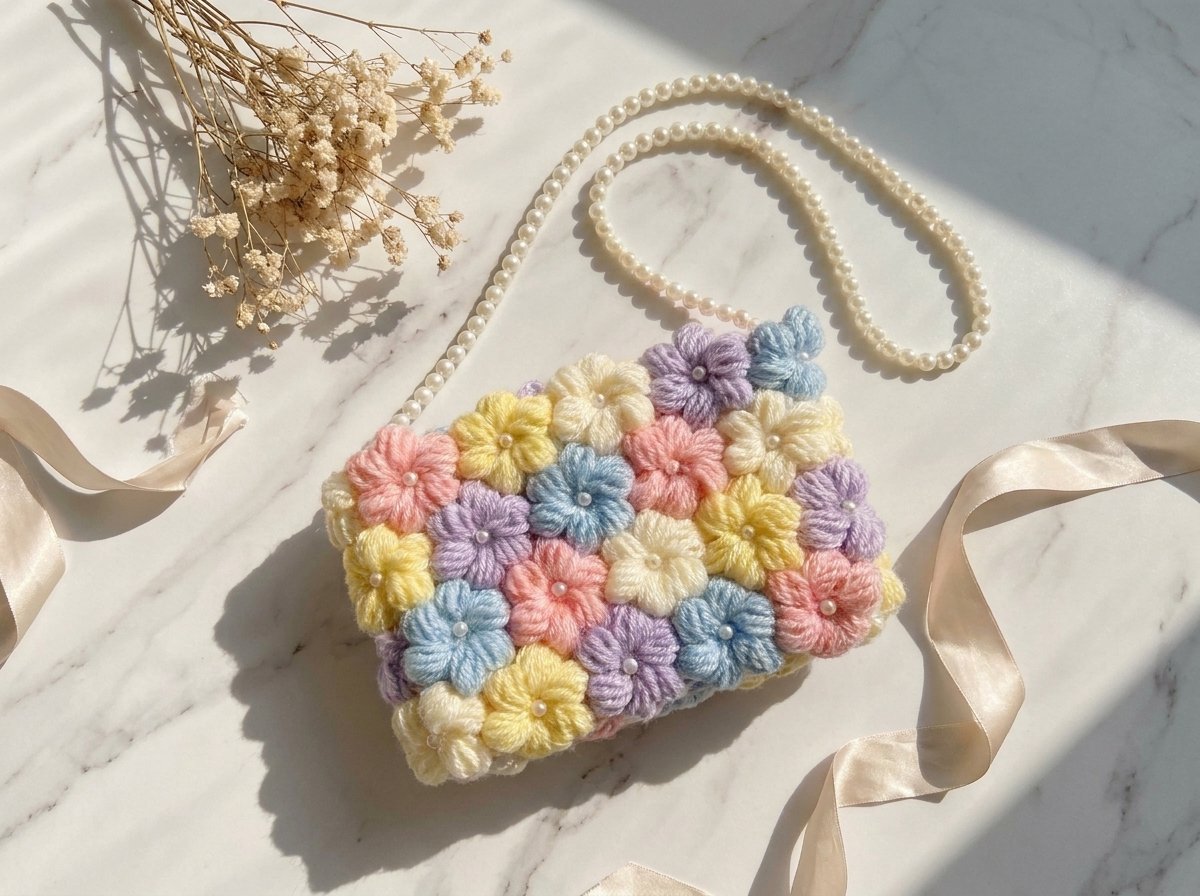
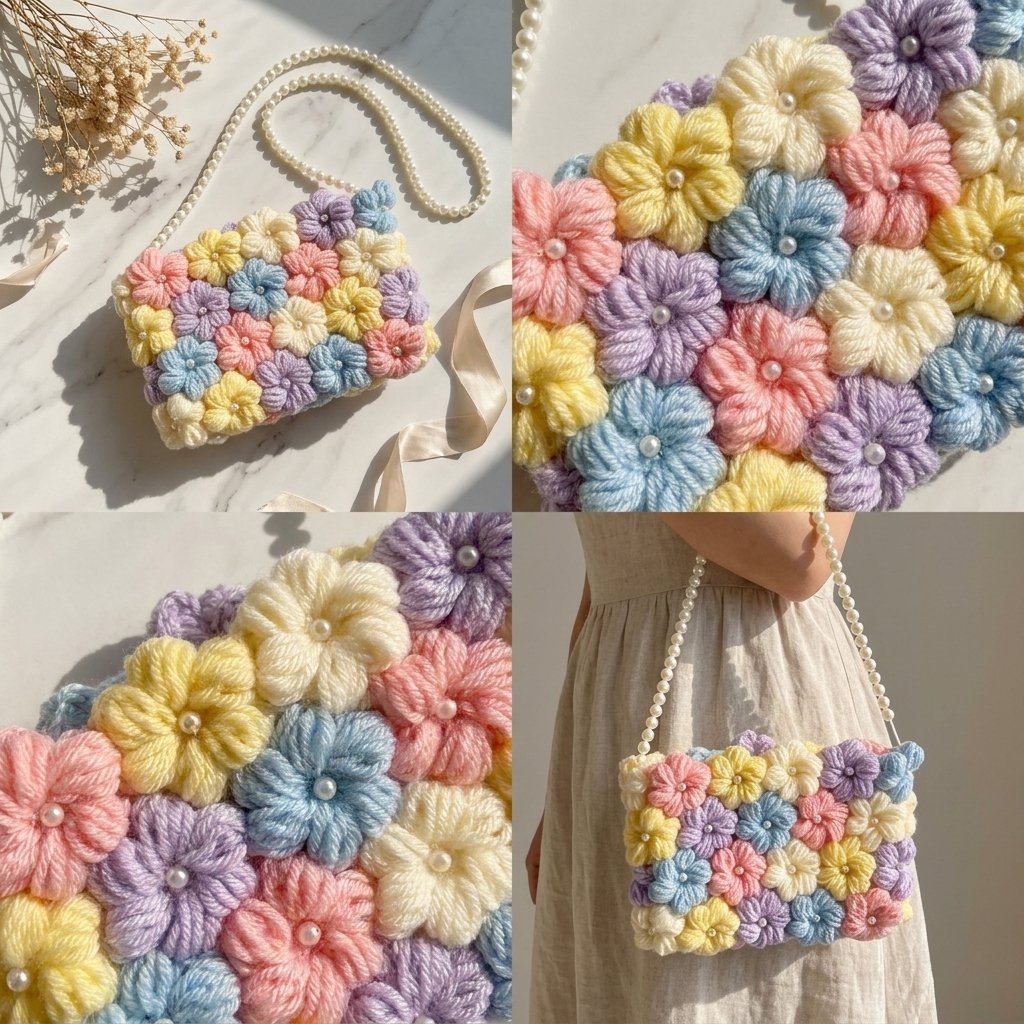
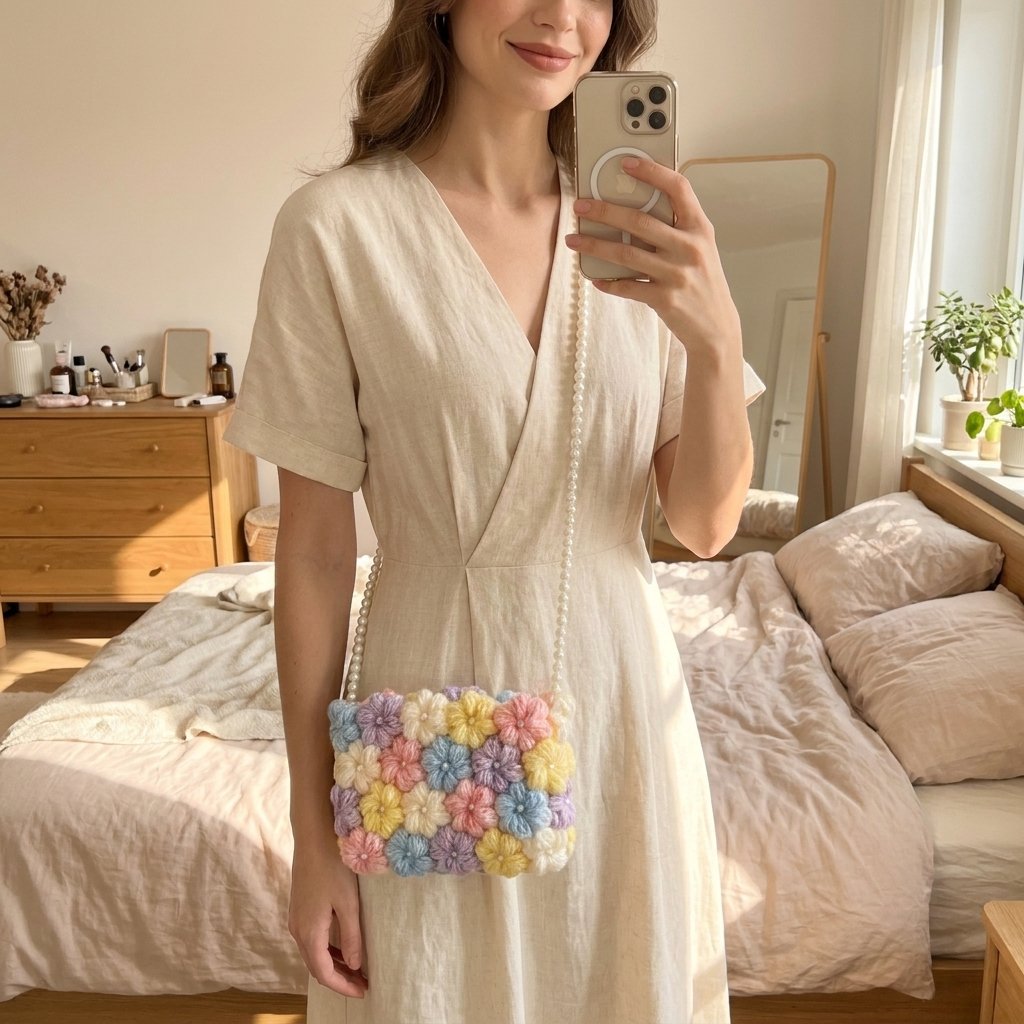
I’ve been wanting to make a proper “garden in a bag” for a while now, and this little clutch is finally it. It’s built entirely out of small puff-stitch flowers — forty of them — pieced together into a patchwork that becomes a bag. It took patience, but I love how it turned out, and I’ve written this up in as much detail as I can so you can follow along without any guesswork.
Materials
| Item | Details |
| Crochet hook | 3.5 mm |
| Yarn | 4-ply, medium weight (not too thin, not too bulky) — any brand works |
| Yarn needle | For sewing flowers together and attaching hardware |
| Scissors | — |
| Center pearls | 6 mm, one per flower (40 total) |
| Strap pearls | 8 mm, as many as needed for your desired strap length |
| Glue | B7000 (flexible fabric/craft glue) |
| Magnetic snap buttons | 1 set (2 pieces) |
| Flat pliers | For folding the magnetic button prongs closed |
Abbreviations used
| Abbreviation | Meaning |
| sc | single crochet |
| hdc | half double crochet |
| sl st | slip stitch |
| ch | chain |
| puff st | puff stitch (5 loops pulled through together) |
Stitch count reference
Keeping to these counts at each stage is what keeps the flowers even and the bag symmetrical — it’s worth double-checking each one before moving on.
| Component | Stitch/count target |
| Flower base round | 6 sc into magic ring |
| Petals per flower | 6 petals |
| Loops on hook before closing each puff | 5 loops |
| Total flowers | 40 |
| Magnetic button base | 12 hdc into magic ring |
| Number of button bases | 2 |
Part 1: Making one flower
Each flower is identical, so I’ll walk through a single one in full — once this feels familiar, the rest is just repetition.
Round 1 — base
| Step | Action |
| 1 | Make a magic ring |
| 2 | Work 6 sc into the ring (total: 6 sc) |
| 3 | Pull the short tail to close the ring |
| 4 | Leave the yarn tail at the front of the work (not the back) — you’ll want it accessible later |
| 5 | Join with a sl st into the first sc |
Petals — repeat this sequence 6 times total
| Step | Action |
| 1 | Ch 3 |
| 2 | Work a puff stitch in the same stitch: yarn over, insert hook, pull up a loop to the height of the ch-3; repeat (yarn over, insert into same stitch, pull up a loop) until 5 loops sit on the hook |
| 3 | Yarn over and pull through all 5 loops at once to close the puff |
| 4 | Ch 3 |
| 5 | Sl st into the next stitch |
Repeat that 5-step sequence six times in total to complete all six petals around the flower. On the sixth repeat, join the final petal back to the very first stitch with a sl st.
Finishing the flower
- Cut the yarn, leaving a tail of a few inches.
- Pull the center tail firmly to close any gap in the middle of the flower.
- Tie the two yarn ends together with two firm knots (a third knot doesn’t hurt, if you want extra security).
- Trim the excess, leaving a little tail in case you need it for sewing later.
Check before moving on: your flower should have exactly 6 puff-stitch petals and no visible gap in the center.
Part 2: Making the full set
Repeat Part 1 until you have 40 flowers.
I split mine across 5 colors, 8 flowers per color, but the breakdown is entirely up to you:
| Approach | Example |
| Single color | 40 flowers, 1 color |
| Multi-color, even split | 5 colors × 8 flowers each = 40 |
| Fully random | Any combination that totals 40 |
Part 3: Laying out the panel
The flowers form the bag through an 8×5 zigzag arrangement:
| Detail | Count |
| Rows | 8 |
| Flowers per row | 5 |
| Total flowers used | 40 |
| Layout style | Zigzag — each row offset slightly from the one before, rather than stacked in a straight grid |
I laid all 40 flowers out on a flat surface first, in this 8-row, 5-per-row zigzag, and moved colors around until I liked the balance before sewing anything. It’s much easier to fix the color placement now than after the flowers are joined.
Part 4: Sewing the flowers together
| Step | Action |
| 1 | Thread a long length of yarn onto your needle (a slightly thinner yarn than your flowers is easier to pass through the stitches) |
| 2 | Start at the bottom of your layout |
| 3 | Sew through the edges where neighboring flowers touch, working flower to flower along the arrangement |
| 4 | Leave a short tail at the start to secure later |
| 5 | Continue row by row until all 8 rows are joined |
| 6 | If you run out of yarn mid-way: knot off the old end securely through a few stitches first, then start the new length from that same point |
| 7 | Once finished, knot off and weave the end through several stitches, then trim |
A heads-up from my own experience: the flowers shift as you sew, so expect to stop and readjust their positions more than once. That’s normal, not a sign you’re doing it wrong.
Check before moving on: all 8 rows should be firmly connected with no loose or gapping seams between flowers.
Part 5: Shaping the bag
| Step | Action |
| 1 | Fold the joined flower panel so the corresponding edges meet |
| 2 | Sew one side seam securely |
| 3 | Repeat on the other side |
| 4 | Turn the bag right side out |
A fabric lining is optional at this stage — I didn’t add one, but it’s a reasonable addition if you’d like more structure inside the bag.
Part 6: Adding the pearl centers
| Step | Action |
| 1 | Apply a small dot of B7000 glue to the center of one flower |
| 2 | Press a 6 mm pearl into the glue |
| 3 | Repeat for all 40 flowers |
| 4 | Let the glue cure fully before handling the bag |
Use a small amount of glue — too much can seep out around the pearl edges.
Part 7: Making the magnetic button bases
Skip this part only if your magnetic buttons already have holes for sewing directly. If they have raised, domed tops (no holes), make a base for each:
| Step | Action |
| 1 | Make a magic ring |
| 2 | Work 12 hdc into the ring (total: 12 hdc) |
| 3 | Close the magic ring |
| 4 | Sl st into the first stitch |
| 5 | Ch 1 |
| 6 | Cut yarn, leaving a tail for sewing |
| 7 | Repeat to make a second, identical base (2 bases total) |
How to work an hdc, for reference: yarn over, insert hook into the ring, pull up a loop (3 loops now on hook), yarn over and pull through all 3 loops at once.
Part 8: Attaching the magnetic buttons to their bases
| Step | Action |
| 1 | Push the magnetic button through the center of the crochet base |
| 2 | Fit the metal stopper on the back |
| 3 | Use flat pliers to fold the metal prongs securely around the button |
| 4 | Trim any excess yarn tail |
| 5 | Repeat for the second button |
Part 9: Attaching the buttons to the bag
| Step | Action |
| 1 | Position one button at the center of one side of the bag |
| 2 | Sew it on, passing the needle through several stitches around the base |
| 3 | Knot off securely on the inside |
| 4 | Pass the yarn through a few extra stitches to reinforce |
| 5 | Trim excess |
| 6 | Repeat on the opposite side with the second button |
Check before moving on: the two magnetic sides should align and snap closed when the bag is folded shut.
Part 10: Making the pearl strap
| Step | Action |
| 1 | Thread a long piece of white yarn onto your needle |
| 2 | Tie a small knot to secure the starting end |
| 3 | Thread on 8 mm pearls, one after another |
| 4 | Continue until the strap reaches your desired length |
| 5 | Secure both ends of the strap firmly to the bag |
Strap length is entirely a matter of preference — hold it up against yourself before securing the ends to judge the drop.
The finished bag
The final piece: 40 hand-joined puff-stitch flowers, pearl centers, a magnetic snap closure, and a beaded strap.
Ways to customize it:
| Variation | Notes |
| Color | All one color, or mix as many as you like |
| Lining | Optional fabric lining for more structure |
| Strap | Longer or shorter, depending on how you like to carry it |
| Pearl size | Swap in different sizes for the centers or strap |
Mine came out soft, colorful, and a little like a bouquet I can carry around.