V-Stitch Mesh Tote Bag Crochet Pattern (Any Size!) | Beginner-Friendly + Easy
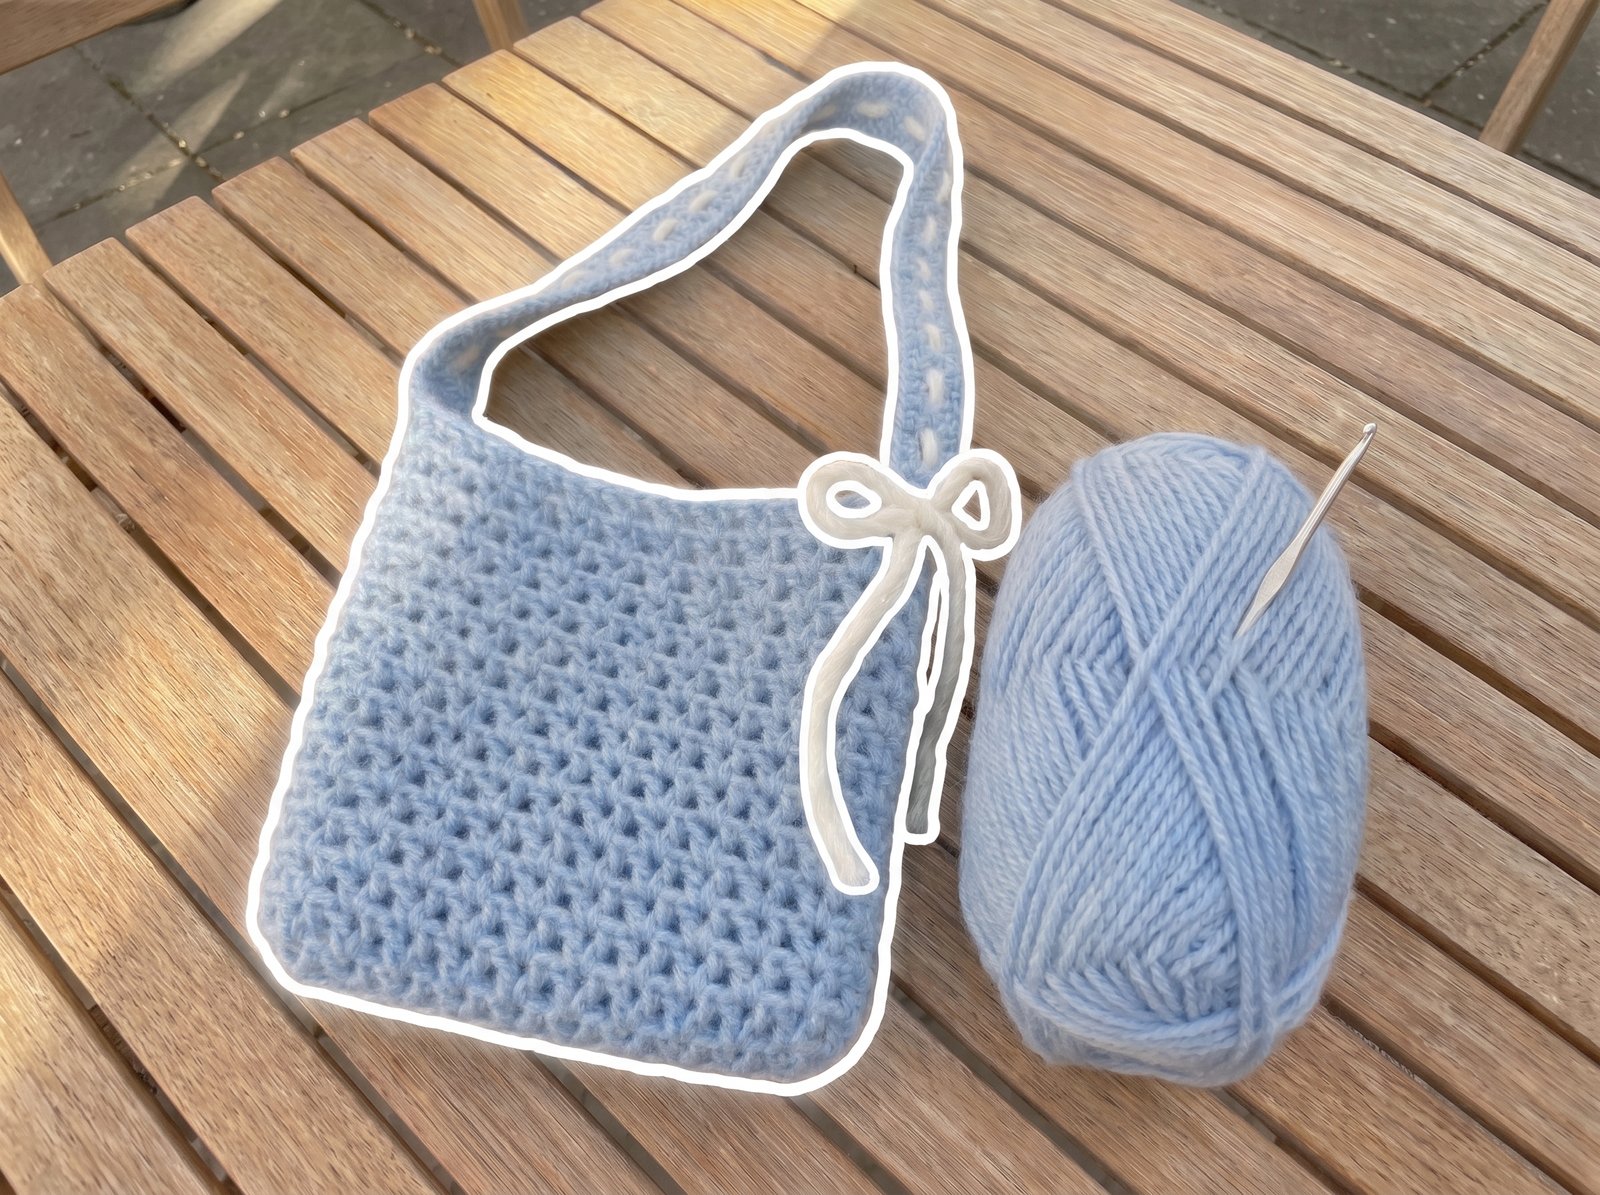
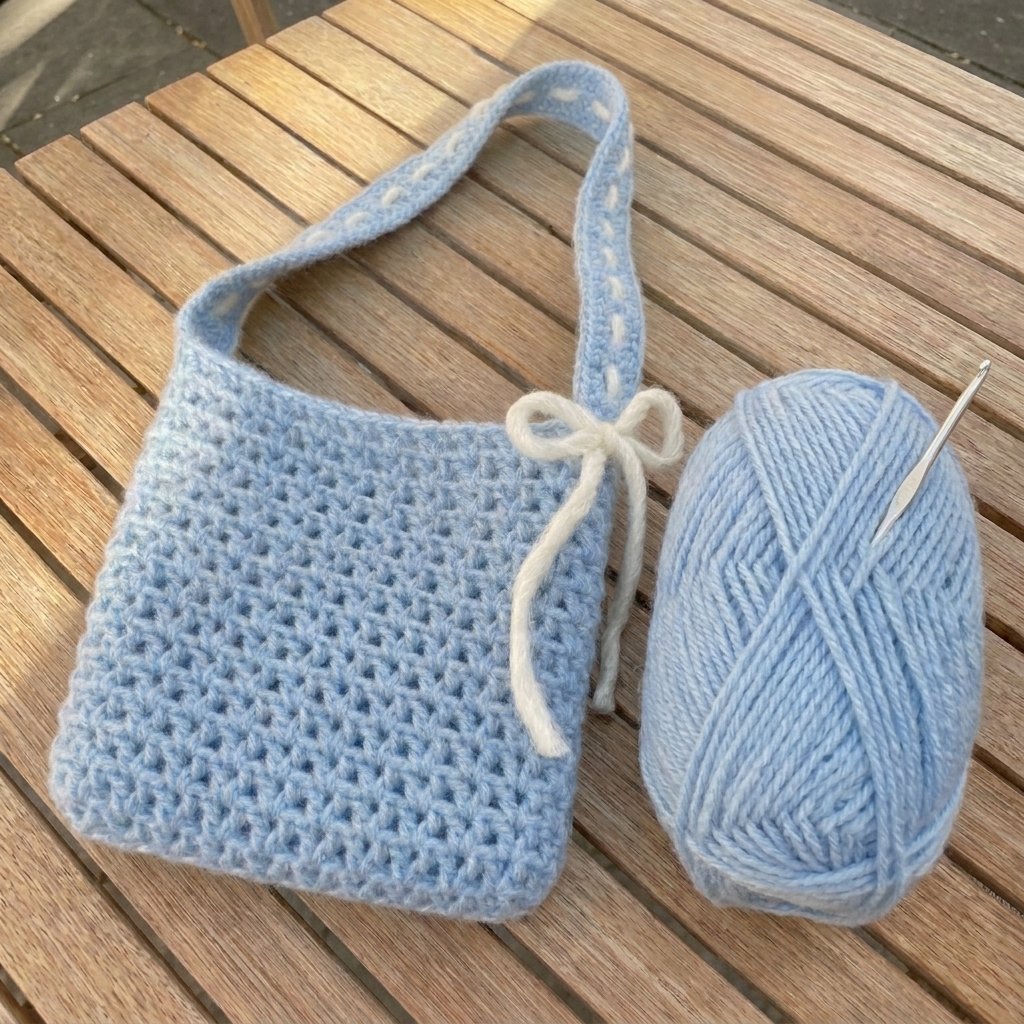
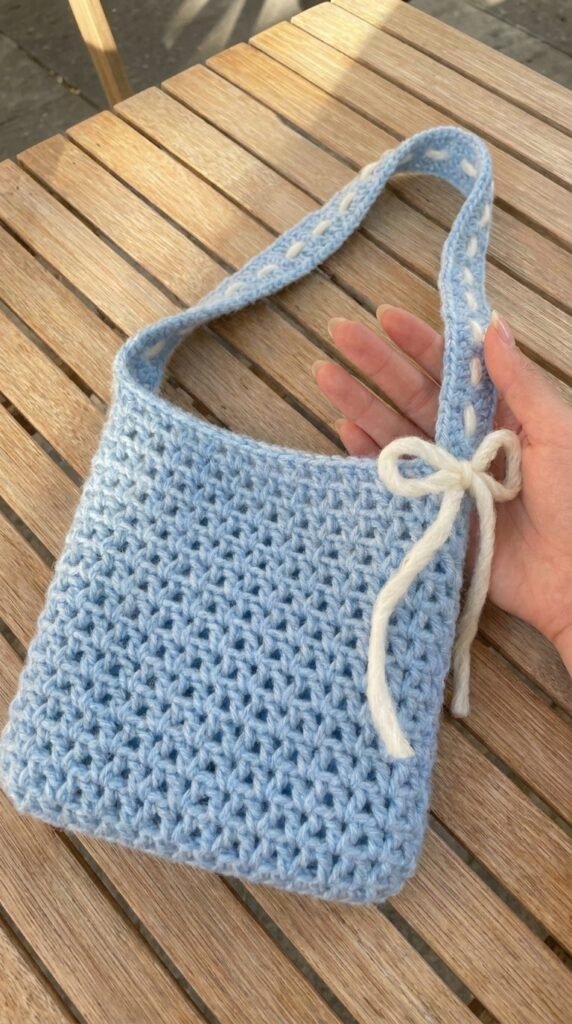
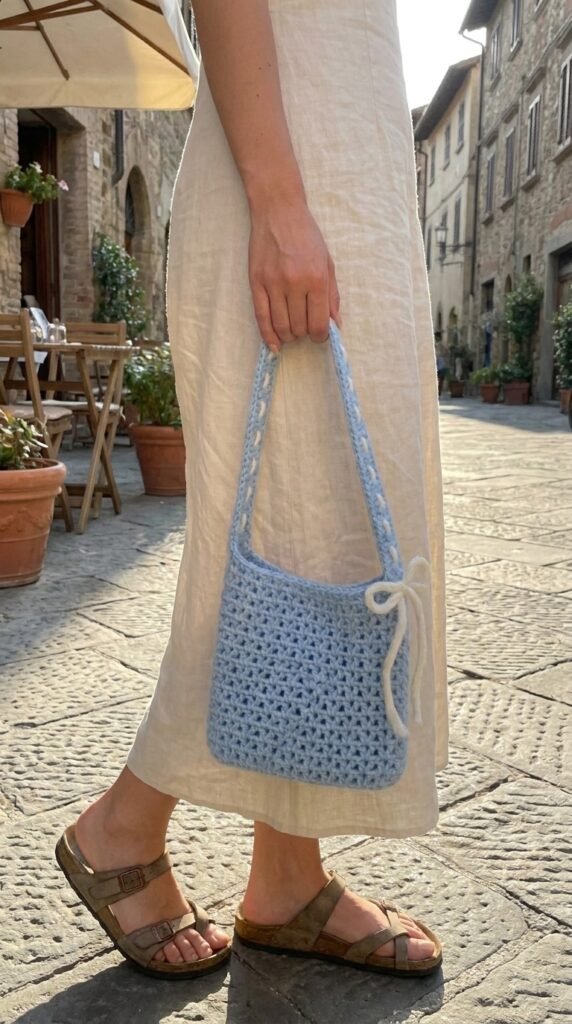
A sturdy, adjustable-size tote bag built from an oval base, a breezy V-stitch mesh body, and a self-attached strap — finished off with an optional woven ribbon or yarn bow detail through the strap. The whole bag scales to whatever size you need simply by adjusting your starting chain and round count, so this pattern works as a template as much as a fixed recipe.
Quick glance
| Time | Skill | Finished size | Hook |
| 3–5 hrs | Intermediate | Adjustable — sized to fit a standard paperback book in the original | 4.5mm |
Materials
- DK or medium (worsted) weight yarn, acrylic or cotton — cotton or a cotton blend gives the finished bag more structure and hold
- 4.5mm crochet hook (match to your yarn weight)
- 2 stitch markers (bobby pins work as a substitute)
- Optional: ribbon, wool, or a thick contrast yarn for the woven bow detail on the strap
Terms & abbreviations
| Abbrev | Term | Notes |
| ch | chain | — |
| dc | double crochet | — |
| sl st | slip stitch | used to join rounds and to attach the strap |
| V-stitch | — | (dc, ch 1, dc) worked into the same stitch or space |
| st(s) | stitch(es) | — |
| rnd(s) | round(s) | worked in joined rounds, not continuous spiral |
Part 1 — Oval Base
Foundation: Chain the width you want your bag to be, keeping your chains snug rather than loose — a looser foundation chain leaves visible gaps once the oval is worked. Chain 2 more after this (these are your turning chains and don’t count as a stitch).
Round 1:
- In the 3rd chain from your hook, work 6 dc. On the 6th dc, close the small gap that naturally opens up by inserting your hook slightly into the space between the chain and the stitch group, rather than straight into the chain itself.
- Dc into each remaining chain across to the last chain.
- In the last chain, work 6 dc (same technique as the first end).
- Working back along the other side of the foundation chain, dc into the back bump of each chain across.
- Join with a sl st to your very first dc.
This gives you a closed oval with 6-dc fans at each rounded end. It’s completely normal for this round to curl — that settles out once you’ve worked another round or two.
Round 2:
- Ch 2 (turning chain, doesn’t count as a stitch).
- Work 2 dc in each of the next 6 stitches (the fan you made at one end of Round 1) — this widens that curve.
- Dc once in each stitch across the straight side.
- Work 2 dc in each of the next 6 stitches at the other end.
- Dc once in each stitch back across the straight side to close the round.
- Join with a sl st to the first dc of the round.
This is your base. You can repeat Round 2’s shaping logic (2 dc in each end-fan stitch, single dc along the straight sides) for additional rounds if you want a larger base — the original bag used 2 rounds total.
Part 2 — Body (V-Stitch Mesh)
This is where the bag transitions from a flat oval into an upright mesh body.
Round 1:
- Ch 3 (counts as your first dc), ch 1, dc into that same starting stitch — this is your first V-stitch.
- *Skip 2 stitches, work a V-stitch (dc, ch 1, dc) into the next stitch.* Repeat from * around.
- If your stitch count doesn’t divide evenly, it’s fine to finish with a partial gap at the end — it won’t affect the finished look.
- Join with a sl st into the 3rd chain of your starting ch-3.
Round 2 onward:
- Ch 3 (counts as first dc), ch 1, dc into the chain-1 space directly below (not into a stitch — into the open V space from the round below).
- *Skip the next two “legs” of the V below, and work your next V-stitch (dc, ch 1, dc) into the following chain-1 space.* Repeat around.
- Join with a sl st into the 3rd chain of your starting ch-3.
Repeat this round as many times as needed for your desired body height. The original bag used 12 total rounds, which produced a bag roughly hand-sized. Fewer rounds gives a shorter bag; more gives a taller one.
A construction note worth knowing: the point where you join and start each round leaves a faint seam line running up the bag. Plan for this to sit at the center back of your finished bag, since it’s barely noticeable there but would stand out on the front.
Part 3 — Strap
The strap is worked directly onward from wherever your last body round ended, so one end is already attached to the bag without any extra sewing.
Row 1:
- Ch 4, then dc into the first ch-1 space.
- Work 2 V-stitches (dc, ch 1, dc) into the next two spaces — this determines strap width; use more V-stitches for a thicker strap, fewer for a thinner one.
- Dc once (no chain-1) into the final space to close the row.
Row 2 onward:
- Ch 2, turn.
- Dc into the same stitch as your turning chain.
- Work the same number of V-stitches as Row 1 into the chain-1 spaces across.
- Dc once into the final dc of the previous row (not into a chain) to close the row.
Repeat this row until your strap reaches the length you want — the original strap used 39 rows total.
Attaching the strap:
- Place stitch markers on the top edge of the bag body, spaced to match your strap’s width, marking where the free end of the strap will attach.
- Turn the bag inside out so the join won’t show on the outside.
- Without fastening off, insert your hook into the first marked stitch and sl st to join.
- Continue working across, alternating between a stitch on the strap’s final row and the matching stitch on the bag body, sl st joining each pair together, until you reach the second stitch marker.
- Chain 1 to secure, then fasten off and weave in the end.
- Turn the bag right-side out again.
Repeat the whole strap section on the opposite side of the bag if you want two shorter handles, or leave it as one long continuous strap for a crossbody-style bag.
Common mistakes
| Mistake | Fix |
| Big gaps at the ends of the oval base | Foundation chain was worked too loosely — keep tension snug on the starting chain specifically |
| Mesh rounds drift off pattern partway through | You inserted into a stitch instead of the chain-1 space below — always look for the “V” gap, not the stitch tops |
| Strap looks lopsided when attached | Stitch markers weren’t spaced evenly before joining — measure both marked sections match before you start sewing |
Part 4 — Optional Bow Detail (woven strap accent)
- Cut two equal-length strands of ribbon, wool, or thick contrast yarn — long enough to wrap most of the way around your strap with extra left over to tie.
- Starting at one end of the strap, thread the strands through the center of the mesh, pulling through from front to back.
- Continue weaving up and down through each mesh opening along the strap, alternating front-to-back and back-to-front as you go.
- Once you reach the desired point, tie the ends into a bow.
Finishing
Weave in any remaining ends. If your base curled during Part 1 and hasn’t fully relaxed, a light steam block (iron on low, held above the fabric, no direct contact) will help it sit flat.
Write a review
 no image