3D Crochet Dragon Fruit Phone Bag Pattern
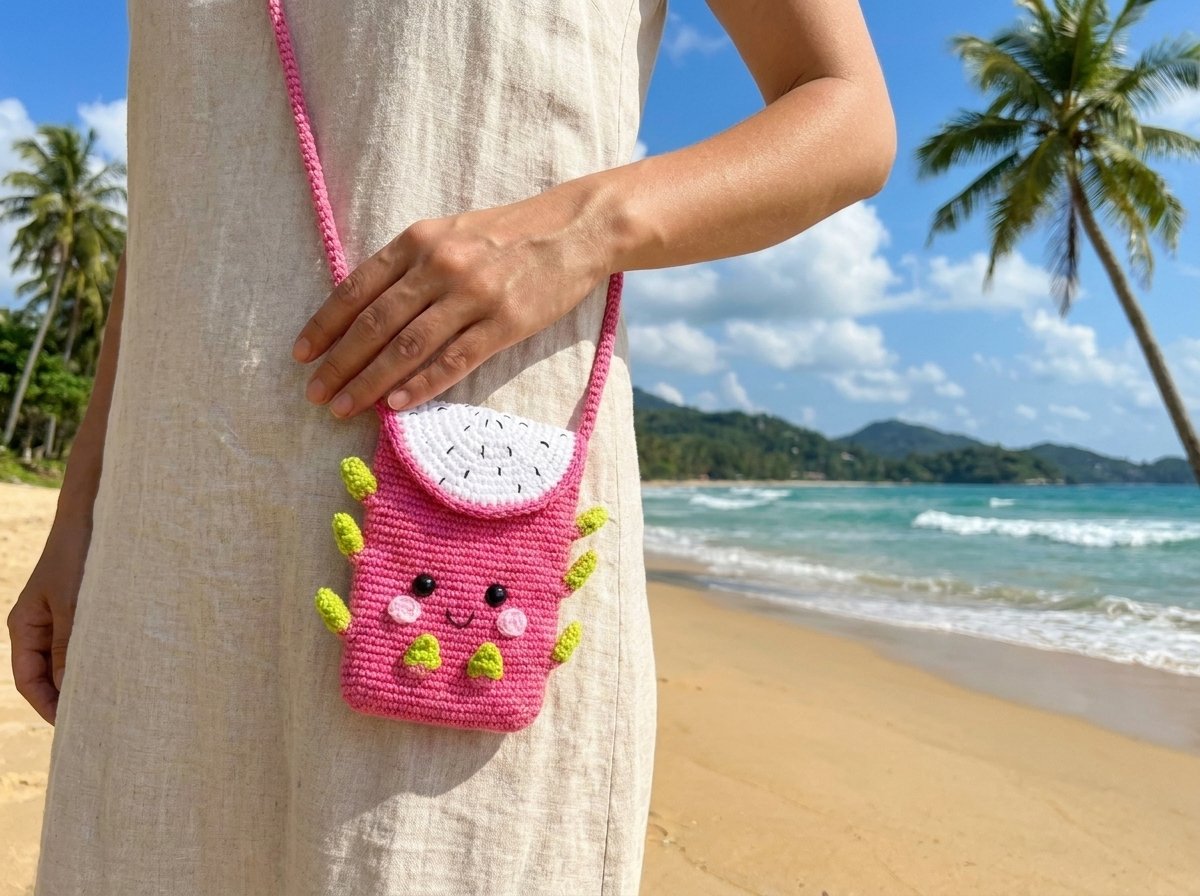
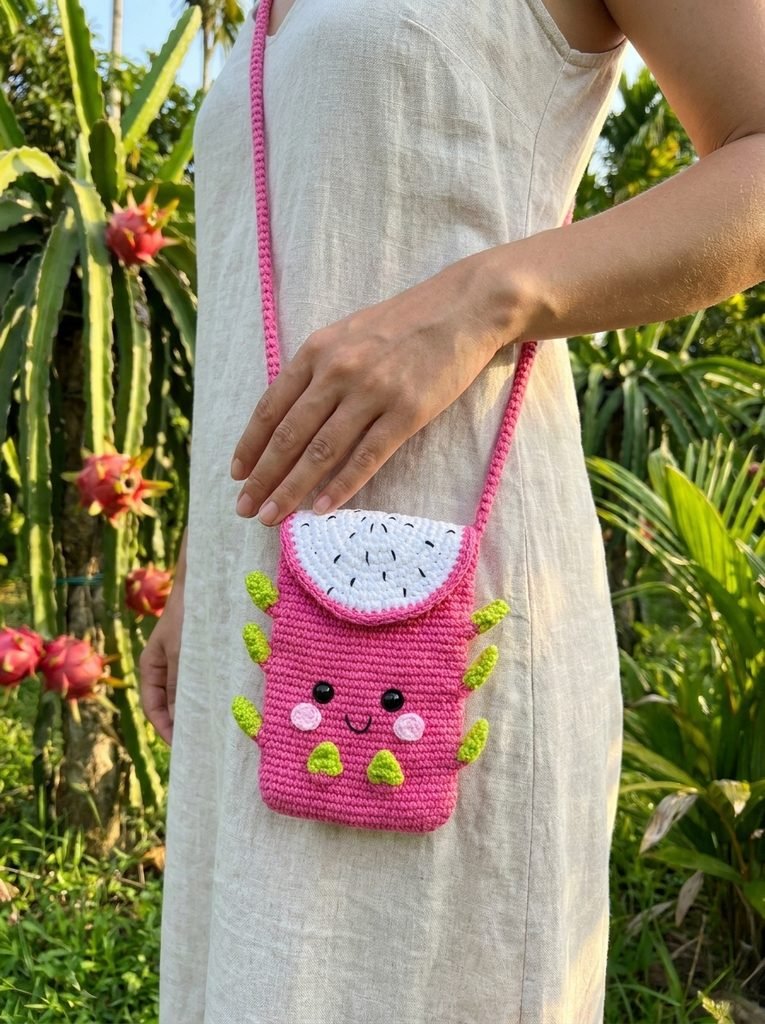
A crossbody phone bag shaped like a dragon fruit — pink body, a white flip-top flap resembling the fruit’s flesh, plus surface-worked leaves, a braided strap, and a cute embroidered face. This is a genuinely multi-part build: a large oval body, a separate circular flap, a braided cord strap, and two sizes of leaves worked directly onto the body’s surface rather than sewn on afterward.
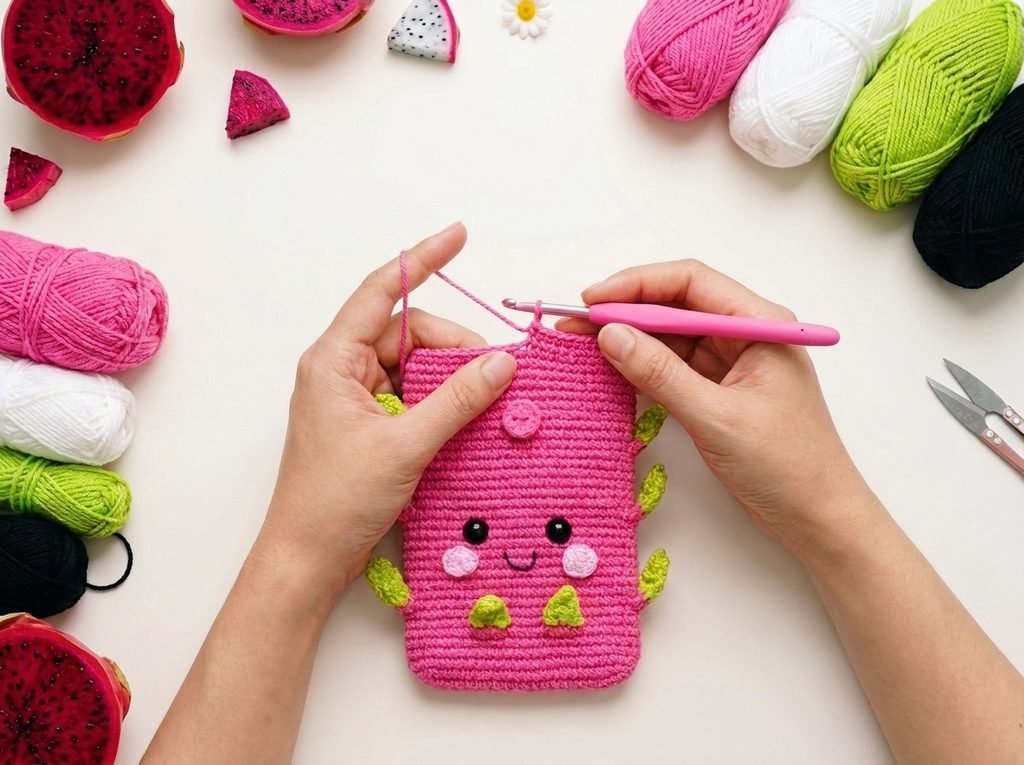
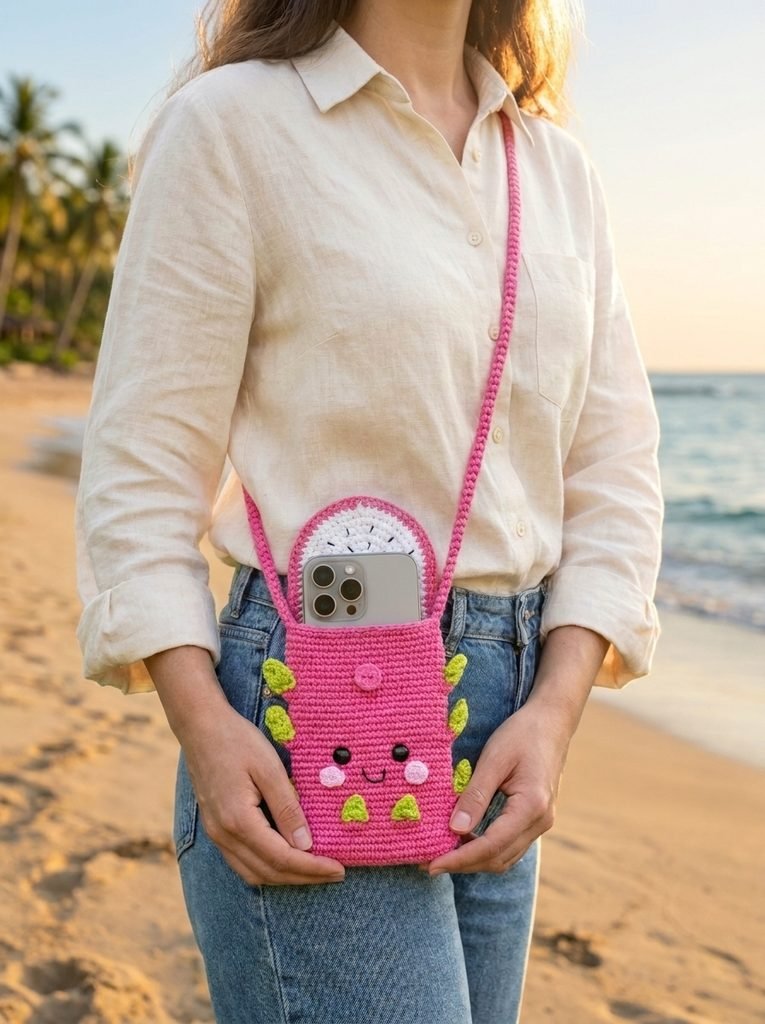
Quick glance
| Time | Skill | Finished size | Hook |
| 5–7 hrs | Intermediate–Advanced | Phone-pouch size, ~1m strap | 3.0mm |
Materials
- Milk cotton yarn, held with 5 strands together throughout: pink (main body), white (flap), green (leaves), plus small amounts of pink/rose for the blush
- 3.0mm crochet hook
- Two 12mm oval safety eyes
- One 22mm magnetic snap closure
- Black, white, and rose-red thread (for face embroidery details)
- Craft glue
- Stitch markers
- Tapestry needle, scissors
Terms & abbreviations
| Abbrev | Term | Notes |
| ch | chain | — |
| sc | single crochet | the only stitch used throughout |
| inc | increase | 2 sc in same st |
| dec | decrease | 2 sc worked together as 1 |
| MR | magic ring / circular cast-on | — |
| st(s) | stitch(es) | — |
| rnd(s)/row(s) | joined rounds for the body and flap; short worked-in-place rows for the leaves | — |
Part 1 — Main Body
Foundation: Chain 21.
Round 1: Sc in the 2nd chain from your hook and across the first long side (20 sc total). At the far end, work a fan increase into the end chain (roughly 4 sc, forming the rounded tip). Turn to work back along the other side of the foundation chain: 18 sc, then a smaller increase at the final corner. Join with a slip stitch. (Exact rounding varies slightly by translation — the goal is a standard oval base, wider increases at both curved ends and plain sc along both straight sides.)
Round 2: Chain 1. Work increases at both curved ends (following the same pattern repeat as Round 1), with plain sc along both straight sides.
Round 3: Chain 1. Continue the same increase pattern at both ends, plain sc along the sides.
Confirm your stitch count reaches 48 total by the end of Round 3 before moving on — this is the fixed body circumference for the rest of the bag.
Rounds 4–35: Sc around, plain. (48 sts, constant across all 32 rounds)
Body checkpoint
| Round | St count |
| 3 (end) | 48 |
| 4–35 | 48 (constant) |
Part 2 — Flap (worked as a flat increasing circle)
Round 1: Circular cast-on/MR. Chain 1, 6 sc into the ring. Join. (6 sts)
Round 2: Chain 1. Inc around. (12 sts)
Round 3: Chain 1. [sc 1, inc] x6. (18 sts)
Round 4: Chain 1. [sc 1, inc, sc 1] x6. (24 sts)
Round 5: Chain 1. [sc 3, inc] x6. (30 sts)
Round 6: Chain 1. [sc 2, inc, sc 2] x6. (36 sts)
Round 7: Chain 1. [sc 5, inc] x6. (42 sts)
Round 8: Chain 1. [sc 3, inc, sc 3] x6. (48 sts)
Round 9: Chain 1. [sc 7, inc] x6. (54 sts)
Round 10: Chain 1. [sc 4, inc, sc 4] x6 — change to your contrast color (white) partway through this round, as described in the source video: work until 2 loops remain on your last stitch of the old color, then finish that stitch with the new color and continue. (60 sts)
Round 11: Continuing in the contrast color: chain 1, [sc 9, inc] x6. (66 sts)
Fasten off, leaving a long tail for joining the flap to the body later.
Flap checkpoint
| Round | St count |
| 1 | 6 |
| 2 | 12 |
| 3 | 18 |
| 4 | 24 |
| 5 | 30 |
| 6 | 36 |
| 7 | 42 |
| 8 | 48 |
| 9 | 54 |
| 10 | 60 (color change) |
| 11 | 66 |
Part 3 — Strap (braided cord technique)
Leave a 20cm starting tail. Make a slip knot, then chain 2.
Work a repeating 4-step unit: sc into the 2nd-to-last stitch picking up a side thread, turn, sc picking up one side thread, turn, sc picking up two side threads, turn, sc picking up two side threads. Repeat this 4-step cycle continuously to build a round, braided-look cord.
Continue until your strap reaches your desired length — about 1 meter (~40in) for a crossbody strap, as shown in the reference photo.
Part 4 — Blush (make 2)
MR, chain 1, 6 sc into the ring. Join with a slip stitch. Cut yarn leaving a tail long enough for sewing. Repeat for a second blush circle.
Part 5 — Small Leaves (make 2, worked directly onto the body)
These are worked as a short, self-contained shaping sequence directly into the surface of the main body — not as separate pieces.
Placement: Fold the body in half and locate Round 6. Count 7 stitches from the fold and begin at the 8th stitch.
Row 1: Insert your hook and pull up the leaf color. Chain 1, then work 2 sc increases. Cut yarn.
Row 2: Reattach yarn at the first stitch. Chain 1, work 2 sc decreases, then 1 more sc decrease.
Row 3: Chain 1, turn, work 1 sc decrease, then 1 more sc decrease.
Row 4: Chain 1, turn, work 1 more sc decrease, then chain 1 and cut yarn to close the leaf point.
Repeat on the opposite side, skipping 6 stitches from the first leaf and starting the second at the 7th stitch beyond it.
Part 6 — Large Leaves (make 6, worked the same way as the small leaves but longer)
Placement: Mark 6 positions total — 2 each at body Rounds 9, 18, and 25.
Row 1: Insert hook at a marked position, chain 1, work 2 sc increases, then 1 sc. Cut yarn.
Row 2: Reattach yarn, chain 1, sc 3, then 1 sc decrease.
Row 3: Chain 1, turn, sc 2, then 1 sc decrease.
Row 4: Chain 1, turn, sc 1, then 1 sc decrease.
Row 5: Chain 1, turn, 1 sc decrease, then chain 1 and cut yarn to close.
Repeat at all 6 marked positions.
Assembly
The source video moves directly from gathering materials to a finished bag without narrating each assembly step in detail — the following sequence is based on standard construction logic and the reference photos:
- Sew the flap to the top-back edge of the main body opening.
- Sew in the magnetic snap — one half inside the front of the body, the other on the underside of the flap, aligned to meet when closed.
- Attach the braided strap to both sides of the bag body for a crossbody strap.
- Attach the two blush circles to the face area, below where the eyes will sit.
- Attach the two safety eyes above the blush circles.
- Embroider the mouth in black thread, and any small seed/highlight details on the flap in black and white thread as shown in the photo.
- Secure any glued elements (eyes backing, snap edges) and let dry fully before use.
Common mistakes
| Mistake | Fix |
| Body oval comes out lopsided | Both curved ends need matching increase counts — check Round 3 lands at 48 total before starting the plain rounds |
| Flap doesn’t match the body width | Confirm your flap reaches 66 stitches at Round 11 — a mismatch here means the flap won’t sit flush against the body opening |
| Leaves pull the fabric or pucker | Keep tension relaxed on the decrease rows — these are worked directly into finished fabric, so pulling too tight distorts the body underneath |
| Strap comes out twisted | The braided cord technique relies on consistent “twist the fabric” turns between each stitch — keep the turn direction consistent throughout |
Finishing
Weave in all ends, including the many small tails left from the leaf and blush pieces. Let any glued components fully set before regular use, especially the magnetic snap and eye backings.