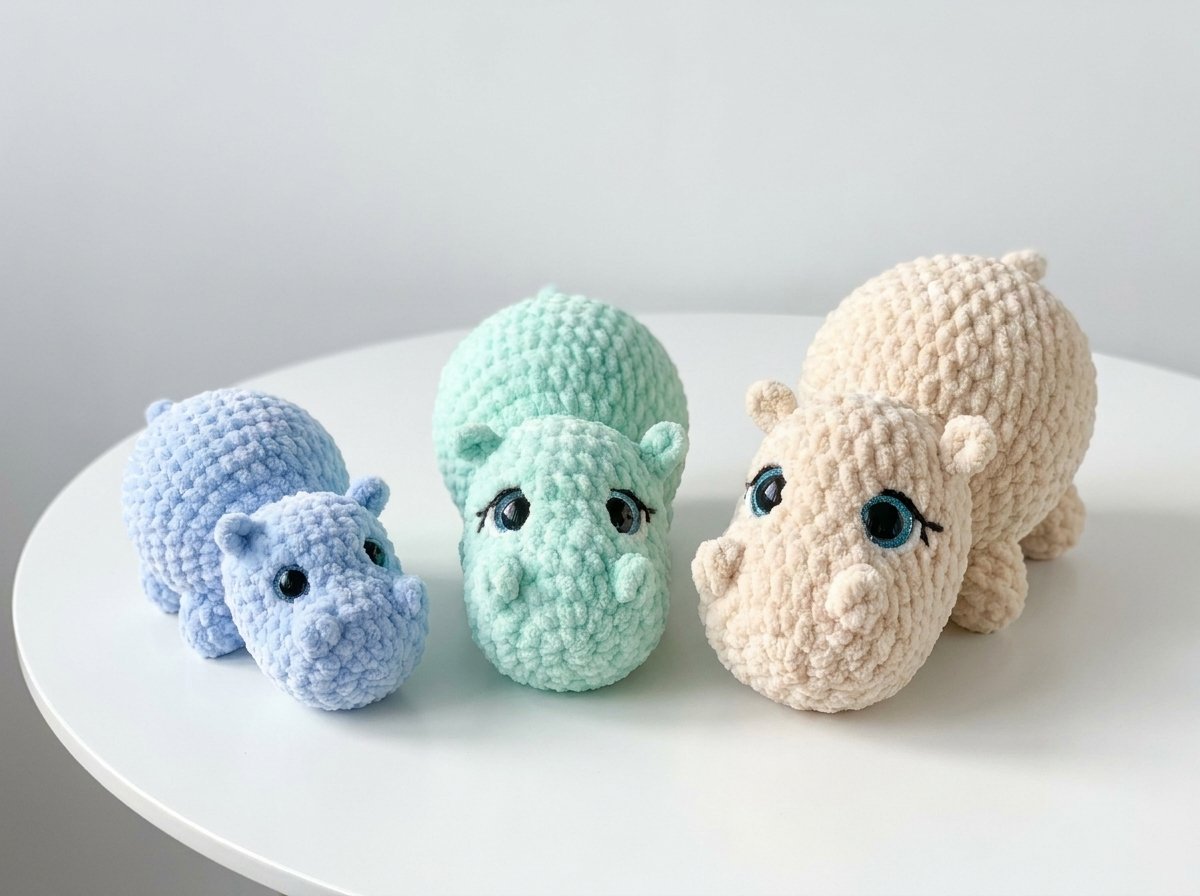
No-Sew Crochet Hippo Pattern – Easy Beginner-Friendly Hippo Amigurumi Tutorial
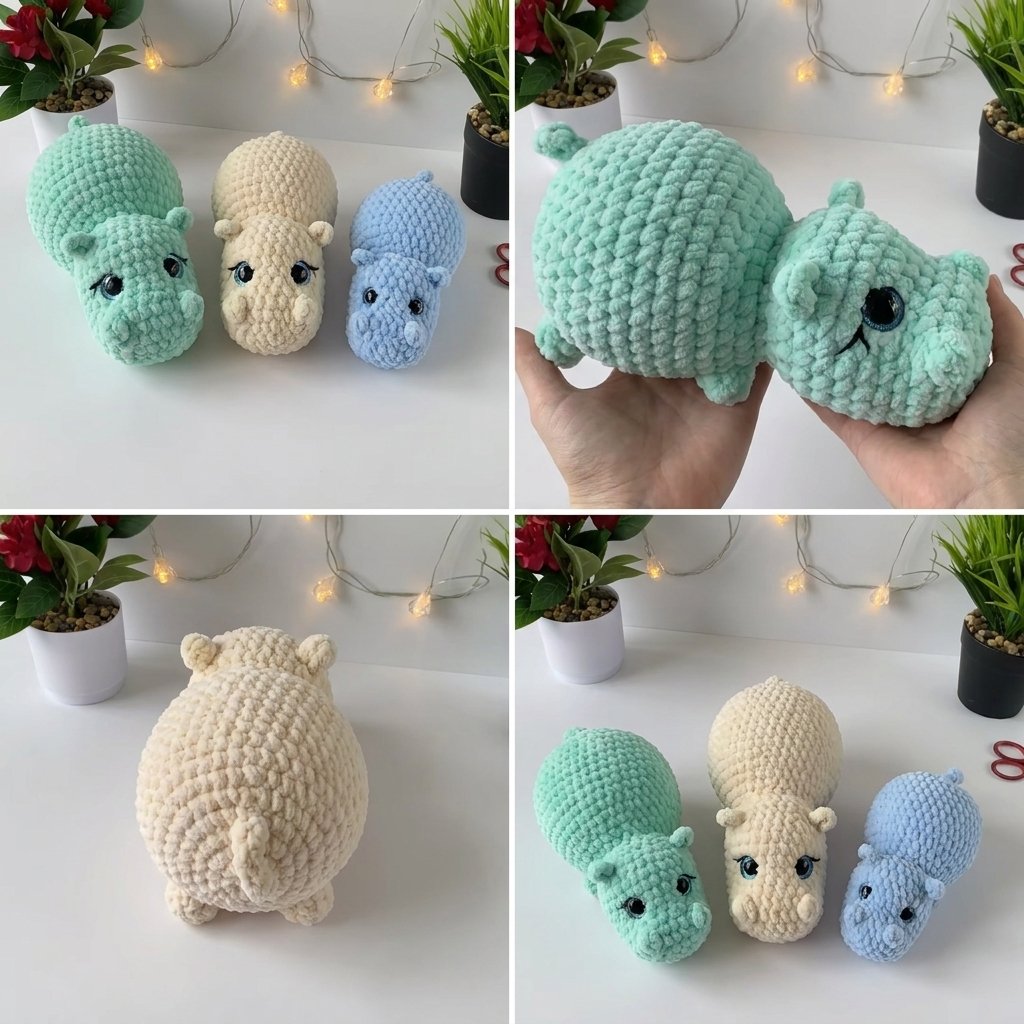
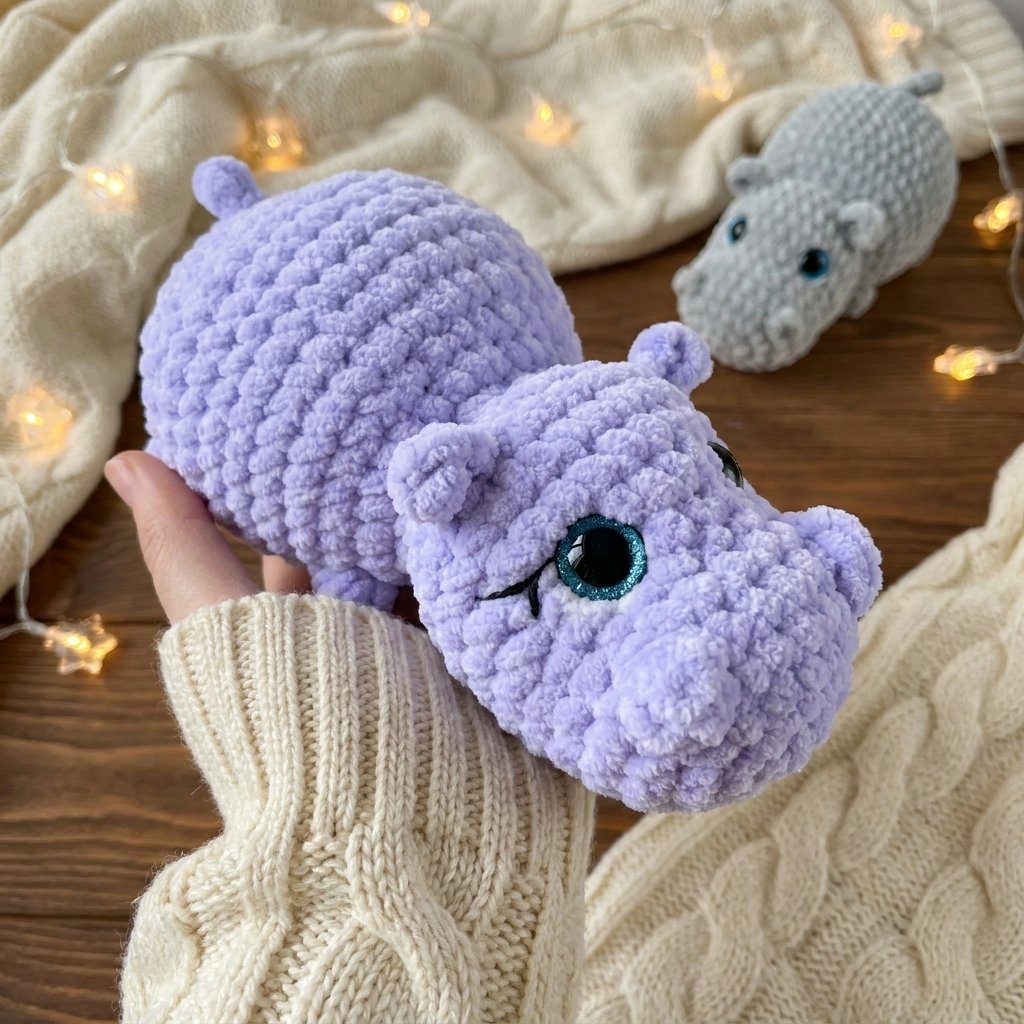
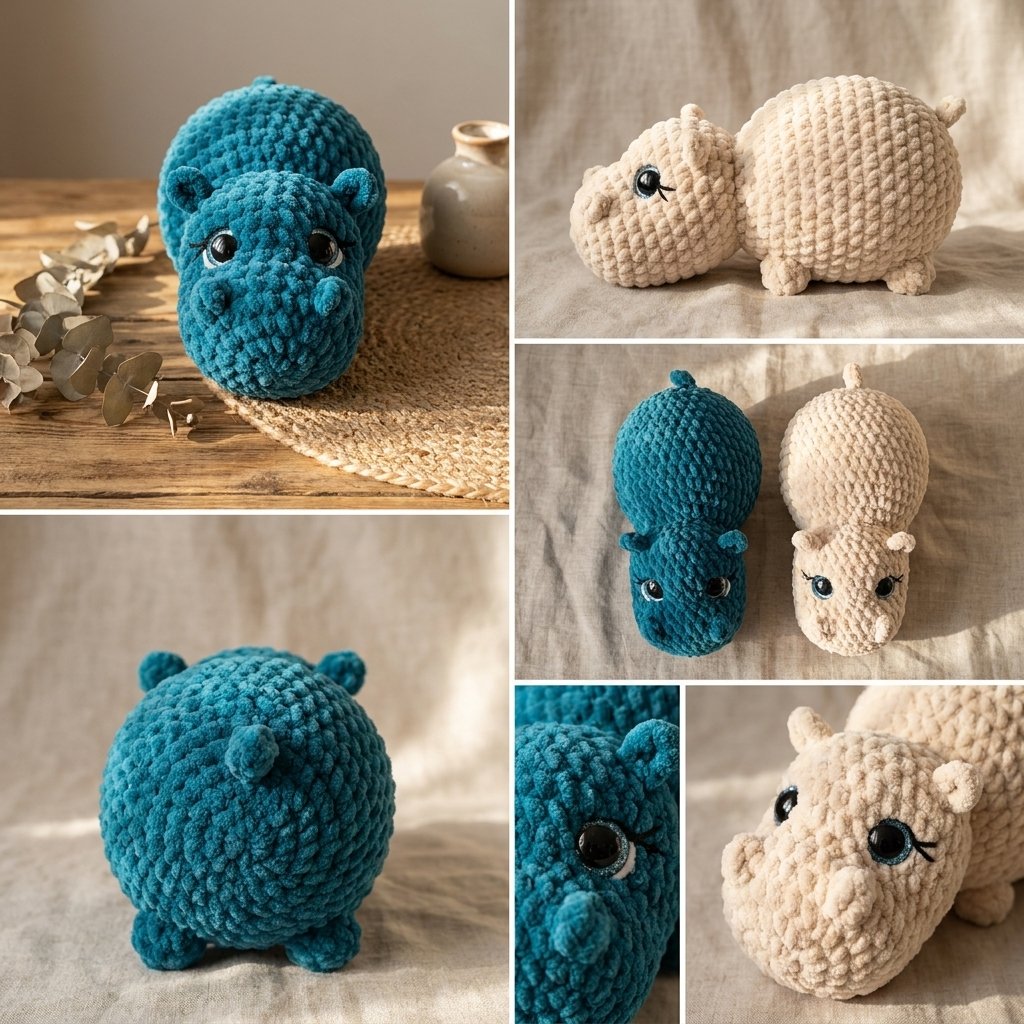
I love a project where the “finishing” step is basically just weaving in one tail, and that’s exactly what this hippo is. The whole thing — head, ears, body, legs, and curly little tail — is worked as one continuous piece in the round. The ears and tail aren’t separate pieces you sew on afterward; they’re built right into the rounds as little chain loops, and the nostrils and feet get their shape from a simple bobble stitch worked directly into place. No sewing pieces together at all.
I made mine in a jumbo/super bulky plush yarn for that satisfyingly squishy, oversized look, but this works in any weight — just size your hook to match.
Materials
| Item | Notes |
| Jumbo or super bulky weight plush yarn | Any brand of chunky “velvet”-style yarn works beautifully here |
| 5mm crochet hook | Adjust up to a 6–8mm hook if you’re using an even chunkier yarn than mine |
| Pair of 18mm safety eyes | With backing washers |
| Yarn/tapestry needle | |
| Scissors | |
| Poly-fil stuffing | |
| Stitch marker | |
| A small amount of white yarn | For the eyelash-highlight detail underneath the eyes |
| A small amount of black yarn (medium weight acrylic works well) | For the embroidered eyelashes |
Abbreviations (US Terms)
| Abbreviation | Meaning |
| MR | magic ring |
| ch | chain |
| sl st | slip stitch |
| sc | single crochet |
| inc | increase |
| dec | decrease (I use the invisible decrease throughout — worked through the front loops only of the next 2 stitches) |
| st(s) | stitch(es) |
Two Techniques You’ll Use Throughout
The bobble stitch (used for the nostrils and the feet): yarn over, insert your hook into the stitch, yarn over and pull up a loop, yarn over and pull through 2 loops — that’s one partial double crochet, but don’t finish it off. Repeat this 2 more times into that exact same stitch (for a 3-stitch bobble) or 3 more times (for a slightly bigger 4-stitch bobble), each time leaving the loops sitting on your hook rather than completing them. Once you have all your loops on the hook, yarn over one final time and pull through everything at once. This closes all those partial stitches into one puffy little bobble sitting on top of a single stitch — the stitch count doesn’t change, you’ve just added texture.
Built-in ears and tail (no sewing required): rather than crocheting a separate piece, you’ll build a tiny loop directly into the round — working a stitch, then a few chains, closing that little chain into a loop with a slip stitch, and anchoring it back into the same base stitch. It sounds fiddly the first time, but it creates the cutest little rounded ear or curled tail without ever picking up a needle.
The Hippo — Worked as One Continuous Piece
This entire animal is crocheted in a single, unbroken spiral from the tip of the head all the way down to the tail. Keep your stitch marker moving with you the whole way through.
The Head
| Round | Instructions | Stitch Count |
| 1 | 8 sc in a magic ring | 8 |
| 2 | 8 inc around | 16 |
| 3 | (2 sc, 4 inc, 2 sc) ×2 | 24 |
| 4 (the nostrils) | 8 sc, 1 bobble stitch, 6 sc, 1 bobble stitch, 8 sc | 24 |
| 5 | 24 sc around | 24 |
| 6 | 5 sc, dec, 11 sc, dec, 4 sc | 22 |
| 7 | 8 sc, 3 inc, 1 sc, 3 inc, 7 sc | 28 |
| 8–9 | 28 sc around (2 rounds) | 28 |
Round 10 — the ears: work 10 sc, then build your first ear directly into the next stitch: 1 sc into the stitch, chain 3, slip stitch into the 2nd chain from your hook, sc into the last chain, then sc back into that same base stitch to anchor the loop. Work 7 sc, then build a second ear the exact same way. Finish the round with your remaining sc to bring you to 30 stitches total. If your ears don’t land perfectly symmetrical the first time, it’s easy to adjust their placement by eye once you see how the round is shaping up.
| Round | Instructions | Stitch Count |
| 11 | 30 sc around | 30 |
Placing the eyes: position your safety eyes between rounds 7 and 8, with 5 visible stitches between them. Attach the backing washers securely.
| Round | Instructions | Stitch Count |
| 12 | (3 sc, dec) around | 24 |
| 13 | (dec, 1 sc) around — pause and stuff the head firmly here | 16 |
| 14 | (1 sc, inc) around | 24 |
| 15 | (inc, 2 sc) ×8 | 32 |
The Body and Legs
There’s no break here — keep going directly from the head’s last round into the body.
| Round | Instructions | Stitch Count |
| 16 (front feet) | 2 sc, 1 bobble stitch (this time using the bigger 4-loop version for a chunkier foot), 24 sc — adjust leg placement as needed — 1 bobble stitch, 3 sc | 32 |
| 17 | 8 sc, (inc, 1 sc) ×8, 8 sc | 40 |
| 18–22 | 40 sc around (5 rounds) | 40 |
| 23 | 8 sc, (dec, 1 sc) ×8, 8 sc | 32 |
| 24 (back feet) | 3 sc, 1 bobble stitch, 24 sc, 1 bobble stitch, 3 sc | 32 |
| 25 | (2 sc, dec) around | 24 |
Round 26 — the tail: work 12 sc, then build the tail the same way you built the ears: 1 sc into the next stitch, chain 3, slip stitch into the next chain from your hook, sc into the last chain, then sc back into the body to anchor it. Finish with 10 more sc to complete the round at 24 stitches.
Now is a good time to stuff the body firmly before closing everything up.
| Round | Instructions | Stitch Count |
| 27 | (2 sc, dec) around | 18 |
| 28 | (1 sc, dec) around — keep stuffing as you go | 12 |
| 29 (final) | 6 invisible decreases around | 6 |
Cut your yarn, thread the tail through the front loops of the remaining 6 stitches, and pull tight to close the hole completely. Weave the end in through a few different points inside the body to secure it well.
Finishing the Face
- Using a small amount of white yarn, embroider a simple highlight shape just underneath each eye — this is what gives the finished face that soft, expressive look.
- Switch to black yarn and embroider a set of eyelashes above or beside each eye, following the curve of the eye itself.
And that’s it — one continuous, no-sew hippo, ready for cuddling. I love making a little herd of these in different colors; the whole thing works up so quickly that it’s hard to stop at just one.