Crochet Mini Breakfast Toasts Pattern – 4 Cute Toppings & Easy Amigurumi Food
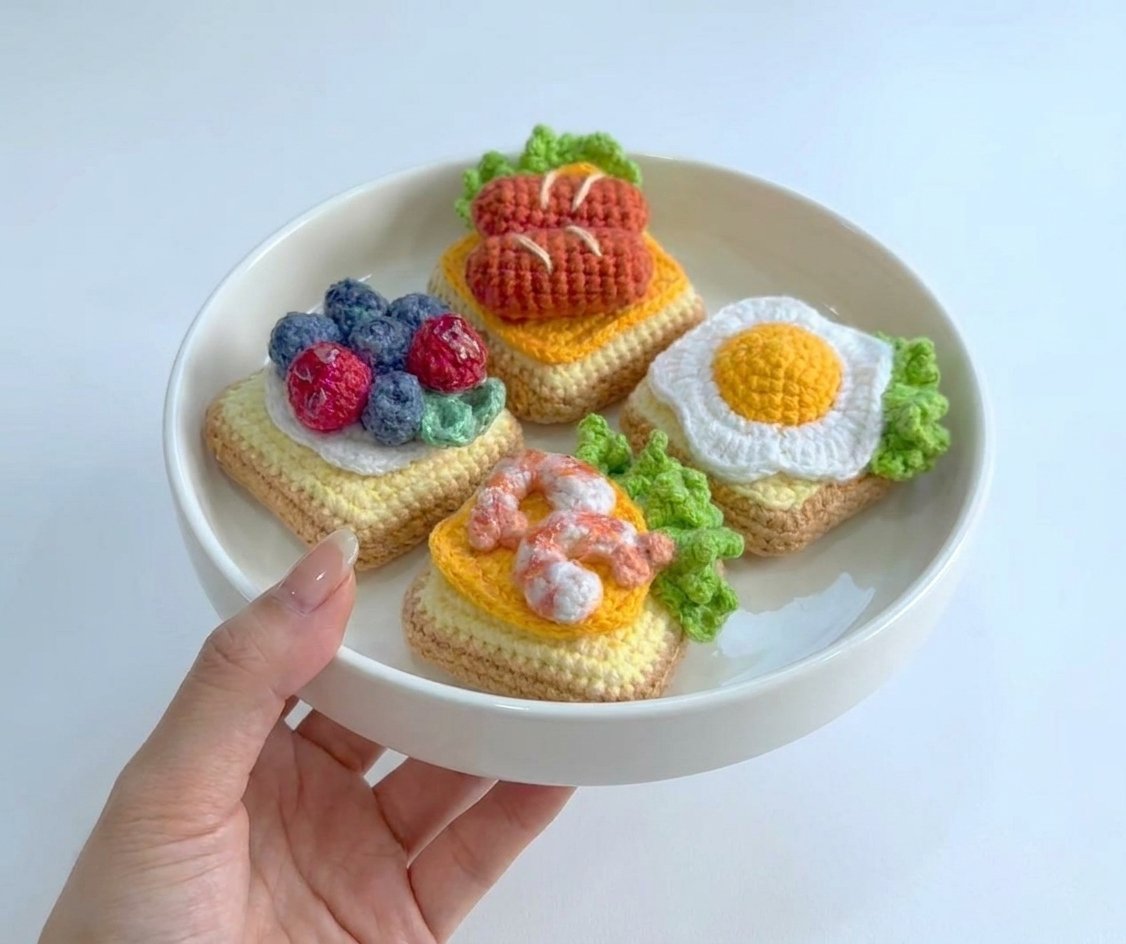
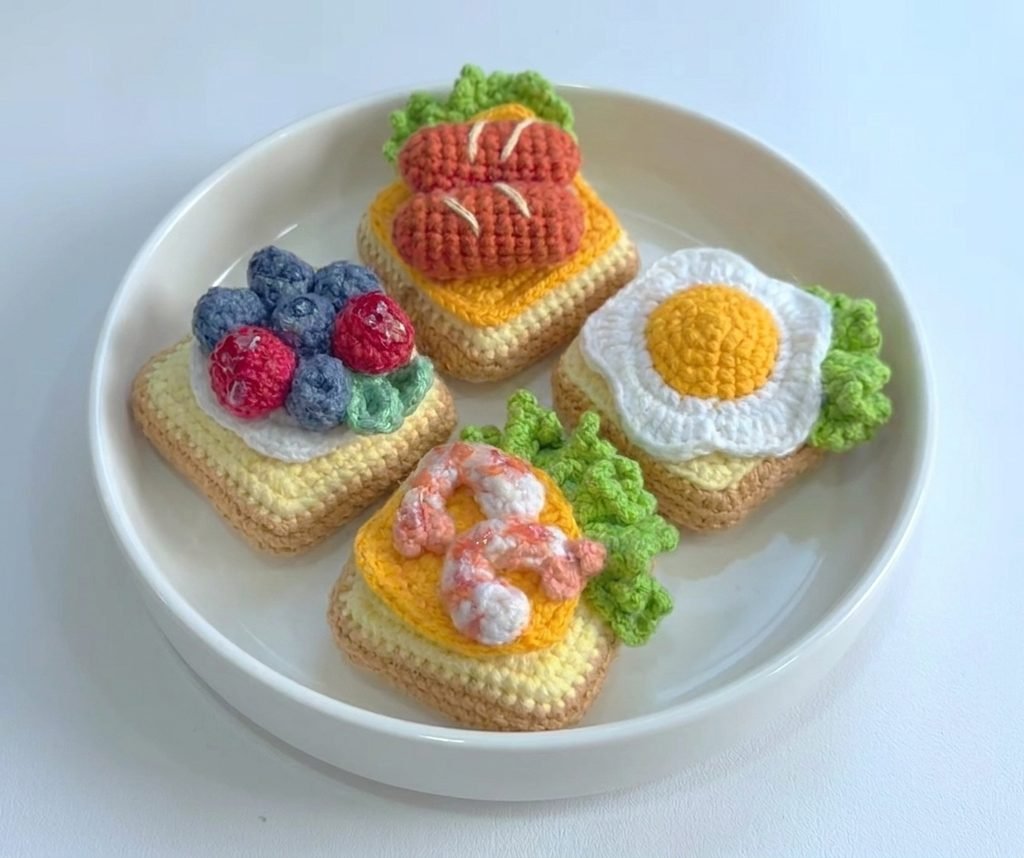
A full play-food set: four toast slices, each topped differently — sausage, a fried egg, mixed berries with whipped cream, and shrimp. Every component (toast, sausage, egg, berries, shrimp, cream, cheese, lettuce) is its own small build, then everything gets assembled and glued together at the end.
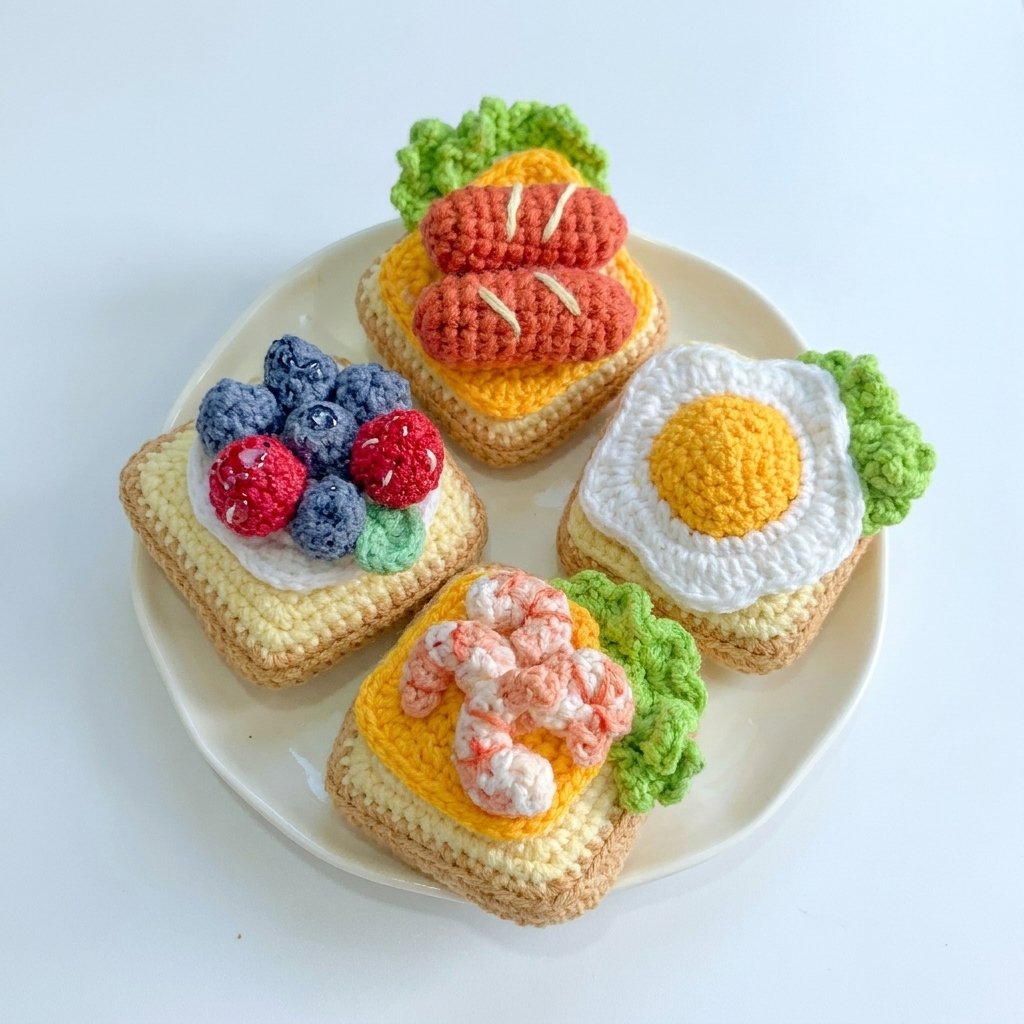

Quick glance
| Time | Skill | Makes | Hook |
| 4–6 hrs (full set) | Intermediate | 4 topped toast slices | 2.5mm |
Materials
- 4-ply milk cotton yarn in: cream/yellow (bread), brown (crust), orange-red (sausage), yellow + white (egg), blue + red (berries), pink/orange + white (shrimp), white (cream), orange-yellow (cheese), green (lettuce)
- 2.5mm crochet hook
- Hot glue
- Polyester fiberfill
- Yarn needle, scissors
Terms & abbreviations
| Abbrev | Term |
| ch | chain |
| sc | single crochet |
| hdc | half double crochet |
| dc | double crochet |
| tr | treble/triple crochet |
| inc | increase |
| dec | decrease (invisible dec unless noted) |
| MR | magic ring |
| FLO | front loop only |
| st(s) | stitch(es) |
| rnd(s)/row(s) | rounds unless noted as rows |
Part 1 — Toast Base (make 2 pieces per slice)
Round 1: MR, 8 sc. Join, chain 1. (8 sts)
Round 2: [sc 1, (3 sc in next st)] x4. (16 sts)
Round 3: [sc 2, (3 sc in next st)], then [sc 3, (3 sc in next st)] x3, then sc 1. (24 sts)
Round 4: [sc 3, (3 sc in next st)], then [sc 5, (3 sc in next st)] x3, then sc 2. (32 sts)
Round 5: [sc 4, (3 sc in next st)], then [sc 7, (3 sc in next st)] x3, then sc 3. (40 sts)
Round 6: [sc 5, (3 sc in next st)], then [sc 9, (3 sc in next st)] x3, then sc 4. (48 sts)
Round 7: [sc 6, (3 sc in next st)], then [sc 11, (3 sc in next st)] x3, then sc 5. (56 sts) At the last stitch, leave it unfinished and switch to brown yarn.
Rounds 8–10 (brown): Sc around, plain. (56 sts, all 3 rounds)
Fasten off, leaving a long tail for sewing. This is your front piece.
Back piece: Repeat Rounds 1–7 only (stop before switching to brown) for a second, flat piece. (56 sts, cream color only)
Assembly: Align the front and back pieces and sew each corresponding stitch together around the edge. Leave an opening, stuff with fiberfill, then sew the opening closed.
Part 2 — Sausage (make 2 per sausage-topped toast)
Round 1: MR, 6 sc.
Round 2: Inc around. (12 sts)
Rounds 3–11: Sc around, plain. (12 sts, all 9 rounds)
Stuff with fiberfill, then work 6 invisible decreases around to close. (6 sts) Fasten off, leave a tail, and sew the opening closed. Embroider a few diagonal cream/white lines across the finished sausage for the “sear mark” detail shown in the photo.
Part 3 — Fried Egg
Round 1 (yellow, yolk): MR, 5 sc.
Round 2: Inc around. (10 sts)
Round 3: [sc 1, inc] x5. (15 sts)
Round 4: [sc 2, inc] x5. (20 sts)
Round 5: Sc around, plain. (20 sts) At the last stitch, leave unfinished and switch to white.
Round 6 (white, worked in front loop only): Inc in every st around. (40 sts)
Round 7: *sc 1, hdc 1, (dc inc) x2, hdc 2, sc 1* — repeat around 5 times total. This creates the scalloped, irregular edge of the egg white.
Part 4 — Blueberry (make several)
Round 1: MR, 5 sc.
Round 2: Inc around. (10 sts)
Round 3: Sc around, plain. (10 sts)
Round 4: 5 invisible decreases around. (5 sts)
Fasten off, leaving a tail. Sew through the remaining 5 front loops and pull tight to close into a small round berry.
Part 5 — Raspberry
“almost the same way as the blueberry.”
R1: 6sc in MR
R2: 6inc [12]
R3 – R4: 12sc (2 rounds)
R5: 5 inv-dec
Part 6 — Shrimp
Round 1: 6 sc into a ring.
Round 2: 6 dc.
Round 3 (switch to orange): sc 1, hdc 1, dc 2, hdc 1, sc 1 — a small scalloped segment.
Round 4: Switch back to the previous color, repeat Round 3’s scallop pattern.
Rounds 5–7: Continue alternating colors each round, repeating the same scallop pattern — this builds the shrimp’s segmented, striped body.
Round 8: 1 invisible dec, 1 dc decrease, 1 invisible dec. Join with a slip stitch.
Tail fins: Chain 3, turn, sc into the 2nd chain from your hook, then hdc, then slip stitch. Repeat once more (chain 3, turn, sc, hdc, slip stitch) for the second fin.
Part 7 — Whipped Cream / Cream Cheese
Round 1: MR, 8 sc.
Round 2: Inc around. (16 sts)
Round 3: [sc 1, inc] x8. (24 sts)
Round 4: [sc 2, inc] x8. (32 sts)
Round 5 (scalloped swirl edge): Work in this sequence around: sc 3, (hdc inc), tr 1, dc 1, hdc 1, sc 3 — then (hdc inc), sc 2, hdc 1, (dc inc), tr 1, dc 1, hdc 1, sc 4 — then (hdc inc), dc 2, hdc 1, sc 2, (hdc inc), dc 1, sc 1.
This edge sequence is intricate and varies in stitch height throughout — it’s worth following the video closely for this round specifically, since the varying stitch combination is what creates the natural, irregular whipped-cream swirl look.
Join with a slip stitch, cut yarn.
Part 8 — Cheese Slice
Worked identically to the Toast Base, Rounds 1–6 only (48 sts), in an orange-yellow “cheese” color.
Part 9 — Lettuce
Pattern 1 (ruffled strip): Chain 28. Turn, work from the 3rd chain from your hook: 26 dc across.
Row 2: *Chain 4, sc into the next stitch* — repeat across the entire row. The chain-4 loops create the crinkled lettuce-leaf texture.
Smaller lettuce (for other toasts): Same construction, but starting with only 18 chains for a shorter piece.
Pattern 2 (an alternate lettuce style) is shown on-screen in the source video without a narrated stitch count — not included here.
Assembly
Based on the reference photos, each toast slice is topped as follows:
- Sausage toast: cheese slice, lettuce, 2 sausages
- Egg toast: lettuce, fried egg
- Berry toast: whipped cream, blueberries and raspberries clustered on top
- Shrimp toast: cheese slice, lettuce, shrimp, with a touch of glue-and-yarn or paint detail for the glossy “sauce” look shown in the photo
Glue or sew each topping onto its toast base in the arrangement shown in your reference photos.
Common mistakes
| Mistake | Fix |
| Toast base corners look uneven | Each round’s “3 sc in same stitch” corner increases need to land in the same 4 corner positions every round — use stitch markers to track them |
| Egg white edge looks too uniform | Round 7’s scallop pattern is what creates the irregular fried-egg look — don’t substitute a plain increase round |
| Shrimp segments don’t show clearly | Keep tension consistent when alternating colors each round so the color bands stay distinct rather than blending |
| Whipped cream swirl looks flat | The varying stitch heights in Round 5 are what create the dimensional swirl — resist the urge to simplify it to all one stitch type |
Finishing
Weave in all ends throughout each component before final assembly. Let any glued elements fully set before handling the finished toasts.