Crochet Ghost Bag Charm Pattern – Easy Bell Ghost Amigurumi Tutorial
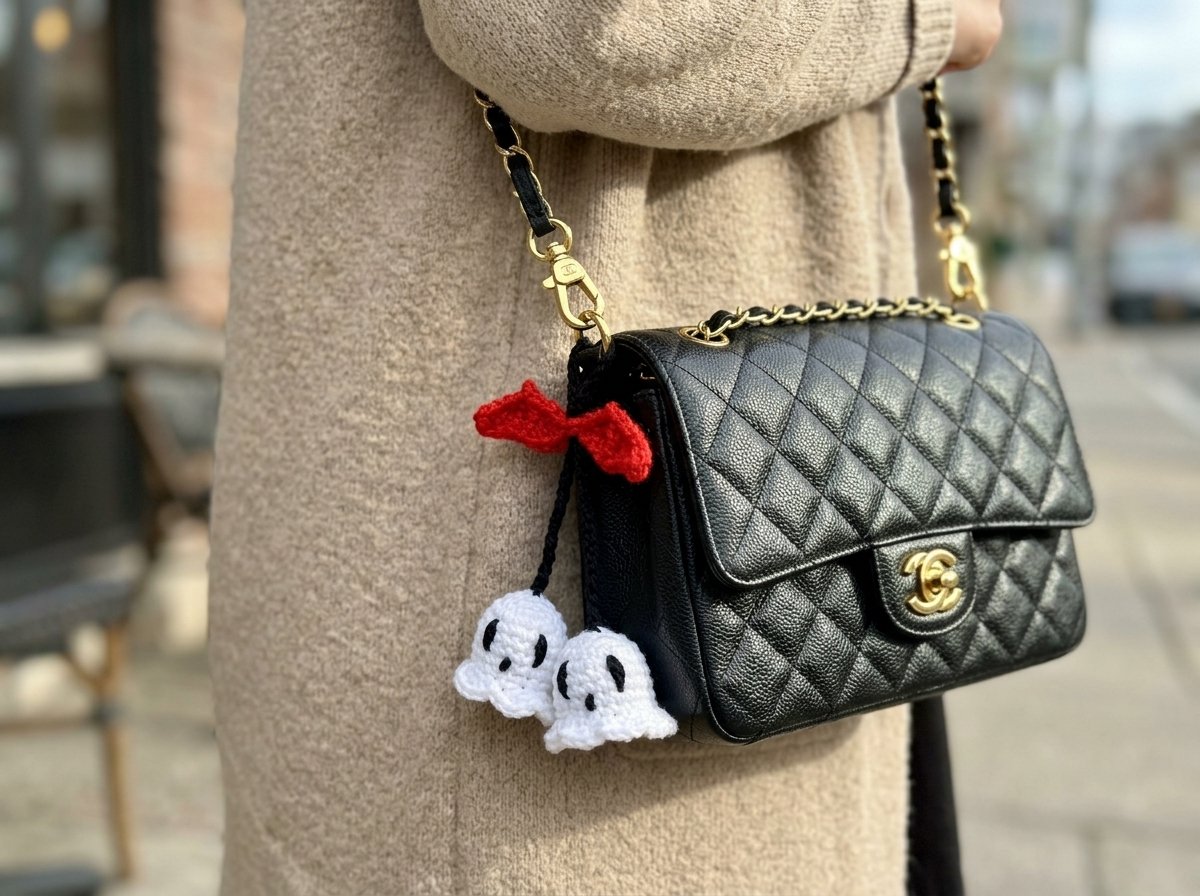
These little bell-shaped ghosts have quickly become one of my favorite quick makes for the season. Each one has a soft, scalloped skirt edge that gives it that classic “bell ghost” silhouette, a simple embroidered face, and the pair hang together from a little red bow — perfect clipped onto a bag, a keyring, or even a zipper pull.
Let’s make two ghosts, one bow, and a strap to tie it all together.
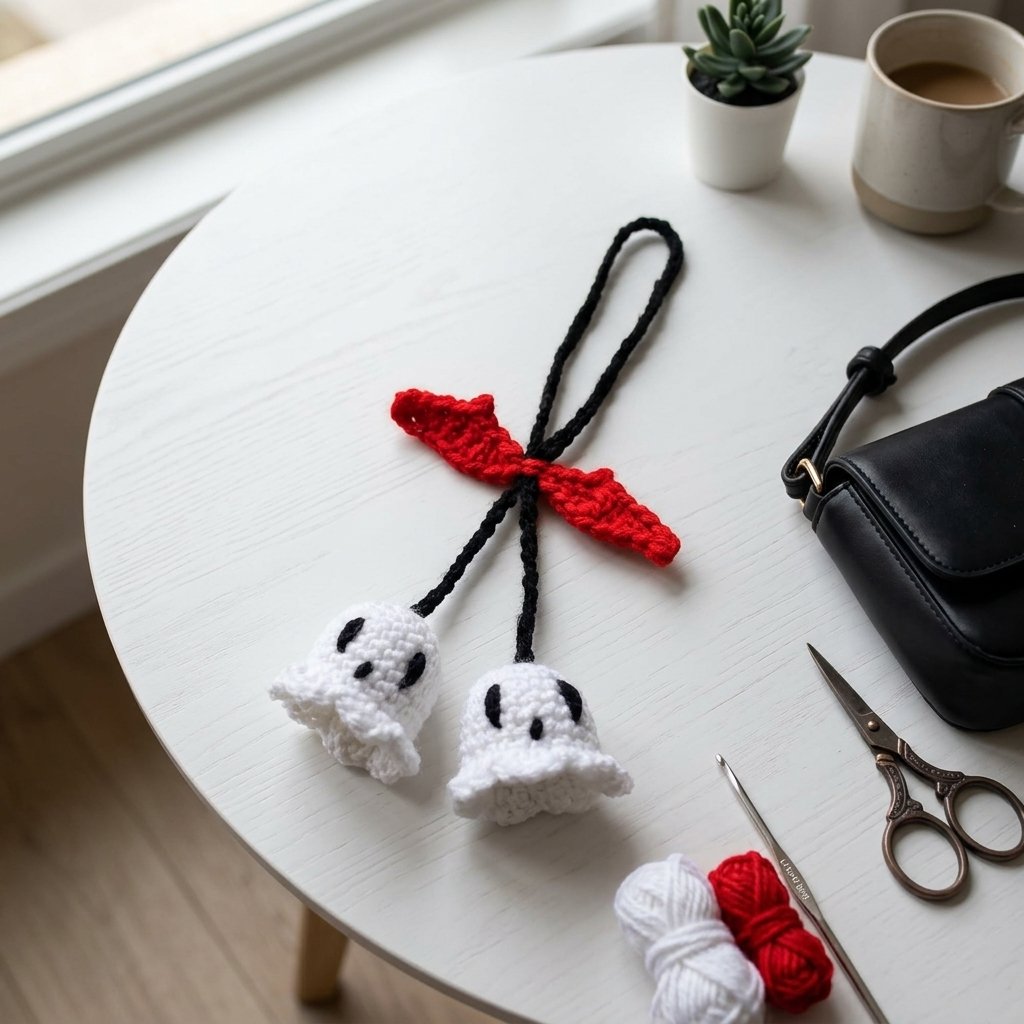


Materials
| Item | Notes |
| Worsted weight acrylic yarn, white | For the two ghosts |
| Worsted weight acrylic yarn, red | For the bow |
| Worsted weight acrylic yarn, black | For the face embroidery and the strap |
| 3.5mm crochet hook | |
| Scissors | |
| Darning/tapestry needle | |
| Stitch marker |
Abbreviations (US Terms)
| Abbreviation | Meaning |
| MR | magic ring |
| ch | chain |
| sl st | slip stitch |
| sc | single crochet |
| hdc | half double crochet |
| dc | double crochet |
| tr | treble/triple crochet |
| inc | increase (2 sc in the same stitch) |
| st(s) | stitch(es) |
Part 1: The Ghosts (Make 2)
This whole piece is worked in a continuous spiral — no joining slip stitch at the end of each round — right up until the scalloped edge at the very bottom.
| Round | Instructions | Stitch Count |
| 1 | 6 sc in a magic ring | 6 |
| 2 | 6 inc around | 12 |
| 3 | (1 sc, inc) ×6 | 18 |
| 4 | (5 sc, inc) ×3 | 21 |
| 5–9 | 21 sc around (5 rounds) | 21 |
The scalloped bottom edge: join with a slip stitch, then mark your first stitch. Skip 1 stitch, work 3 dc into the next stitch (this forms one shell), then slip stitch into the following stitch. Repeat this skip 1, shell of 3 dc, slip stitch pattern all the way around — you should get 7 shells total, forming that lovely bell-shaped, scalloped skirt. Join with a slip stitch, chain 1, cut your yarn, and weave in the end.
The face: using black yarn and your darning needle, embroider two small dot eyes and a simple little mouth onto the front of the ghost, wherever looks best to you — the beauty of this face is how simple and freehand it is.
Repeat the entire ghost to make a second one.
Part 2: The Bow
This little bow is worked as one flat, symmetrical piece along a single chain, with graduated stitch heights that curve each half into a pointed lobe.
- Chain 17.
- Skip the first chain, slip stitch into the next. Chain 1.
- Working into the back bumps of the remaining chain: sc, hdc, dc, tr into the next four stitches in turn.
- At the tip: chain 1, then slip stitch back into that same tr stitch — this little picot point is what shapes the pointed corner of the bow.
- Continue back down in reverse: dc, hdc, sc, then slip stitch into the next stitch — this slip stitch lands you right at the center pinch point of the bow.
- Mirror the whole sequence for the second half: sc, hdc, dc, tr into the next four stitches, chain 1 and slip stitch back into that tr for the second picot point, then dc, hdc, sc to finish.
- Chain 1, slip stitch into the same closing stitch, chain 1, and cut your yarn.
Weave in your ends, and you’ll have a neat, symmetrical little bow with a pinched center and two pointed lobes.
Part 3: The Strap and Assembly
- Using your black yarn, chain a length to suit how you’d like your charm to hang — 65 chains gave a nice drop for mine, but feel free to make yours shorter or longer. Cut the yarn once you reach your desired length.
- Thread this strap chain through the center pinch point of your bow, so it forms a loop at the top for attaching to a bag, zipper, or keyring. Secure both ends on the underside of the bow with a few small stitches and a knot, then trim any excess.
- For the two shorter connecting cords that link the bow down to each ghost, work the same way: attach a strand at the bow’s center point, bringing it down to the top of each ghost, and secure it there with a few stitches and a knot.
And that’s your finished ghost duo, dangling sweetly from their little red bow. I love how quick this one comes together — it’s the kind of project you can make a whole batch of for gifting, and the scalloped bell shape gives it so much more personality than a plain round ghost would.