Chunky Yarn Zombie Crochet Pattern – Free Loop Stitch Halloween Buddy
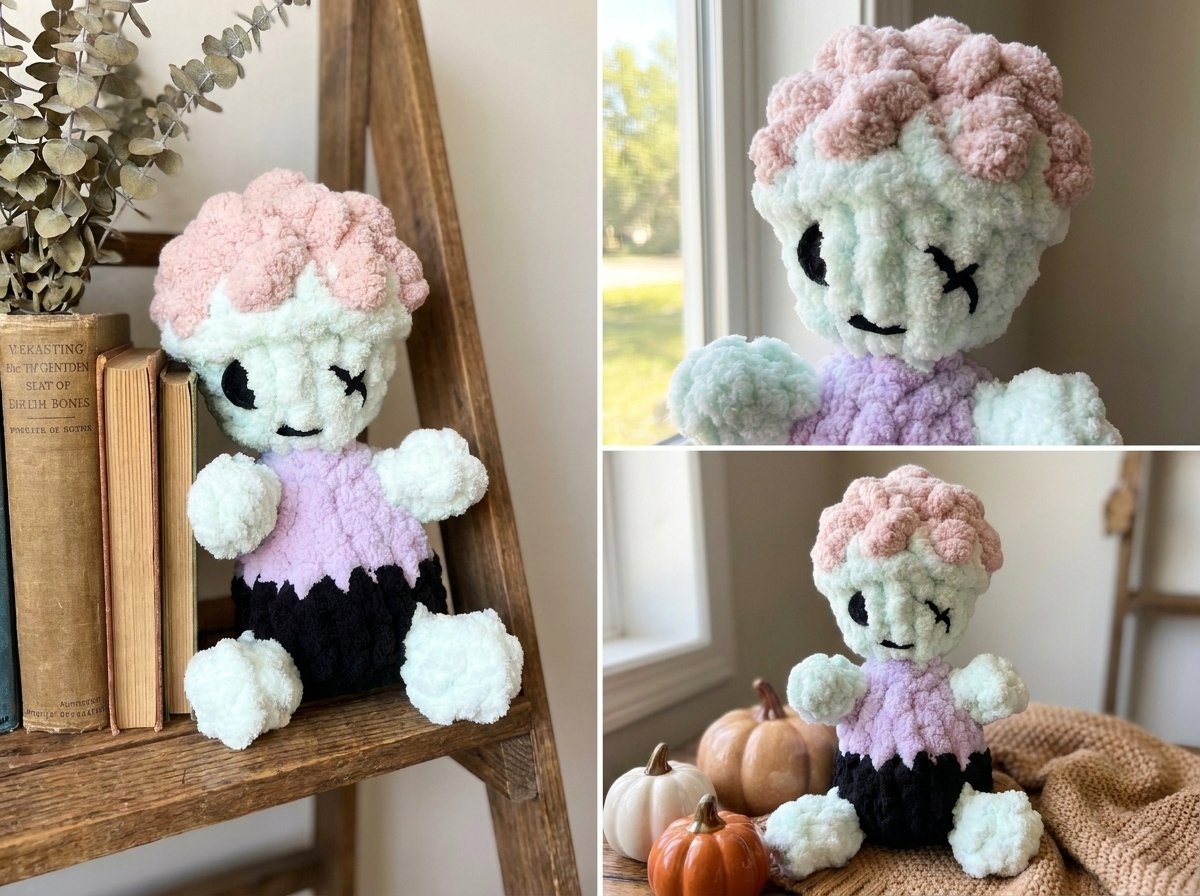
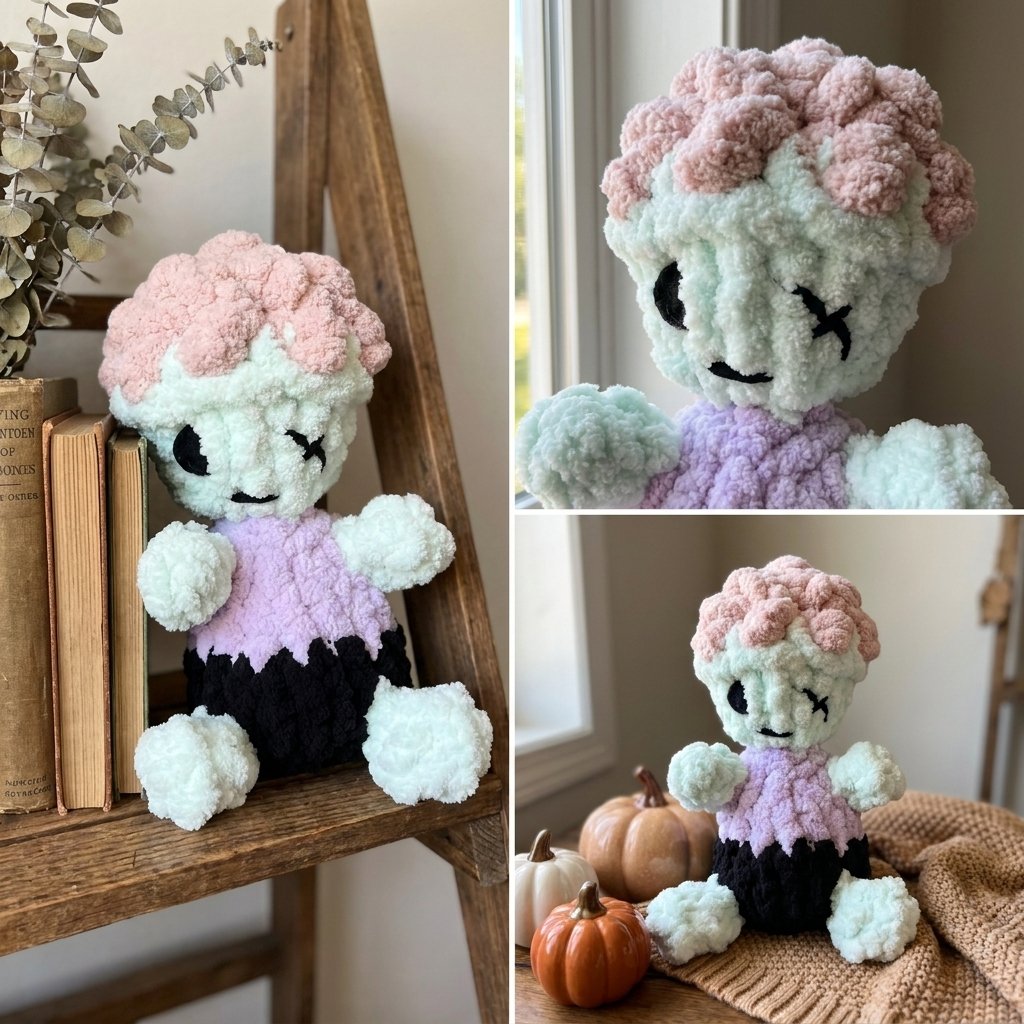
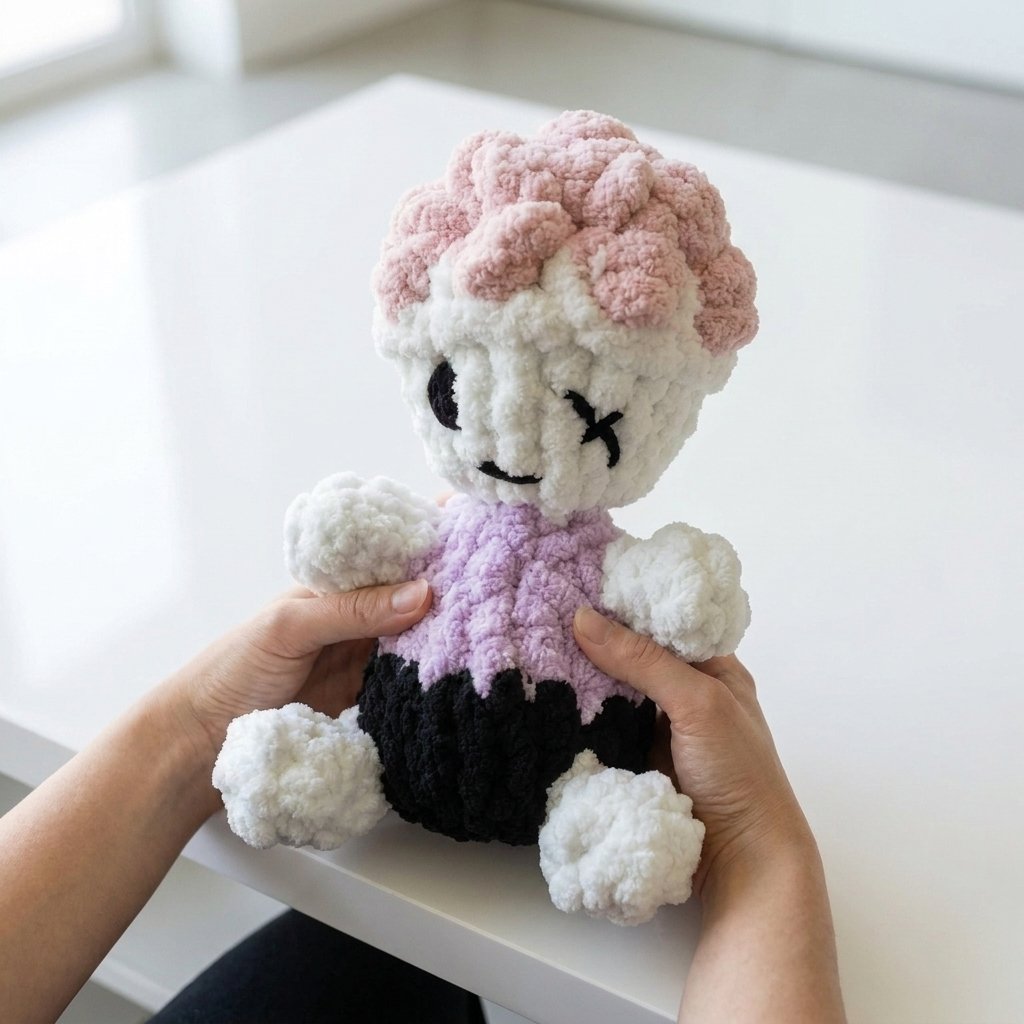
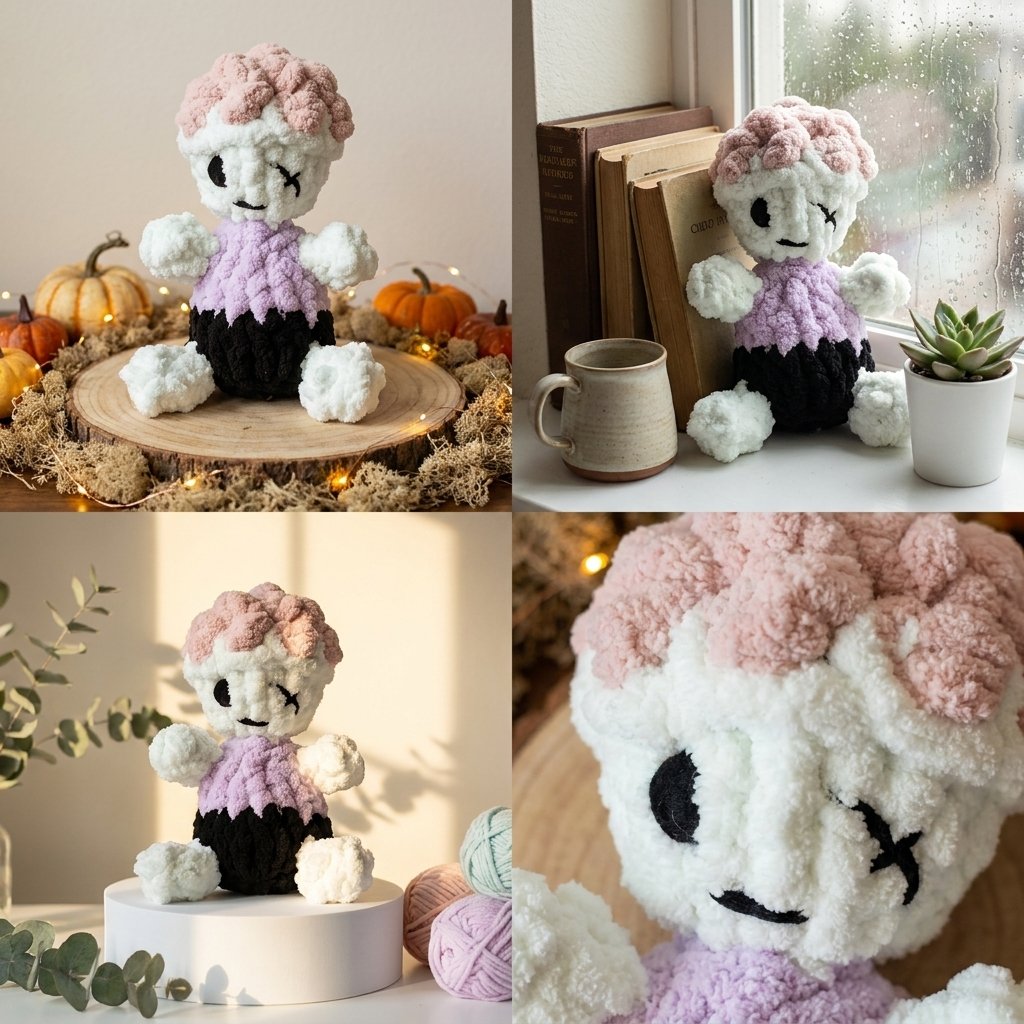
There’s something so satisfying about turning a few skeins of chunky yarn into a squishy little monster, and this zombie buddy might be my favorite Halloween make yet. He’s got a bumpy bobble-stitch brain peeking out of his head, a crisscross stitched eye, and a stitched-up mouth that gives him just the right amount of creepy-cute energy. If you’ve made any of my other Halloween buddies, you already know the drill — big yarn, big loops, and a finished friend in an evening.
This pattern uses simple finger-knitting style loop stitches (worked with a large hook or your fingers, depending on how you prefer to work with chunky yarn), so it comes together fast. No fussy gauge swatches, no tiny stitches to squint at. Just soft, oversized loops that build up into a plump little zombie.
Finished Size
Roughly 12–14 inches tall, depending on how tightly you pull your loops and how full you stuff him.
Materials
- Chunky/jumbo yarn in mint green (for the skin)
- Chunky/jumbo yarn in a soft pink or blush (for the brain top)
- Chunky/jumbo yarn in lavender (for the shirt)
- Chunky/jumbo yarn in black (for the pants and face embroidery)
- Polyester stuffing
- Embroidery needle (large-eye, yarn needle works well)
- Scissors
Feel free to swap in whatever colors you have on hand — the pink and mint were simply sale finds, so don’t feel locked into this exact palette. Any skin tone and any “brain” color will work just as well.
Stitches & Techniques Used
- Slip knot and chain
- Knit (basic loop stitch)
- Purl (backward loop stitch)
- Increase (adding a loop between two existing loops)
- Decrease (pulling two loops together)
- Bobble stitch (for the brain texture)
- Color changing by tying on a new strand
- Closing rounds from the inside out
- Basic embroidery for the face
If you’ve never done a bobble stitch before, it’s worth practicing on a scrap piece first. It’s simply pulling up a loop, wrapping around to grab another loop in that same spot, then pulling both back through — but it helps to get a feel for it before tackling the brain section, since that’s the most detailed part of this pattern.
Pattern Instructions
Head
- Make a slip knot, then chain 5 more for 6 loops total.
- Turn your work around and pull the tail through to form it into a circle. Knit across all 6 loops once.
- Increase to 8 loops: knit 1, knit 2, increase between loops 2 and 3, knit 4, knit 5, knit 6, increase between loops 6 and 7, knit 8.
- Knit across 8 loops, three times total (so you’ll have worked three full rows of 8).
- Purl across all 8 loops.
Note: If your face is coming out looking small, especially with thinner chunky yarn, simply add one extra row of knit 8 before moving on. This pattern’s proportions are based on a true jumbo/chunky weight yarn.
Brain (Bobble Section)
- Tie on your pink or blush color, cutting the mint and knotting the two strands together to secure.
- Work 8 bobble stitches across the top:
- Pull up a loop as normal.
- Wrap around and pull a second loop through that same stitch, so you now have two loops together.
- Wrap around again and pull both loops through to complete the bobble.
- Repeat this seven more times, working across the row, for 8 bobbles total.
- Decrease from 8 bobbles to 6:
- Make a bobble that also functions as a decrease by pulling up your first loop in the opposite direction from before, then closing it into the previous bobble stitch.
- Continue with two more standard bobbles.
- Work another decreasing bobble the same way, pulling two stitches together as you form it.
- Finish with two more regular bobbles. You should now have 6 loops on your hook/needle.
- Decrease from 6 down to 3, working normally (not as bobbles this time) — alternating right-over-left and left-over-right as you pull each loop through, until 3 loops remain.
- Cut a long tail (you’ll need extra length for the next step), thread it through the final 3 loops from the inside out, and pull tight to close the top.
Filling In the Brain Texture
Bobble stitches naturally leave small gaps between them, so before stuffing, take your long tail and weave it in and out around the bobbles — ducking under one, coming up through the next, and gently pulling to close up any visible holes. You’re not trying to flatten anything; the goal is to keep it bumpy and irregular so it reads as a brain. Work your way around the whole top until you’re happy with the coverage, then tie off and tuck the end down inside the head.
Finishing the Head
- Stuff the head firmly.
- Close the bottom opening by threading your yarn from the inside out, pulling tight, tying off, and tucking the tail inside.
- If you’d like simple button-style eyes instead of embroidery, this is the point to add them — tie on chunky black yarn where you want each eye, then knot and either bury or trim the ends. For an embroidered face like the sample zombie, wait until the whole doll is assembled (see the Face section below).
Body
- Using your shirt color (lavender in this sample), pull up 4 loops directly off the base of the head, working them in a slight circle rather than a straight line — this makes closing up the neck much easier later. Knit across the 4 loops once.
- Increase to 6 loops while purling back across: purl 1, purl 2 (increasing between them), knit 3, knit 4, then purl 5 and purl 6 for the row.
- Knit across 6 loops, two times total.
- Increase to 8: increase for 1, knit 2, knit 3, knit 4, increase for 5, knit 6, knit 7, knit 8.
- Knit across 8 loops once.
- Color change to your pants color: cut the shirt-color yarn, tie on the new color, and knit across 8 loops with the new color.
- Increase to 10: knit 1, increase for 2, knit 3, knit 4, knit 5, knit 6, increase for 7, knit 8, knit 9, knit 10.
- Knit across 10 loops, four times total.
- Cut yarn and stuff the body firmly.
- Close the bottom the same way as the head — thread from the inside out, pull tight, tie off, and tuck inside. Also snug up and tie off the neck join between the head and body, tucking that tail inside as well.
Arms (make 2)
- Just below the purl row on the body, pull up 2 loops close together on one side.
- Knit across the 2 loops.
- Increase to 4: increase for 1, knit 2, knit 3, knit 4.
- Knit across 4 loops once.
- Cut the yarn, close from the inside out, pull tight, then weave the tail back down to your starting point before tying off and tucking it into the body.
- Repeat for the second arm on the opposite side of the body.
Legs (make 2)
- Directly beneath each arm, pull up 2 loops, positioning the second loop right under the first.
- Knit across the 2 loops.
- Increase to 3: knit 1, increase, then knit the last loop.
- Increase to 4: increase on one side first, then knit across the remaining 3 loops.
- Knit across 4 loops once.
- Cut, close from the inside out, weave the tail back to the starting point, tie off, and tuck inside the body.
- Repeat for the second leg.
Face (Embroidered Version)
For a zombie with real personality, embroidering the face lets you get creative with asymmetry — a regular eye on one side and a crisscross “X” eye on the other reads as delightfully undead.
- Thread an embroidery needle with black yarn.
- Decide on your placement — a straight or slightly curved mouth low on the face, an eye a few rows up on one side, and a crisscross X eye on the other, leaving a few rows of space between the eyes and the mouth.
- Bring your needle up at the starting point of the mouth and stitch across to form a simple curved or straight line for the mouth.
- From the end of the mouth, bring the needle up one row higher to begin the first eye. Stitch just underneath the purl ridge rather than directly on it — pulling the yarn tight will naturally shift it into place. Wrap around the same spot roughly 7–8 times to build up a solid round or oval eye shape, adjusting how you angle each wrap depending on whether you want a rounder or more elongated eye.
- For the second eye, bring the needle up near where you want your crisscross, then stitch one diagonal line and cross it with a second diagonal line to form an X.
- If you like, add extra character with a stitched eyebrow, a second pass over the mouth for a bolder line, or a few random stitching lines elsewhere on the face for a stitched-together zombie look.
- Once you’re happy with the face, tie off your yarn securely and tuck the tail down inside the head.
Final Touches
Give your zombie a once-over, trim any stray yarn ends, and fluff up the bobble brain so it sits nice and full. And that’s it — a squishy, huggable little zombie ready to join your Halloween decor or trick-or-treat bowl display.