Hello Kitty Amigurumi Crochet Pattern – Cute & Easy Free Crochet Pattern
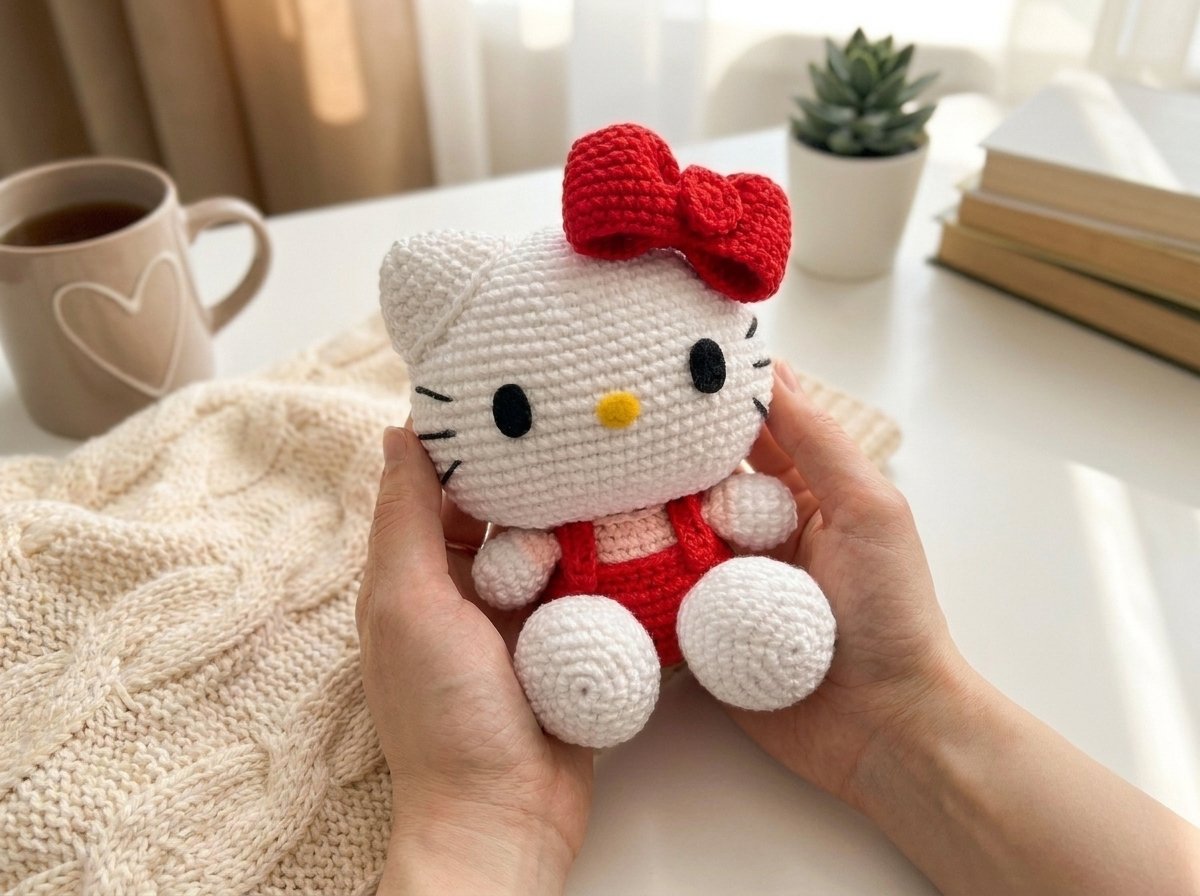
Make this adorable Hello Kitty Amigurumi Crochet Pattern with simple amigurumi techniques and easy-to-follow shaping.
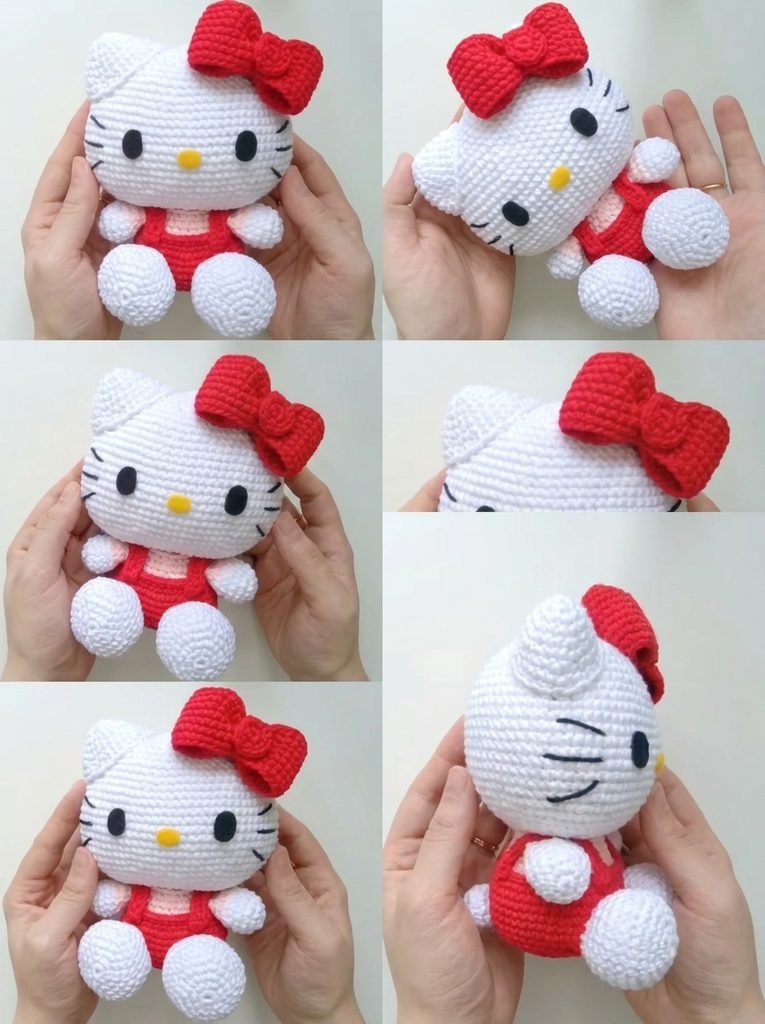
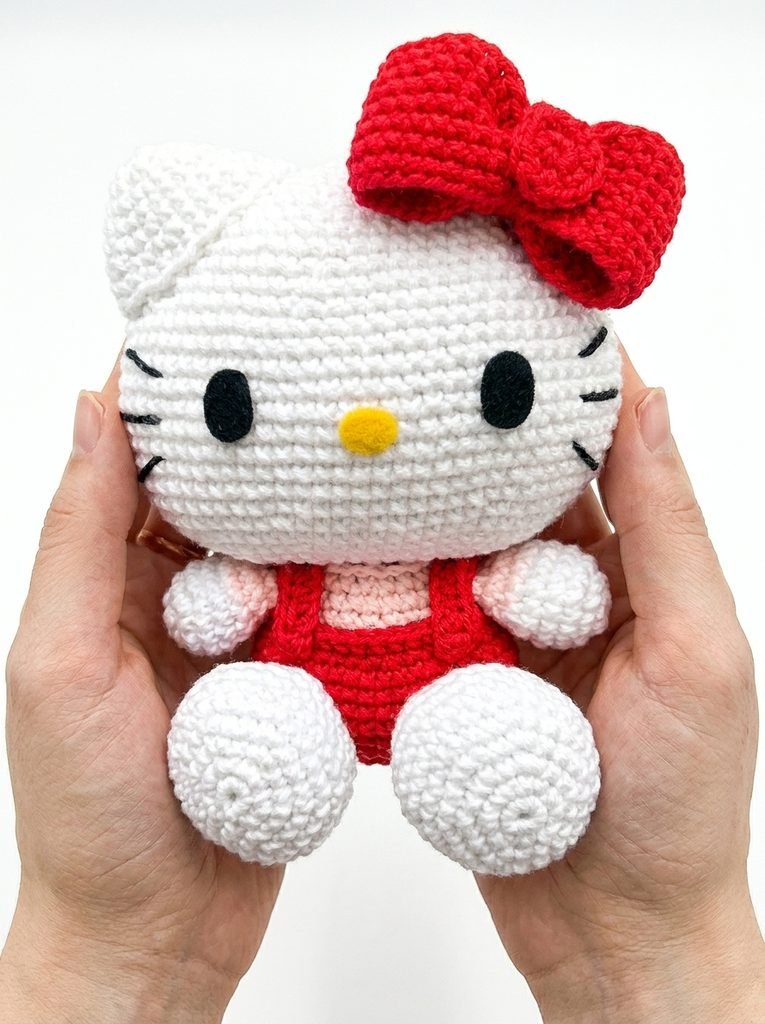
This cute crochet character features a soft white head, classic red bow, red outfit, tiny arms, rounded feet, and embroidered whiskers.
The finished amigurumi is approximately 15 cm tall and 12 cm wide, depending on your yarn tension and materials.
🎀 Pattern Level: Intermediate
🧶 Finished Size: Approx. 15 × 12 cm
🪡 Hook Size: 2.0 mm
❤️ Main Colors: White, red, pink & black
Hello Kitty Amigurumi Pattern
Why You’ll Love This Pattern
- Cute and compact finished size
- Classic white, red, and pink color combination
- Fun project for amigurumi lovers
- Separate pieces make assembly easier
- Great for handmade gifts and crochet collections
- Uses basic amigurumi shaping techniques
Pattern Information
| Details | Information |
| Pattern Type | Amigurumi |
| Skill Level | Intermediate |
| Finished Size | Approx. 15 cm × 12 cm |
| Hook | 2.0 mm |
| Yarn Weight | Approx. 2 mm |
| Main Color | White |
| Outfit | Red + pink |
| Bow | Red |
| Eyes | Black felt |
| Nose | Yellow felt |
| Crochet Terms | US terms |
Materials
Gather all your materials before starting the project.
| Material | Quantity / Color |
| Crochet hook | 2.0 mm |
| Yarn | Approx. 2 mm thick |
| White yarn | Main color |
| Red yarn | Bow & outfit |
| Pink yarn | Outfit & arms |
| Black yarn | Whiskers |
| Black felt | Eyes |
| Yellow felt | Nose |
| Stuffing | As needed |
| Yarn needle | 1 |
| Scissors | 1 pair |
| Stitch marker | 1 |
| Sewing pins | For positioning |
| Liquid silicone | For attaching details |
Optional
- Small amount of pink blush for the cheeks
- Stitch counter
- Stuffing tool
Crochet Abbreviations
| Abbreviation | Meaning |
| MR | Magic Ring |
| ch | Chain |
| sc | Single Crochet |
| inc | Increase |
| dec | Decrease |
| sl st | Slip Stitch |
| hdc | Half Double Crochet |
| BLO | Back Loop Only |
Note: This pattern uses US crochet terminology.
Before You Start
Work your amigurumi stitches tightly so the stuffing doesn’t show through.
Use a stitch marker to keep track of the beginning of each round.
Stuff each piece gradually as you crochet.
Part 1: Crochet the Head
The head starts with a foundation chain and is worked around both sides to create an oval shape.
Head Stitch Count
| Round | Instructions | Total |
| 1 | Ch 14; inc, 11 sc, inc around opposite side | 30 |
| 2 | 2 inc, 11 sc, 4 inc, 11 sc, 2 inc | 38 |
| 3 | (2 sc, inc, 13 sc, inc, 2 sc) ×2 | 42 |
| 4 | (6 sc, inc) ×6 | 48 |
| 5 | 2 inc, 20 sc, 3 inc, 22 sc, inc | 54 |
| 6 | (8 sc, inc) ×6 | 60 |
| 7 | 2 inc, 26 sc, 3 inc, 28 sc, inc | 66 |
| 8 | (10 sc, inc) ×6 | 72 |
| 9–18 | 72 sc | 72 |
The head reaches its widest point at 72 stitches before the decreases begin.
Head Decreases
| Round | Instructions | Total |
| 19 | (10 sc, dec) ×6 | 66 |
| 20 | 2 dec, 28 sc, 3 dec, 26 sc, dec | 60 |
| 21 | (8 sc, dec) ×6 | 54 |
| 22 | 2 dec, 22 sc, 3 dec, 20 sc, dec | 48 |
| 23 | 48 sc | 48 |
| 24 | (6 sc, dec) ×6 | 42 |
| 25 | (5 sc, dec) ×6 | 36 |
| 26 | (4 sc, dec) ×6 | 30 |
| 27 | (3 sc, dec) ×6 | 24 |
| 28 | (2 sc, dec) ×6 | 18 |
| 29 | (sc, dec) ×6 | 12 |
| 30 | 6 dec | 6 |
Start adding stuffing around Round 26.
Shape the head as you go so it stays smooth and rounded.
When you reach 6 stitches, fasten off.
Thread the yarn onto a needle and close the remaining opening through the front loops.
Part 2: Crochet the Ears
Make 2 white ears.
| Round | Instructions | Total |
| 1 | MR, 6 sc | 6 |
| 2 | 6 inc | 12 |
| 3 | (sc, inc) ×6 | 18 |
| 4 | (5 sc, inc) ×3 | 21 |
| 5 | (6 sc, inc) ×3 | 24 |
| 6 | (5 sc, inc) ×4 | 28 |
| 7 | (inc, 13 sc) ×2 | 30 |
Fasten off and leave a long sewing tail.
Attach the Ears
Place the ears toward the upper sides of the head.
Don’t flatten them completely.
Add a little stuffing while sewing to help them keep their shape.
Sew both ears securely to the head.
Part 3: Add the Face
The eyes and nose are made from felt.
Face Measurements
| Detail | Approx. Size |
| Black eye | 13 × 10 mm |
| Yellow nose | 11 × 8 mm |
Cut:
- 2 black oval eyes
- 1 yellow oval nose
Eye Placement
Place the eyes around the middle of the head.
The eye placement begins around Round 13.
Leave approximately 11 stitches between the eyes.
Place the nose between the eyes, slightly lower than their center line.
Secure the felt pieces with suitable craft adhesive.
Part 4: Embroider the Whiskers
Use black yarn and a yarn needle.
Make 3 whiskers on each side.
| Whisker | Placement |
| Upper | Slightly diagonal |
| Middle | Mostly horizontal |
| Lower | Slightly diagonal downward |
Start each whisker approximately 3–4 stitches behind the eye.
Use the crochet rows as your guide to keep both sides balanced.
Part 5: Crochet the Body
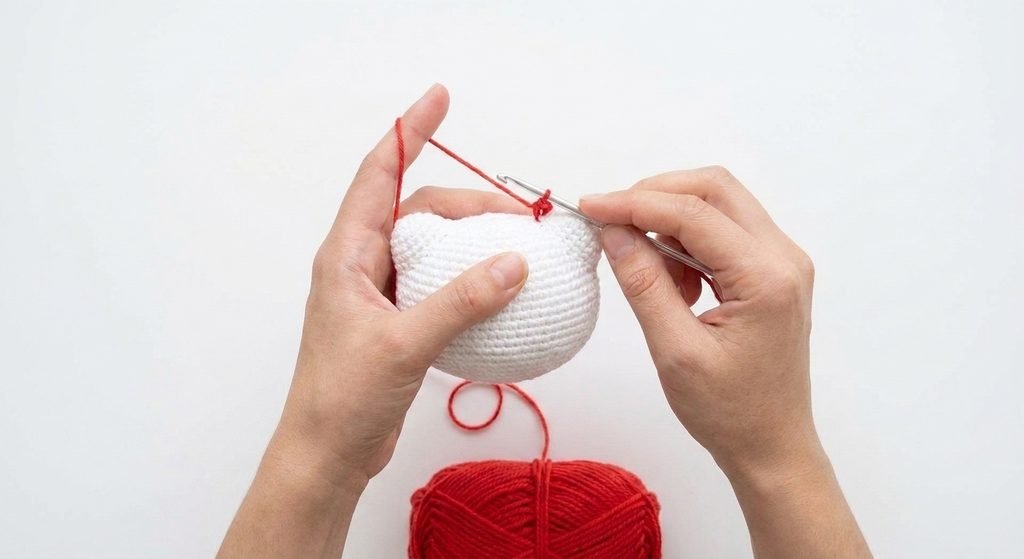
Start with red yarn.
Body
| Round | Instructions | Total |
| 1 | Ch 14; inc, 11 sc, inc around opposite side | 30 |
| 2 | 2 inc, 11 sc, 4 inc, 11 sc, 2 inc | 38 |
| 3 | (2 inc, 17 sc) ×2 | 42 |
| 4–9 | 42 sc | 42 |
| 10 | (5 sc, dec) ×6 | 36 |
Change to pink yarn before completing the final stitch of Round 10.
Pink Section
| Round | Instructions | Total |
| 11 | BLO: (4 sc, dec) ×6 | 30 |
| 12 | (3 sc, dec) ×6 | 24 |
| 13 | 24 sc | 24 |
| 14 | (4 sc, dec) ×4 | 20 |
Fasten off and leave a long tail.
Add the Red Overall Section
Return to the exposed loops created by Round 11.
Join red yarn to the loose loops.
Work:
1 round of sc
Stuff the body.
Then sew it securely to the bottom of the head.
Keep the body centered as you sew.
Part 6: Crochet the Arms
Make 2 arms.
Start with white yarn.
| Round | Instructions | Total |
| 1 | MR, 6 sc | 6 |
| 2 | 6 inc | 12 |
| 3 | (sc, inc) ×6 | 18 |
| 4–5 | 18 sc | 18 |
| 6 | Change to pink; (4 sc, dec) ×3 | 15 |
| 7 | (3 sc, dec) ×3 | 12 |
| 8 | (sc, dec) ×4 | 8 |
Add a small amount of stuffing to the white portion.
Flatten the bottom.
Work 4 sc across the opening.
Fasten off and leave a sewing tail.
Make the second arm the same way.
Attach the Arms
Position the arms approximately two rounds below the neck.
They should sit just above the red outfit.
Sew both arms firmly into place.
Part 7: Make the Overall Straps
Use red yarn.
Strap ×2
Ch 17
Starting in the third chain:
15 hdc
Fasten off.
Make a second strap.
Position the straps over the red outfit and secure them with a small amount of suitable adhesive.
Part 8: Crochet the Legs
Make 2 white legs.
| Round | Instructions | Total |
| 1 | MR, 6 sc | 6 |
| 2 | 6 inc | 12 |
| 3 | (sc, inc) ×6 | 18 |
| 4 | (2 sc, inc) ×6 | 24 |
| 5 | (3 sc, inc) ×6 | 30 |
| 6–9 | 30 sc | 30 |
| 10 | (3 sc, dec) ×6 | 24 |
| 11 | (2 sc, dec) ×6 | 18 |
| 12 | (sc, dec) ×6 | 12 |
Fasten off.
Leave a long tail for sewing.
Stuff each leg and shape the rounded foot.
Make the second leg the same way.
Attach the Legs
Position the legs underneath the body.
Keep some of the red outfit visible between them.
Align each leg roughly underneath an arm.
Sew them securely while checking that the doll can sit upright.
Part 9: Crochet the Tail
Use white yarn.
| Round | Instructions | Total |
| 1 | MR, 6 sc | 6 |
| 2 | 6 inc | 12 |
| 3 | (sc, inc) ×6 | 18 |
| 4–6 | 18 sc | 18 |
| 7 | (sc, dec) ×6 | 12 |
| 8 | (sc, dec) ×4 | 8 |
Fasten off.
Leave a long sewing tail.
Lightly stuff the tail.
Tail Placement
Sew the tail to the back of the body.
Position it so it helps support the amigurumi when sitting.
This gives the finished piece extra stability.
Part 10: Crochet the Red Bow
The large bow is worked as a circular tube and gathered in the center.
Bow
Ch 38
Make sure the chain isn’t twisted.
Join with a slip stitch.
Round 1
Ch 1.
Work:
38 sc
Join to the first sc with a slip stitch.
Rounds 2–7
Ch 1.
Work:
38 sc
Repeat for 7 total rounds.
Fasten off and leave a long tail.
Shape the Bow
Flatten the crocheted tube.
Find the center.
Use the long yarn tail to wrap tightly around the middle.
Continue wrapping until two clear bow loops form.
Tie off at the back.
Adjust the loops with your fingers until they look even.
Attach the Bow
Place the bow on the upper side of the head.
Secure it with suitable adhesive.
You can temporarily use pins while the adhesive dries.
Remove all pins before handling the finished amigurumi.
Part 11: Make the Bow Center
Use red yarn.
| Round | Instructions | Total |
| 1 | MR, 6 sc | 6 |
| 2 | 6 inc | 12 |
Fasten off.
Close the opening neatly with an invisible finish.
Attach the small circle to the center of the bow.
Final Assembly Checklist
Before finishing your Hello Kitty amigurumi, check each part.
| ✓ | Check |
| ☐ | Both ears are securely attached |
| ☐ | Eyes are evenly positioned |
| ☐ | Nose is centered |
| ☐ | Whiskers are balanced |
| ☐ | Body is centered under the head |
| ☐ | Arms are securely sewn |
| ☐ | Legs are positioned evenly |
| ☐ | Tail supports the sitting position |
| ☐ | Overall straps are attached |
| ☐ | Bow is firmly secured |
| ☐ | All yarn ends are hidden |
Tips for a Neat Finish
Use tight stitches
This helps prevent stuffing from showing through the crochet fabric.
Stuff gradually
Add stuffing little by little while shaping the head and body.
Check placement before sewing
Pin the ears, arms, and legs temporarily before making permanent stitches.
Take your time with the face
The eyes, nose, and whiskers have a big effect on the finished expression.
Shape the bow
After gathering the center, manually adjust both loops for a fuller appearance.
Hello Kitty Amigurumi Stitch Count Cheat Sheet
Save this section as a quick reference while crocheting.
| Piece | Stitch Progression |
| Head | 30 → 38 → 42 → 48 → 54 → 60 → 66 → 72 → 6 |
| Ears ×2 | 6 → 12 → 18 → 21 → 24 → 28 → 30 |
| Body | 30 → 38 → 42 → 36 → 30 → 24 → 20 |
| Arms ×2 | 6 → 12 → 18 → 15 → 12 → 8 |
| Legs ×2 | 6 → 12 → 18 → 24 → 30 → 24 → 18 → 12 |
| Tail | 6 → 12 → 18 → 12 → 8 |
| Bow | 38 sts × 7 rounds |
| Bow Center | 6 → 12 |
Frequently Asked Questions
How big is the finished Hello Kitty amigurumi?
The finished piece is approximately 15 cm tall and 12 cm wide when made with the recommended materials.
What crochet hook do I need?
Use a 2.0 mm crochet hook.
What yarn colors are needed?
You’ll need:
White + red + pink + black
You’ll also need black and yellow felt for the face.
Is this pattern beginner-friendly?
This project is better suited to crocheters who already know basic amigurumi techniques such as magic rings, increases, decreases, stuffing, and sewing pieces together.
Can I make it larger?
Yes.
Using thicker yarn and a larger crochet hook will generally create a larger finished piece.
Keep in mind that your stitch tension and stuffing will also affect the final size.
Can I change the colors?
Absolutely.
You can customize the outfit and bow with your favorite colors while keeping the white head and facial details.
More Cute Amigurumi Crochet Ideas
If you love making small crochet characters, this style of project is perfect for building an adorable handmade collection.
Try experimenting with:
- Crochet animal amigurumi
- Mini crochet dolls
- Cute crochet keychains
- Character-inspired crochet projects
- Small crochet gifts
Happy crocheting! 🧶🎀