Easy Crochet Panda Plushie Pattern (Free & Beginner-Friendly)
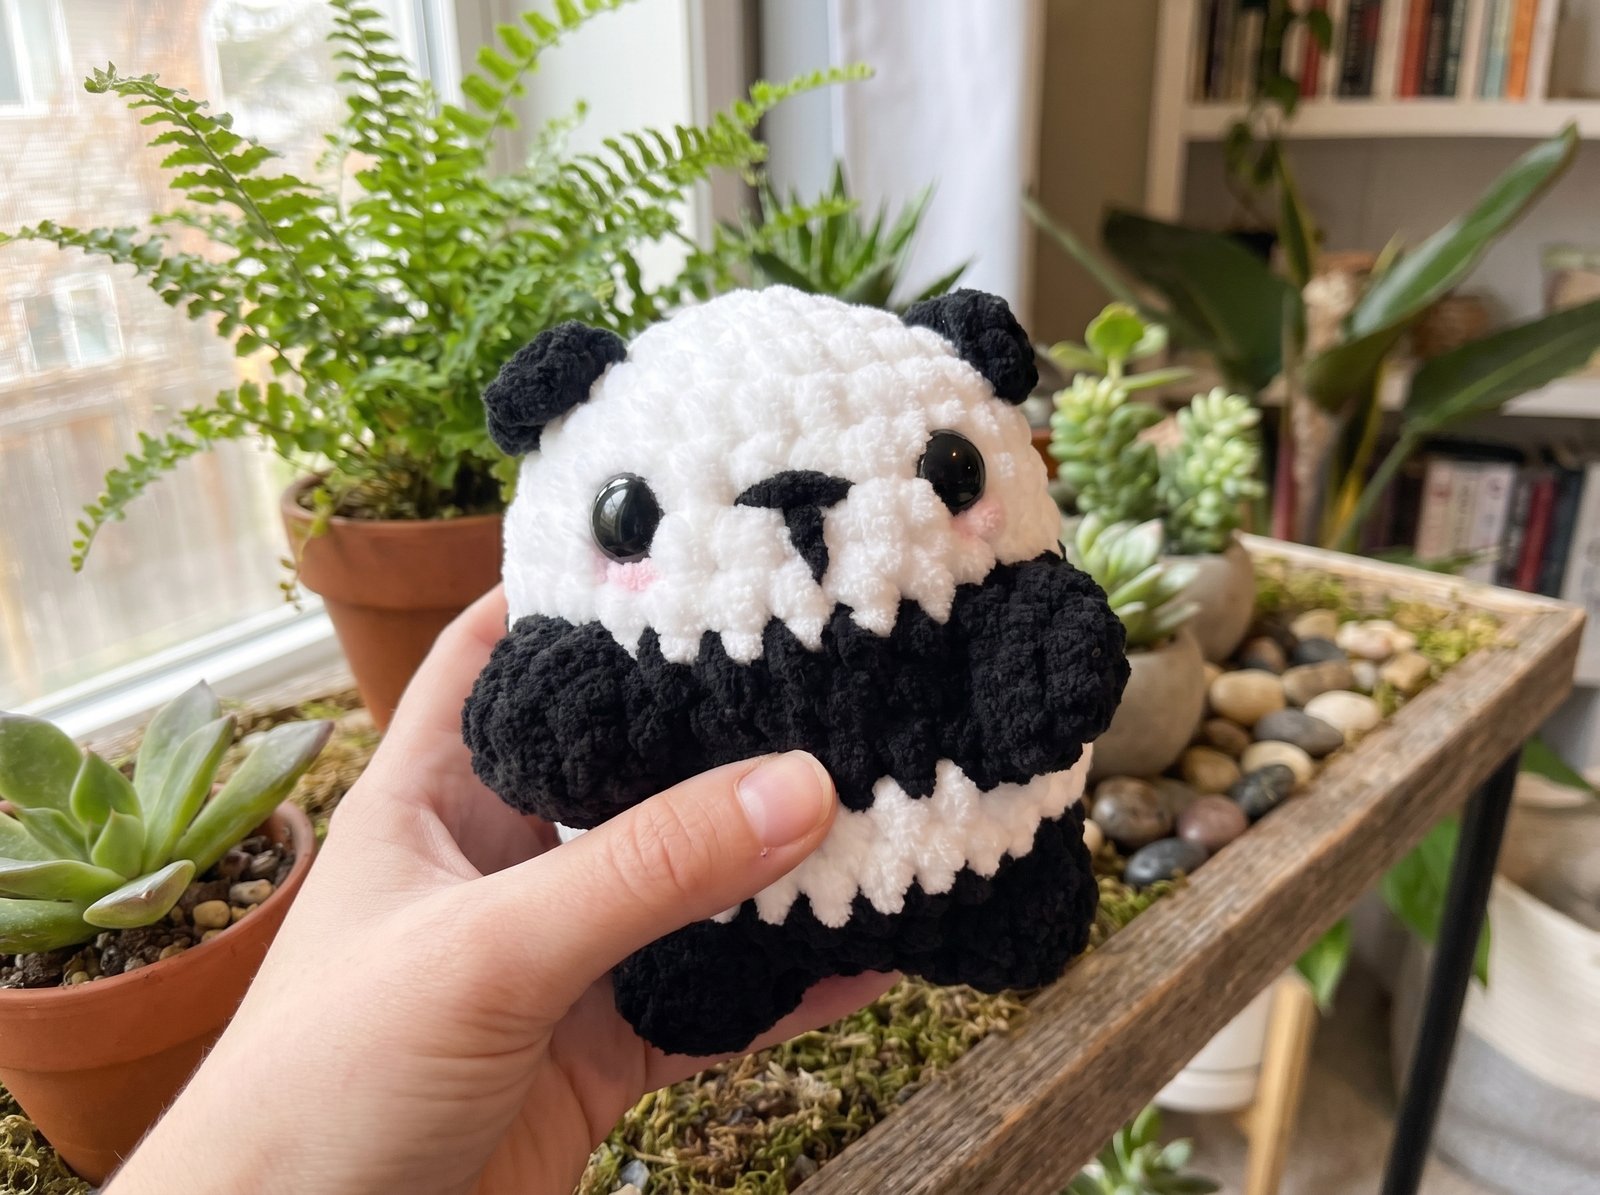
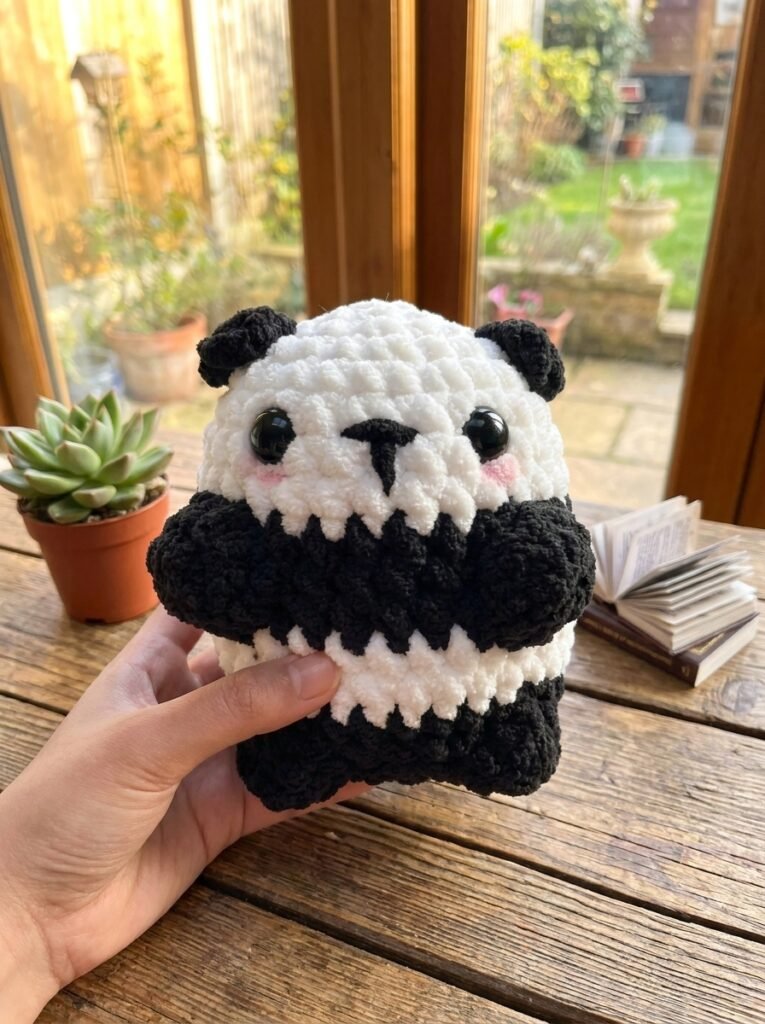
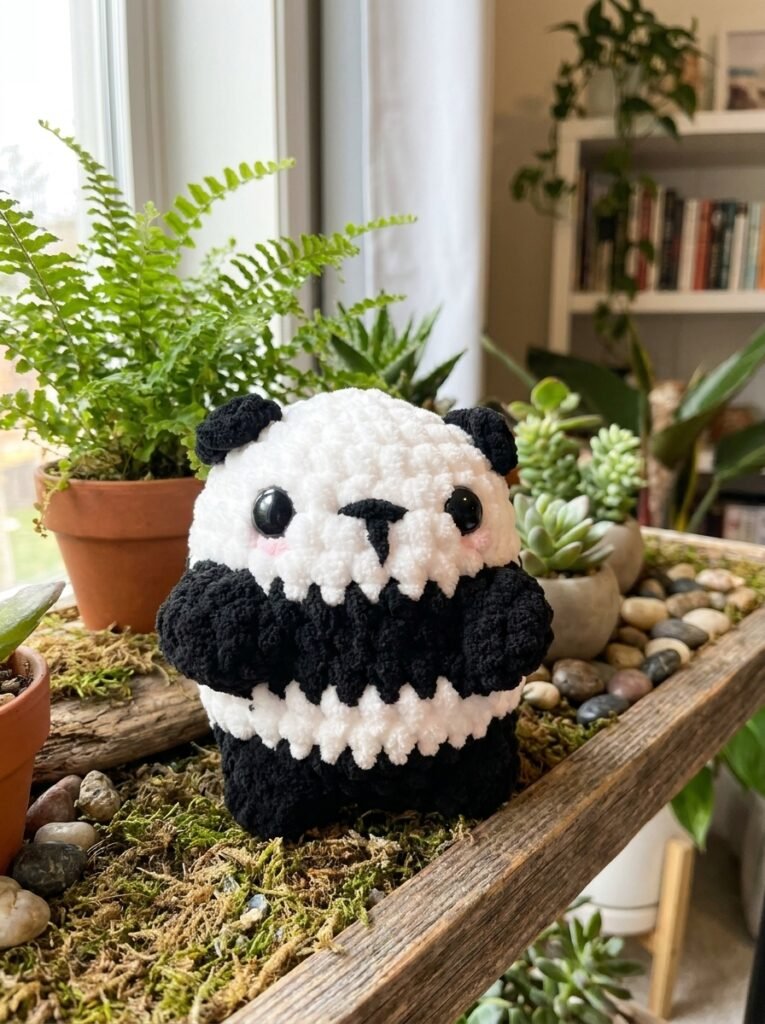
A round, huggable panda plushie built from a single continuously-worked body with color-blocked stripes, plus tiny separate ears, arms, and legs attached with a clever knot-instead-of-sew technique. The soft, fuzzy texture in the photos comes from a chenille/velvet-style yarn, which is what gives this panda its plush, squishable look rather than a typical sharp-stitch amigurumi finish.
Quick glance
| Time | Skill | Finished size | Hook |
| 3–4 hrs | Beginner–Intermediate (color changes + multiple small parts) | approx. 4–5 in | 6.5mm |
Materials
- Chenille or velvet-style yarn in white, black, and a small amount of pink (for the blush) — this soft yarn type is what gives the plush texture shown in the photos
- 6.5mm crochet hook
- Polyester fiberfill stuffing
- Two 16mm safety eyes
- Darning needle, scissors
Terms & abbreviations
| Abbrev | Term | Notes |
| sc | single crochet | the only stitch used for the body, arms, and legs |
| hdc | half double crochet | used once, in the ear |
| dc | double crochet | used once, in the ear |
| inc | increase | 2 sc in same st |
| dec | invisible decrease | insert into next 2 sts as if for 1 sc, yarn over, pull through both loops |
| MR | magic ring | — |
| st(s) | stitch(es) | — |
| rnd(s) | round(s), continuous spiral — close each round with a slip stitch + ch 1 rather than joining, matching the source technique | — |
Part 1 — Body (one continuous piece, color-blocked)
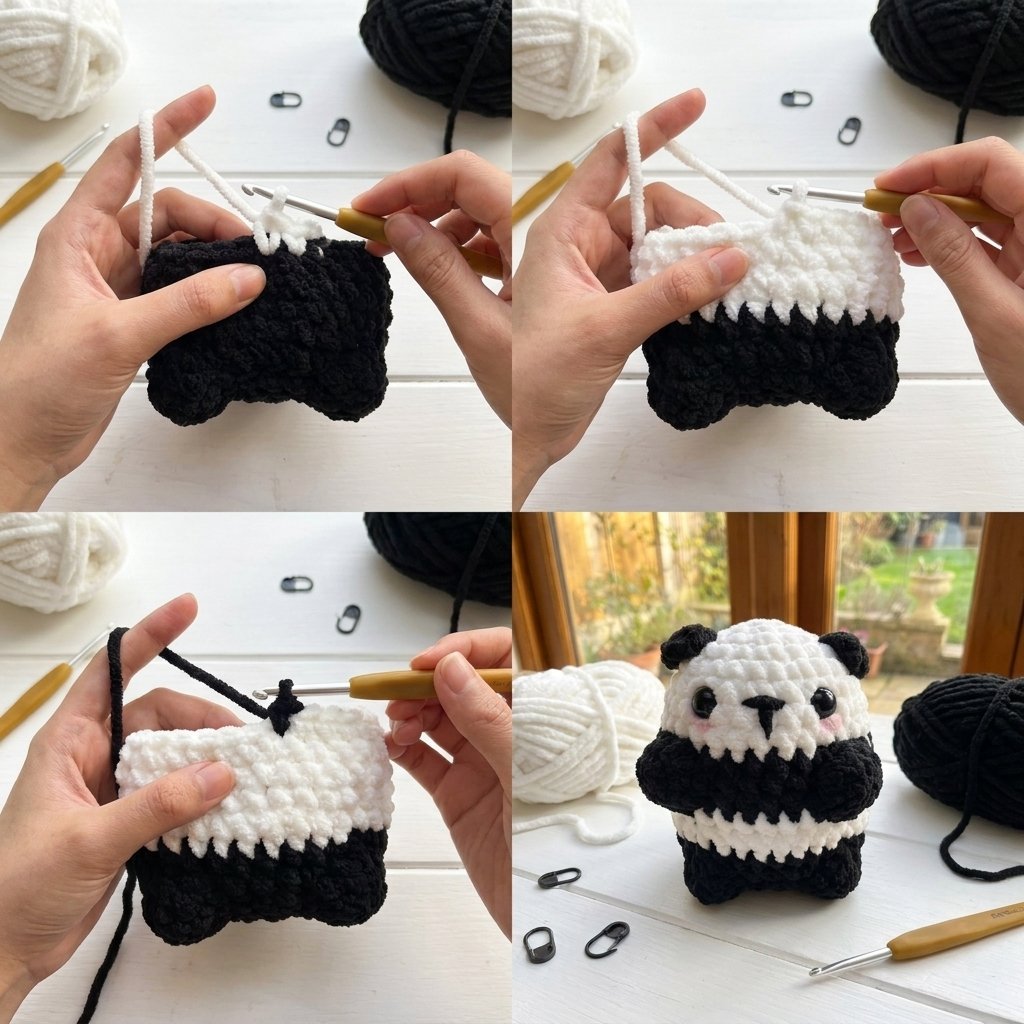
Color sequence: White → Black → White → Black, then decreases continue in black through closing.
| Rnd | Instruction | St count | Color |
| 1 | 6 sc in MR | 6 | White |
| 2 | inc around | 12 | White |
| 3 | [sc 1, inc] x6 | 18 | White |
| 4 | [sc 2, inc] x6 | 24 | White |
| 5 | [inc, sc 3] x6 | 30 | White |
| 6–8 | sc around (3 rounds even) | 30 | White |
| 9–11 | sc around (3 rounds even) | 30 | Black |
| 12–13 | sc around (2 rounds even) | 30 | White |
| 14 | sc around (1 round) | 30 | Black |
Attach safety eyes now, before continuing to the decrease rounds. Placement: count down about 6 rounds from your current row, positioning the two eyes roughly 6 stitches apart on the white section between the two black stripes (see the reference photo for the finished spacing).
| Rnd | Instruction | St count | Color |
| 15 | [sc 3, dec] x6 | 24 | Black |
| 16 | [sc 2, dec] x6 | 18 | Black |
Stuff the body now, filling about 3/4 of the way — the opening is getting small enough that this is your last easy chance to reach the bottom.
| Rnd | Instruction | St count | Color |
| 17 | [sc 1, dec] x6 | 12 | Black |
Add more stuffing, filling all the way to the top this time.
| Rnd | Instruction | St count | Color |
| 18 | dec around (6 decreases total) | 6 | Black |
Add a final pass of stuffing to firm up this last section before closing — keep your stitches tight here so stuffing doesn’t show through the smallest opening. Leave a long tail, then sew the remaining 6 stitches closed with a running stitch, pull tight, and knot securely.
Part 2 — Ears (make 2, black)
Chain 3.
Work 1 hdc into the 2nd chain from your hook. Work 1 dc into the next (last remaining) chain. Chain 1.
Fasten off, leaving a long tail for attaching later.
Part 3 — Arms & Legs (make 4 total, black)
| Rnd | Instruction | St count |
| 1 | 6 sc in MR | 6 |
| 2 | [sc 1, inc] x3 | 9 |
Close the round, then turn the piece inside out. Leave a long tail for sewing, then cut yarn. Repeat 3 more times for a total of 4 identical pieces (2 arms, 2 legs).
Stitch count checkpoints
| Piece | Checkpoint | Count |
| Body | Rnd 5 (before plain rounds begin) | 30 |
| Body | Rnd 18 (final closure) | 6 |
| Arms/Legs | Rnd 2 | 9 |
Assembly
- Ears: Locate the 3rd round from the top of the head, then count 2 more rounds down — this is where each ear attaches. Thread one of the ear’s yarn tails through to the opposite side using your hook, tie a secure double knot, then use a needle to tuck the tails into the stuffing and trim the ends. Repeat for the second ear.
- Arms: Attach so each arm lines up with the upper black stripe — this hides the seam within the color block rather than on plain white.
- Legs: Attach on the same side as each arm, lined up with the lower black stripe.
- Nose: Using black yarn and a needle, enter through the black head area to hide your knot, come out between the eyes, go back in about 2 stitches over, come out at the bottom-middle point, then insert back into your starting point and bring the needle out somewhere hidden to finish. Pull gently to shape a small nose, then trim.
- Blush: Repeat the same embroidery technique in pink yarn, placed just beneath each eye.
- Clean-up: Use a wooden skewer (or similar tool) to tuck in any stray yarn tails or stuffing peeking through the stitches for a clean finish.
Common mistakes
| Mistake | Fix |
| Stuffing shows through at the bottom closure | Stitches were worked too loosely on the final decrease rounds — keep tension tight specifically in rounds 17–18 |
| Ears/arms/legs look randomly placed | Use the round-counting guide above rather than eyeballing — consistent placement is what makes the color-blocking read cleanly |
| Panda looks lopsided | Stuffing added unevenly — stuff in small handfuls and check the shape from multiple angles as you go, not just at the very end |
| Knot-attachment for ears comes loose | Double knot wasn’t pulled tight enough before trimming — snug the knot firmly against the body before cutting the tails short |
Finishing
Weave in any remaining ends. This panda uses knots instead of sewing for the ears, arms, and legs — a genuinely faster assembly method once you’re comfortable with it, since it skips traditional whip-stitching each piece on.
Write a review
 no image