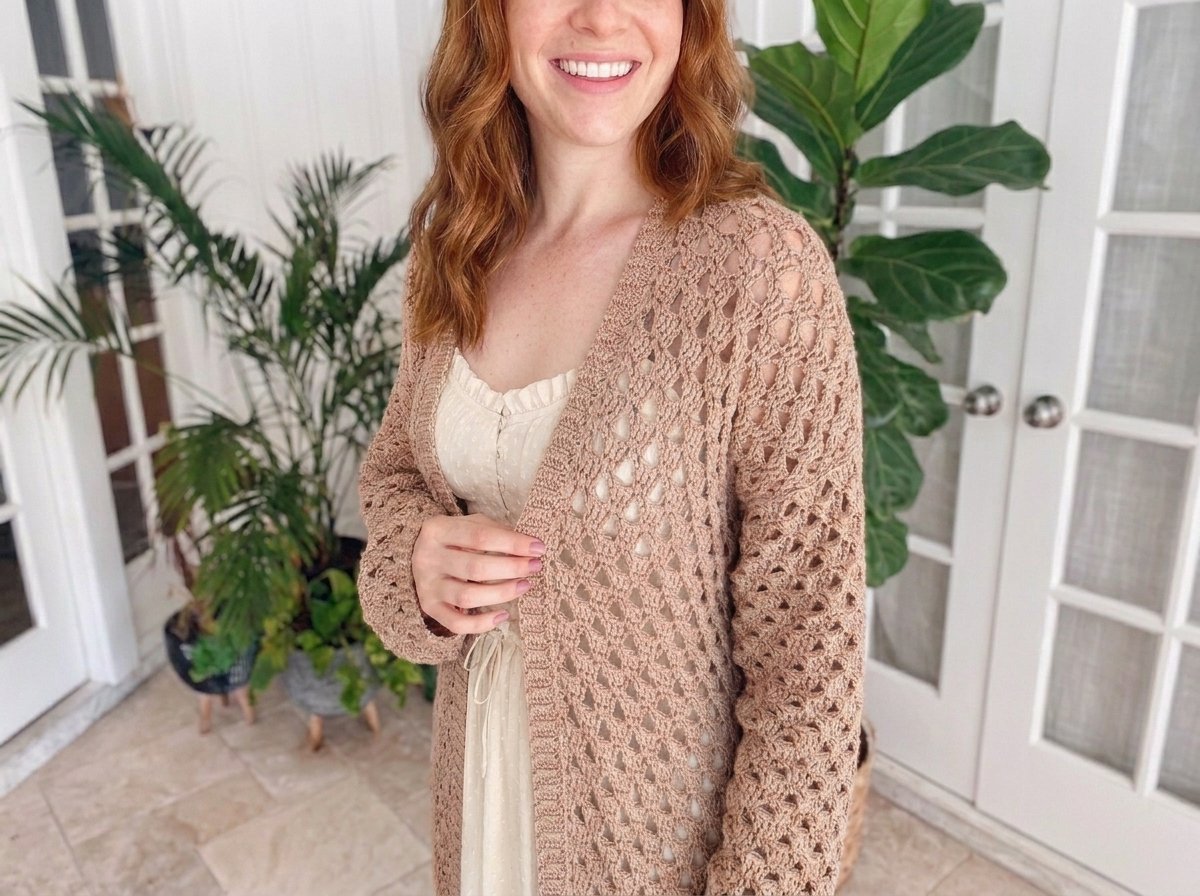
Regency Triangle Crochet Cardigan Pattern – Easy Lacy Crochet Cardigan for All Seasons
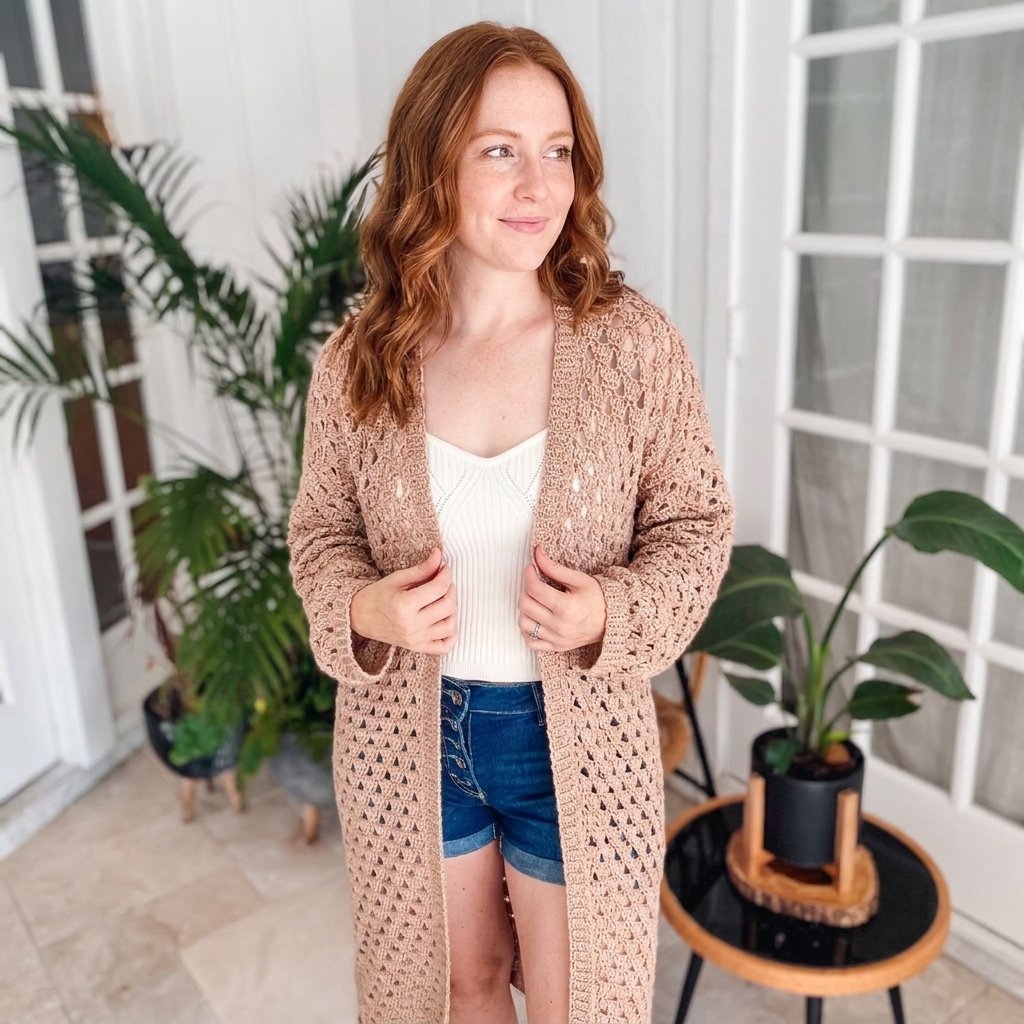
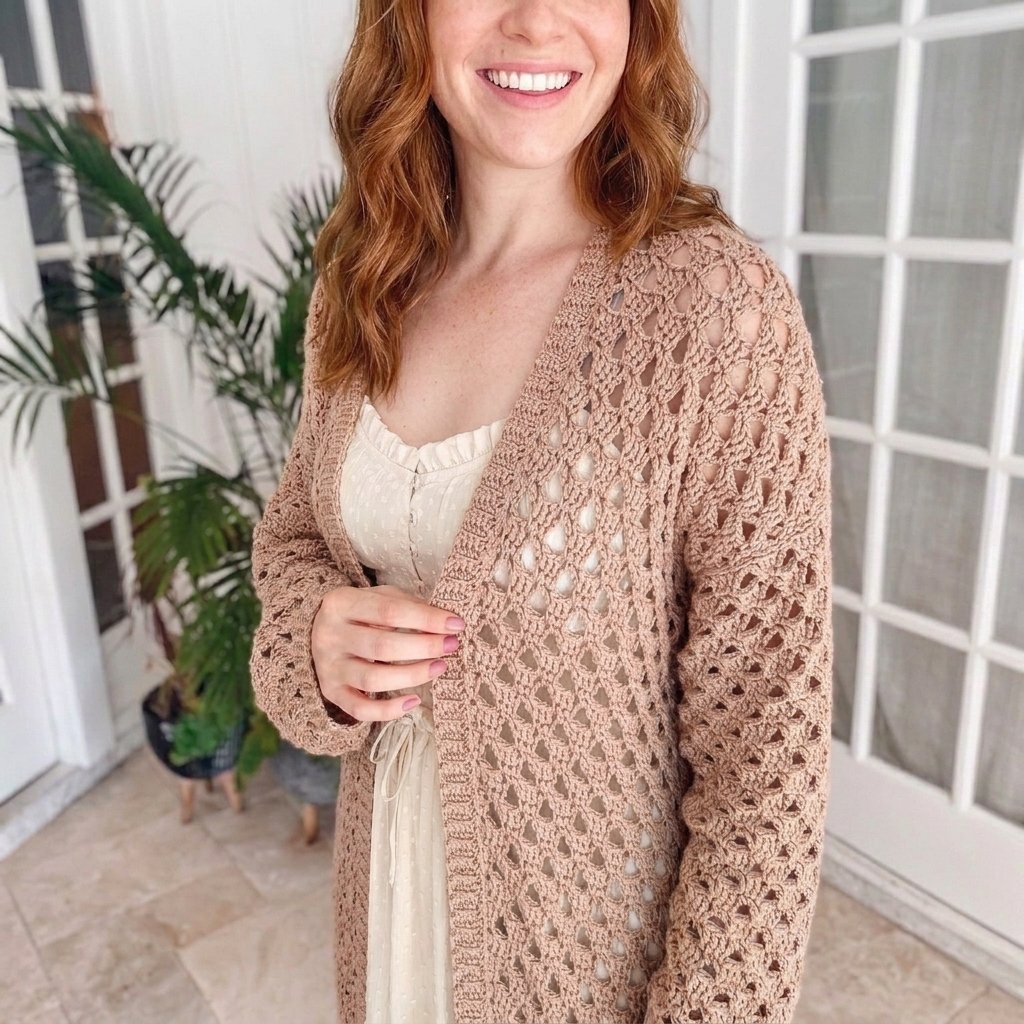
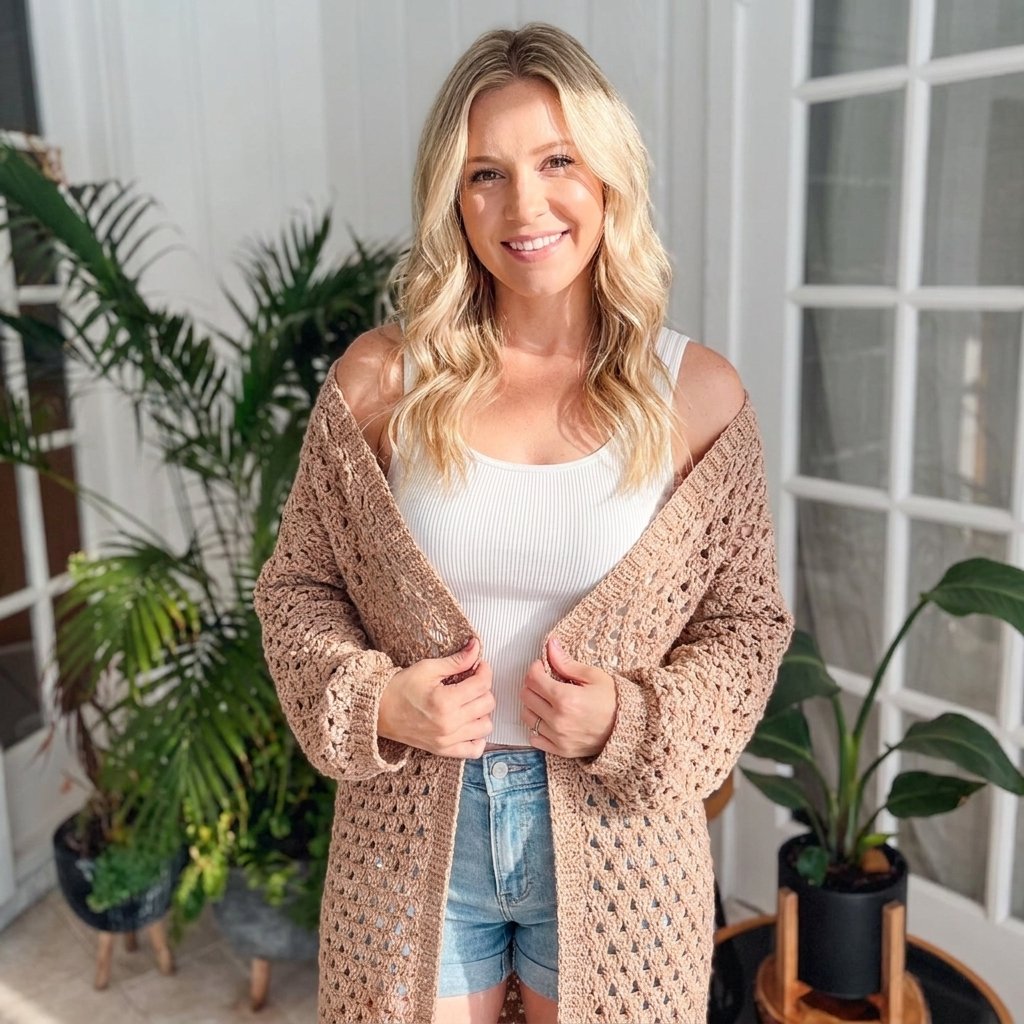
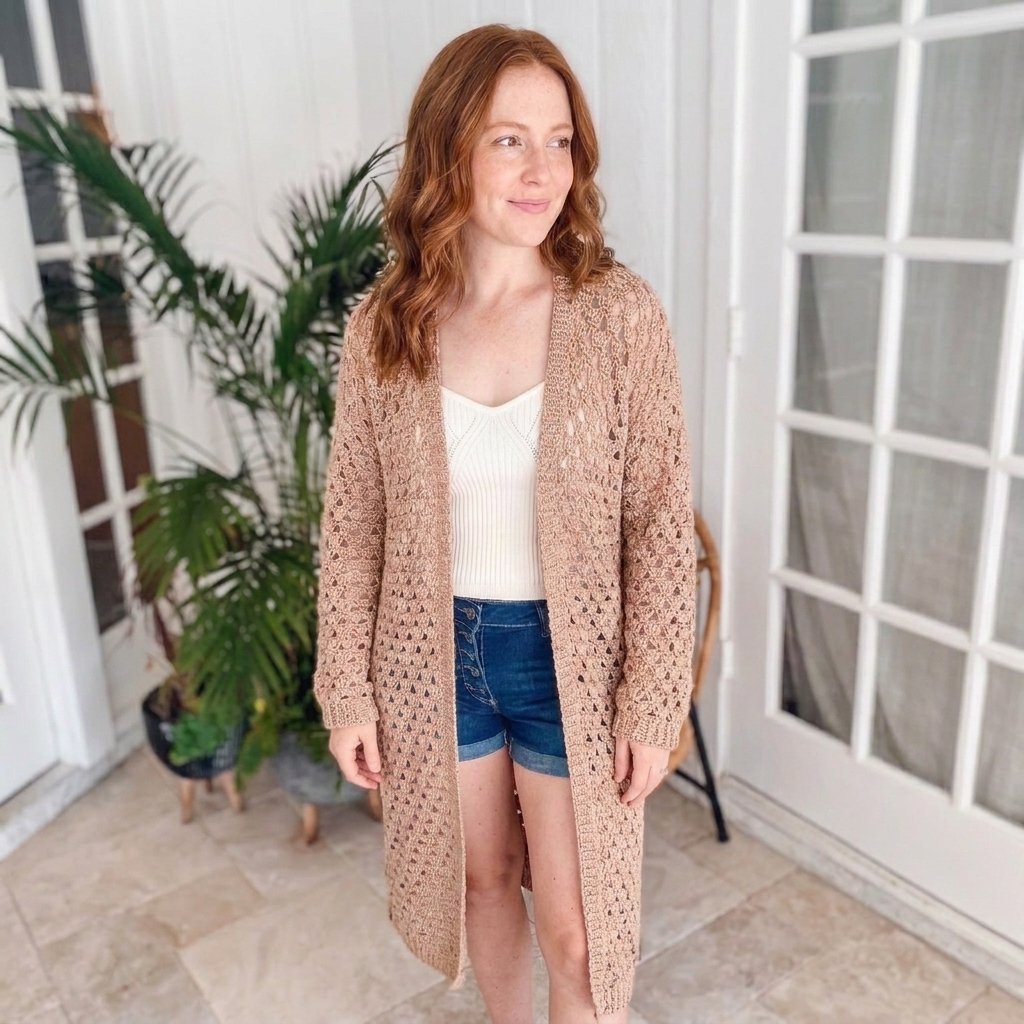
This cardigan has quickly become one of my absolute favorites to make and to wear. It’s built in a soft sport-weight cotton, so despite that airy, lattice-like diamond stitch running through it, it drapes beautifully instead of feeling stiff — nothing like the cotton you’d reach for to make dishcloths. It’s soft against the skin, it moves with you, and it somehow works for nearly every season: thrown over a tank top in summer, layered under a coat in the fall, or just tossed on when the air conditioning gets a little too enthusiastic.
What I love most about this design, though, is the construction. You start by making a long ribbed band completely sideways, and that band becomes the bottom edge of the whole cardigan. From there, you rotate and build the entire lacy body upward out of it — which sounds unusual on paper, but it’s genuinely one of the easiest, most beginner-friendly ways to make a flat, seamed garment. There’s only a small amount of seaming at the very end, and the shaping is nearly foolproof because the length is completely up to you at every stage.
Let’s get into it.
A Few Notes Before You Start
| Detail | Notes |
| Construction | Worked entirely flat (back and forth in rows) — great for a confident beginner |
| Sizing | All the numbers below reflect the size I’m showing here. Every stitch count in this pattern scales directly with your gauge swatch and desired finished measurements, so swatch first and adjust the row/stitch counts proportionally for your size |
| Length | Fully customizable at two different points — the overall body length and the sleeve length — so you can make this a cropped cardigan, a knee-length duster, or anything in between |
| Style options | This can also be made as a sleeveless vest simply by skipping the sleeve section entirely and finishing the armholes with a simple single crochet edge instead |
Materials
| Item | Notes |
| Sport-weight cotton yarn | Soft and drapey rather than stiff — this is what gives the finished cardigan that lovely fluid movement despite the open lace stitch |
| 4mm (US G) crochet hook | |
| Scissors | |
| Yarn needle | For seaming and weaving in ends |
| Stitch markers | Genuinely essential here for keeping track of rows and panel widths — don’t skip these |
Abbreviations (US Terms)
| Abbreviation | Meaning |
| ch | chain |
| sl st | slip stitch |
| sc | single crochet |
| dc | double crochet |
| BLO / FLO | back loop only / front loop only |
| sp(s) | space(s) |
| st(s) | stitch(es) |
| rep | repeat |
| stacked sc | a firm decorative edge stitch — see note below |
A quick note on the “stacked single crochet”: this is a small technique I like to use at the start of certain rows for a clean, sturdy edge. Insert your hook into the stitch as normal and work a single crochet. Then, without moving to the next stitch, insert your hook into the left bar of that same stitch you just made and work a second single crochet into it. That’s your stacked sc — two stitches worked into one spot to firm up the edge. If you’d rather skip it, you can simply substitute a chain at the start of those rows instead.
Gauge Swatch
Before diving in, work up a quick swatch using the same ribbing technique below (just a shorter version) to check your gauge and make sure your finished measurements will match what you’re going for. It’s a small step that saves a lot of frustration later.
Step 1: The Ribbing Band (This Becomes Your Bottom Border)
Here’s the clever part — you’re going to make a long strip of ribbing first, worked sideways. The number of rows in this strip becomes your final stitch count across the width of the cardigan body, so this single piece essentially sets your finished width.
| Row | Instructions | Stitch Count |
| 1 | Ch 6, sc in 2nd ch from hook and each ch across | 5 sc |
| 2+ | Ch 1, turn, sc in the back loop only across | 5 sc |
Keep repeating row 2 until your strip has as many rows as you’d like stitches across the bottom of your cardigan. For reference, my sample size used 189 rows here — but this number is entirely dependent on your gauge and desired width, so let your swatch guide you.
Step 2: Transitioning Into the Lace Body
Now we turn this ribbed strip on its side and build the body up out of it.
- Chain 1, then work one slip stitch into each row-end along one long edge of your ribbing strip — this should match your total ribbing row count exactly (189 slip stitches, for my sample).
- Turn your work — this row of slip stitches is now your wrong side.
- Transition Row: Ch 1, sc in the front loop of the first slip stitch, sc in the front loop of the next stitch, then ch 5, skip 3 sts, sc in the front loop of the next 3 sts — repeat this across, ending with ch 5, skip 3, sc in the front loop of the last 2 sts. Turn.
Working into the front loops here is what gives you that lovely clean line running along the right side of the fabric.
Step 3: The Stitch Pattern (4-Row Repeat)
This lacy diamond mesh is the heart of the whole design, and once you’ve worked through it once, it becomes second nature. After your transition row above, work these four rows in sequence, then repeat them for the entire length of your cardigan body.
| Row | Instructions |
| 1 | Stacked sc in the first st, dc in the next st, then ch 1, sc in the next ch-5 sp, ch 1, dc in the next 3 sts — repeat across, ending with ch 1, sc in the ch-5 sp, ch 1, dc in the last 2 sts. Turn. |
| 2 | Stacked sc in the first st, ch 3, sc in the next ch-sp, sc in the next sc, sc in the next ch-sp, then ch 5 (skipping the 3 dc below), sc in the next ch-sp, sc in the next sc, sc in the next ch-sp — repeat across, ending with ch 3, dc in the last st. Turn. |
| 3 | Ch 1, sc in the first st, ch 1, skip the next ch-sp, dc in the next 3 sts, then ch 1, sc in the ch-5 sp, ch 1, dc in the next 3 sts — repeat across, ending with ch 1, skip the ch-sp, sc in the last st. Turn. |
| 4 | Ch 1, sc in the first st, sc in the next ch-sp, then ch 5, skip the next 3 dc, sc in the next ch-sp, sc in the next sc, sc in the next ch-sp — repeat across, ending with ch 5, skip 3 dc, sc in the last ch-sp, sc in the last st. Turn. |
Repeat Rows 1–4 for your desired body length. Mine came out to a total of 72 rows from the transition row through the end of this repeat — but this is another spot where you can completely customize the length. Hold your work up against yourself as you go: stop early for a crop, keep going for a duster-length cardigan, whatever you love.
Step 4: Dividing Into Panels
Once your body reaches the length you want, it’s time to split the fabric into three separate panels: a first front panel, the back panel, and a second front panel — this is what shapes the shoulders and creates your armhole openings.
| Panel | Setup | Width | Rows |
| First front panel | Mark your 43rd stitch (my sample size), work the established pattern to that marker, turn leaving the rest unworked | 43 sts | 28 rows |
| Back panel | Skip 2 sts past the first panel, mark the next st, then count 97 sts total (including the marked one) for your back panel width | 97 sts | 28 rows |
| Second front panel | Skip 2 more sts, rejoin your yarn, and work the remaining stitches to match your first panel | 43 sts | 28 rows |
A couple of practical notes: try to end your body length on Row 4 (or at least an even-numbered row) before starting the panels, since that sets you up much more cleanly for this step. And however many stitches are left over in the very center of the back panel (11, in my case) are simply left unworked on purpose — that becomes your back neck opening.
Step 5: Seaming the Shoulders
- Block your pieces flat before seaming — it makes the whole process so much easier and the seam so much cleaner.
- Fold in the sides so your front and back panel shoulder edges line up, leaving that center back-neck section unworked and open.
- Seam across each shoulder using an invisible-style seam: come up through the center of a stitch on one side, go down through the center of the matching stitch on the other side, then come up through the center of the next stitch on that same side, and back down on the first side again — working back and forth, stitch for stitch, all the way across.
- Don’t pull too tight as you go — you want to be able to see your stitches clearly while you’re working. Once the whole seam is done, you can gently tug the two ends to snug everything into an almost invisible finish.
- Repeat on the second shoulder.
If you decided to skip the sleeves and make this a vest, this is basically where you’re finished — just move on to the front trim below and finish the armholes with a simple round of single crochet.
Step 6: The Front and Neck Trim
I like to do this step before attaching the sleeves — it’s simply easier to manage with less bulky fabric in your lap.
Setting up the edge:
- With the right side facing you, attach your yarn to the first stitch at one bottom front corner.
- Slip stitch evenly all the way around the entire opening — up one front edge, around the back neck, and down the other front edge. The spacing rule to follow: for every single crochet row along the edge, work 1 slip stitch; for every stacked-sc/double crochet row along the edge, work 2 slip stitches. This keeps everything evenly spaced despite the taller and shorter rows mixing together along that edge.
Working the ribbed trim (join-as-you-go):
Once you’re slip-stitched all the way around back to your starting corner, turn your work and build a ribbing strip directly onto that edge as you go:
| Row | Instructions |
| 1 | Ch 6, sc in 2nd ch from hook and each ch across (5 sts) |
| 2 | Slip stitch into the front loop of the next 2 edge stitches (this is your “join-as-you-go” step) |
| 3 | Turn, skip those 2 slip stitches, sc in the back loop only across (5 sts) |
| 4 | Turn, ch 1, sc across in the back loop only — I like to work that very first stitch through both loops for a slightly tidier outer edge (5 sts) |
Repeat rows 2–4 all the way around the entire front and neck opening until you meet back up with where you started, then fasten off and weave in your end.
Step 7: The Sleeves (Make 2)
Each sleeve is simply a rectangle worked in the same established stitch pattern.
- Chain enough to give you your target stitch count (74 chains gave me 73 working stitches for my size — note that depending on your total stitch count, the very last couple of stitches at the end of each row may fall slightly differently than they did on the body, but you’ll recognize it as the exact same repeat, just landing a little differently at the edge).
- Work the established 4-row stitch pattern for about 50 rows, which gave me a good average drop-shoulder sleeve length. Pin this piece up against your body as you go to check the fit, and remember to leave about an extra inch of allowance for the cuff you’ll add at the end. Add or remove rows freely to fit your own arm length.
Assembling the sleeve:
- Fold the rectangle in half lengthwise and seam along that long edge (a simple whip stitch works beautifully here — the open, textured stitch pattern is very forgiving).
- This gives you a sleeve tube with one open end (your starting chain edge, which will become the cuff) and a folded top edge that will attach into the armhole.
Attaching to the body:
- Line up the sleeve opening with the armhole opening left below the shoulder seam and pin in place if that’s helpful.
- Work your seam by going underneath the “V” of a stitch on the sleeve side and pulling through, then moving to the body side and taking a small stitch down and back up before pulling through again — repeating this back and forth all the way around. This keeps the sleeve stitches sitting slightly more forward, which gives the seam a nice, subtly raised, finished look.
- Once you’re all the way around the armhole, continue that same seaming technique down and under the arm, and keep going down the side seam to join the front and back panels together, matching up your rows as you go.
Repeat for the second sleeve.
Step 8: The Puff Cuffs
The cuffs use the exact same ribbing technique as your front trim, but with one small change in the slip-stitch spacing that gently gathers the sleeve opening into a soft puff instead of leaving it wide.
- Attach your yarn right at the sleeve’s seam line, so the ribbing join stays hidden on the underside.
- Ch 6, sc in 2nd ch from hook and each ch across (5 sts).
- Slip stitch 2 stitches for every 3 stitches along the sleeve opening edge (slip stitch into the next stitch, skip one, slip stitch into the next) — this gathering is exactly what creates that soft puff. If you’d prefer a wider, non-gathered cuff instead, simply work one slip stitch per edge stitch here instead.
- Turn, skip those 2 slip stitches, sc in the back loop only across (5 sts).
- Turn, ch 1 (working the very first stitch through both loops for tidiness, the rest in the back loop only), sc across (5 sts).
- Repeat steps 3–5 all the way around the sleeve opening.
- To close the ring: chain 1, then join your last ribbing row to your very first ribbing row by working a slip stitch through the back loop of both together, all the way down all 5 stitches.
- Fasten off and weave in your ends.
Repeat the entire cuff on your second sleeve, and that’s it — your cardigan is complete.
Making It Your Own
- Length: this is genuinely one of the easiest garments to customize — stop the body early for a crop, or keep going well past 72 rows for a long duster silhouette.
- Vest option: skip the sleeve section entirely, finish your armholes with a simple round of single crochet, and you’ve got a beautiful sleeveless layer instead.
- Cuff style: choose the gathered puff cuff for a romantic, voluminous sleeve, or the same ribbing worked one-stitch-per-edge-stitch for a relaxed, wide cuff instead.
- Color: the lace stitch really lets a solid color shine, but this would be just as lovely worked in a lightly variegated or hand-dyed cotton if you want a little extra dimension.