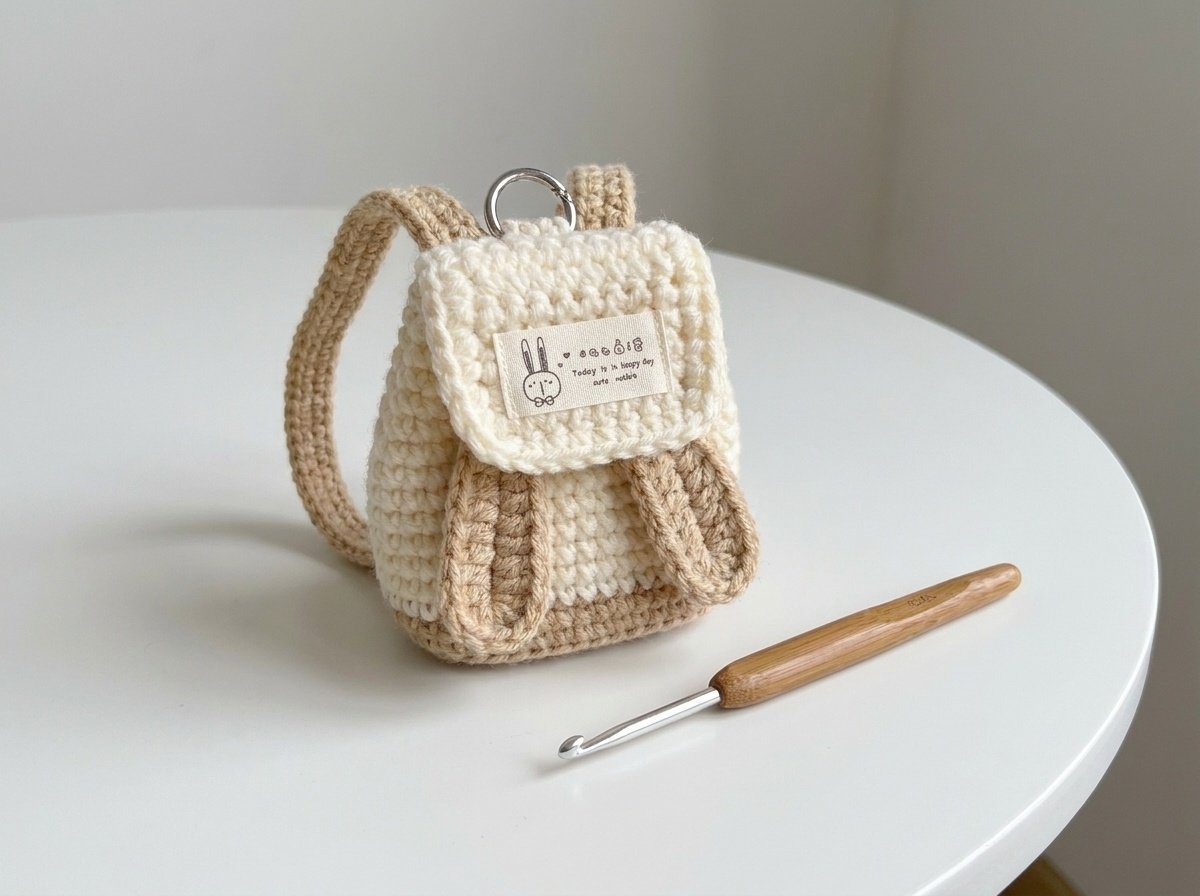
Easy Crochet Rabbit Mini Backpack Keychain Pattern
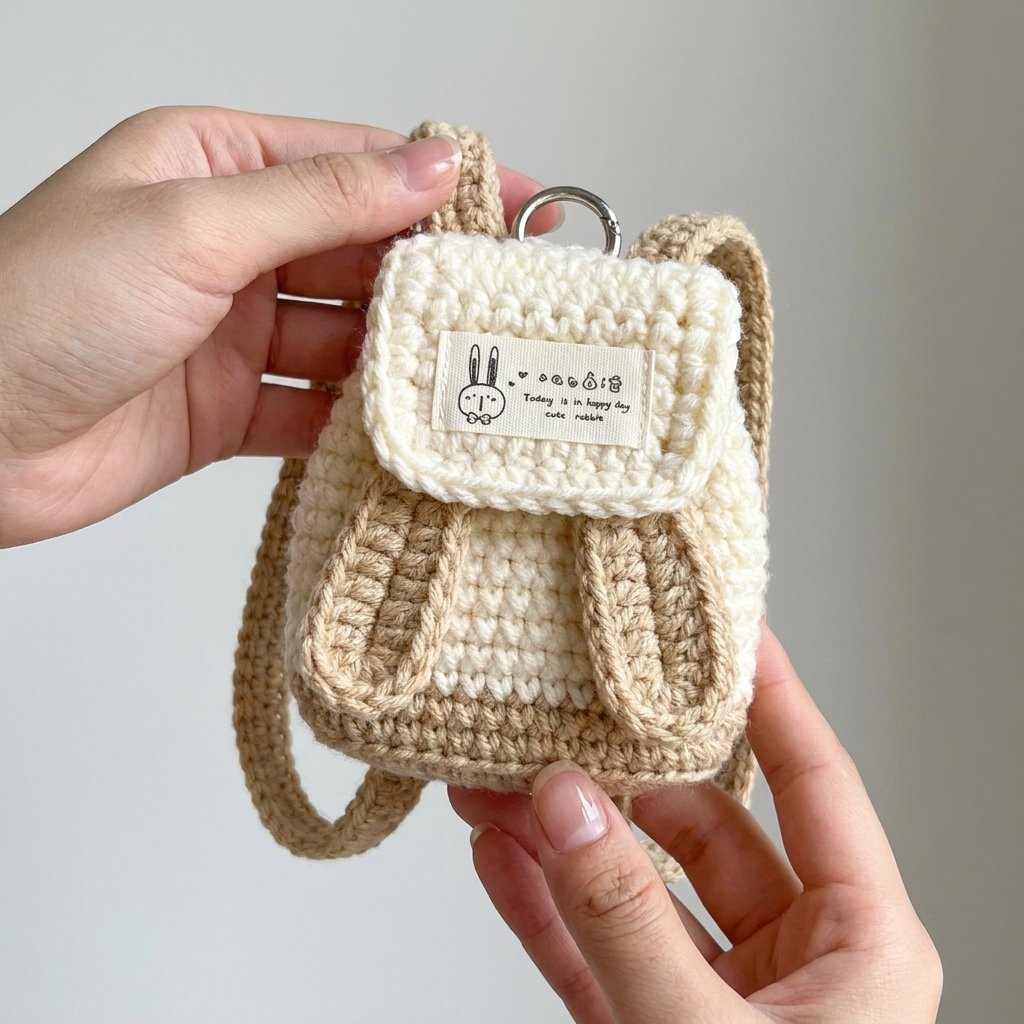
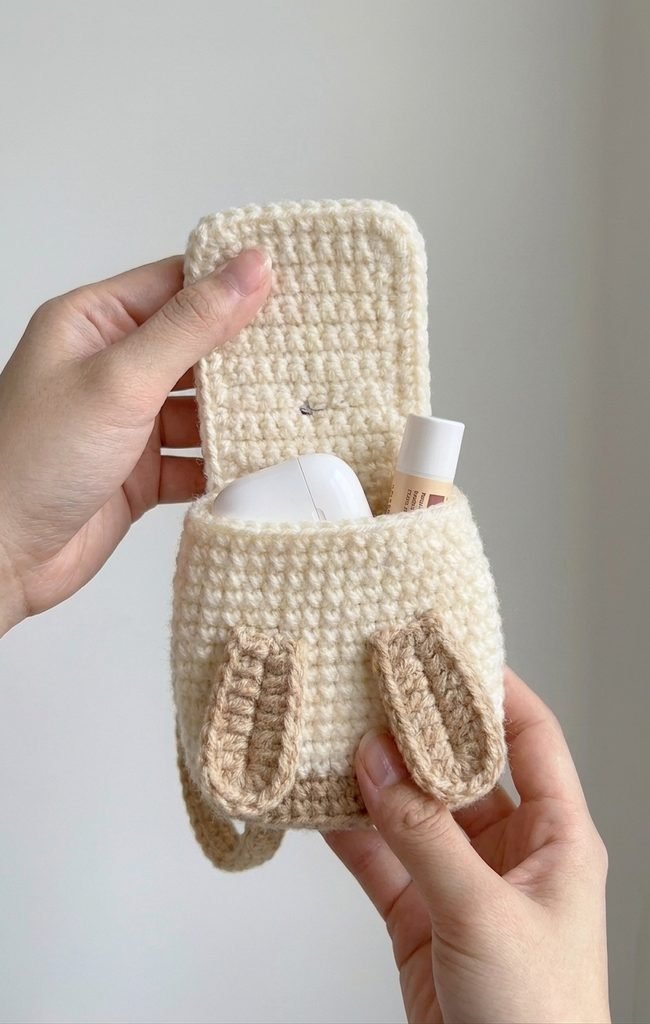
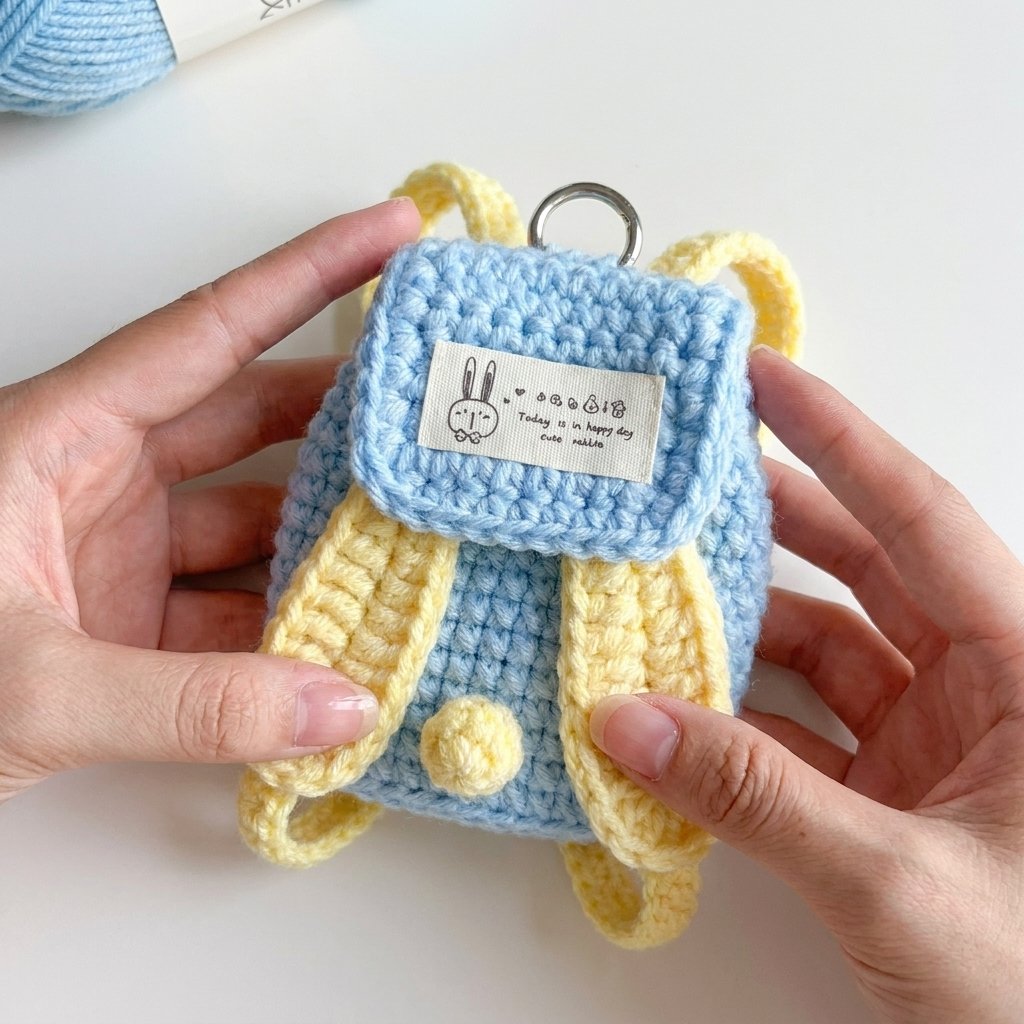
A tiny, fully functional bag shaped like a rabbit — complete with a flap that folds down between two floppy ears, a magnetic snap closure, and a little puff tail. Small enough to hold earbuds, coins, or lip balm, and doubles as a bag charm thanks to the keyring loop at the top.

Quick glance
| Time | Skill | Finished size | Hook |
| 2–3 hrs | Intermediate | Small — fits earbuds/coins/lip balm | 4.0mm |
Materials
- 8-ply (worsted-equivalent) yarn — main color (white/cream) and accent color (pink, for the ears)
- 4.0mm crochet hook
- Small magnetic snap closure (one set)
- Keyring or split ring, for the charm loop
- Yarn/darning needle
- Stitch markers, scissors
- Optional: small decorative fabric label
Terms & abbreviations
| Abbrev | Term | Notes |
| ch | chain | worked using the double chain method — a sturdier, less stretchy foundation than a standard chain |
| sc | single crochet | the primary stitch for the bag body and flap |
| hdc | half double crochet | used in the ear shaping |
| dc | double crochet | used in the ear shaping and tail puff |
| inc | increase | 2 sc in same st, unless noted otherwise |
| BLO | back loop only | used once, to create a defining ridge between the base and sides |
| MR | magic ring | — |
| st(s) | stitch(es) | — |
| rnd(s)/row(s) | rounds for the body, ears, and tail; rows for the flap | — |
Part 1 — Bag Body
Foundation: Chain 12 (using the double chain method).
Round 1: Sc in the 2nd chain from your hook, then sc in each of the next 10 chains. (11 sc) Work 3 sc into the last chain (corner). Working back along the other side of the foundation chain: sc in each of the next 10 chains, then work 2 sc into the last stitch (second corner). Join with a slip stitch. (26 sts)
Round 2: Chain 1. Inc in the first stitch. Sc in each of the next 10 stitches. Work an sc increase in each of the next 3 stitches. Sc in each of the next 10 stitches. Work an sc increase in each of the last 2 stitches. (32 sts)
Round 3: Chain 1. Sc 1, inc 1. Sc in each of the next 10 stitches. Repeat *sc 1, inc 1* three times. Sc in each of the next 10 stitches. Repeat *sc 1, inc 1* two times. (38 sts)
Round 4: Working in the back loop only, sc in each stitch around. (38 sts — this round creates the ridge line separating the base from the sides)
Rounds 5–20: Working through both loops as normal, sc around. (38 sts, constant across all 16 rounds)
Join with a slip stitch, fasten off, and weave in the end.
Body stitch count checkpoints
| Round | St count |
| 1 | 26 |
| 2 | 32 |
| 3 | 38 |
| 4–20 | 38 (constant) |
Part 2 — Flap
Foundation: Chain 9, then chain 1 more. (10 chains total)
Row 1: Starting in the 2nd chain from your hook, sc across. (9 sc)
Rows 2–18: Chain 1, turn, sc across. (9 sts, constant)
After Row 18, work 1 extra sc into the corner stitch to reinforce it.
Border round: Sc evenly along one side edge. At the corner, work 2 sc into that stitch. Sc across the bottom edge (7 sc). Work 2 sc into the next corner stitch. Sc evenly along the remaining side edge. Join with a slip stitch, fasten off.
Part 3 — Ears (make 2)
Foundation: Chain 12, then chain 1 more. (13 chains total)
Round (worked around the chain): Starting in the 2nd chain from your hook: sc in each of the next 3 chains, hdc in each of the next 3 chains, dc in each of the next 5 chains, then work 8 dc into the very last chain — this fan of stitches forms the rounded tip of the ear. Continuing back up the other side of the same foundation chain: dc in each of the next 5 chains, hdc in each of the next 3 chains, sc in each of the last 3 chains.
Join with a slip stitch, fasten off, and weave in ends. Repeat for a second ear.
Part 4 — Tail
Magic ring. Chain 2 (doesn’t count as a stitch). Work 8 unfinished dc into the ring — for each one, yarn over, insert into the ring, pull up a loop, yarn over, pull through 2 loops, leaving the last loop on your hook without closing it. Once all 8 are worked (9 loops total on your hook), yarn over and pull through all of them at once to close them together into a single rounded puff.
Chain 1, fasten off. Pull the magic ring’s tail tight to close the center, then tie the two yarn ends together and trim.
Assembly
- Sew the flap to the top back edge of the bag body, so it folds down to cover the front opening.
- Attach the two ears to the top of the flap, positioned upright on either side.
- Sew the puff tail onto the front of the bag body, near the bottom.
- Sew in the magnetic snap closure — one half on the inside front of the bag body, the other half on the underside of the flap, positioned to align when the flap folds down.
- Attach a keyring or split ring to the top of the flap or body to complete the bag-charm/keychain function.
Common mistakes
| Mistake | Fix |
| No visible ridge between base and sides | Round 4 wasn’t worked in back loop only — check you’re skipping the front loop on that round specifically |
| Flap doesn’t sit centered over the front | Double check the flap is sewn to the exact center-back of the bag’s top edge before securing |
| Ears look flat instead of tapered | The 8-dc fan at the tip is what creates the rounded point — make sure all 8 land in that single last chain, not spread across several |
| Magnetic snap shows through the fabric | Position the snap pieces slightly further from the edge and stitch through only 1–2 strands of yarn per anchor point so the metal doesn’t distort the stitches |
Finishing
Weave in all remaining ends. Since this piece is unstuffed and functions as an actual small bag, keep your tension reasonably firm throughout so the finished pouch holds its shape without sagging.